How to Regrout a Shower: A Comprehensive DIY Guide
Crumbling, cracked, or moldy grout is one of the most common reasons showers start looking tired — but regrouting is one of the most rewarding weekend projects a homeowner can tackle. This guide walks you through every stage, from diagnosing failed grout to sealing the finished joints, so your shower looks (and performs) like new.
Why Grout Fails (And Why Regrouting Matters)
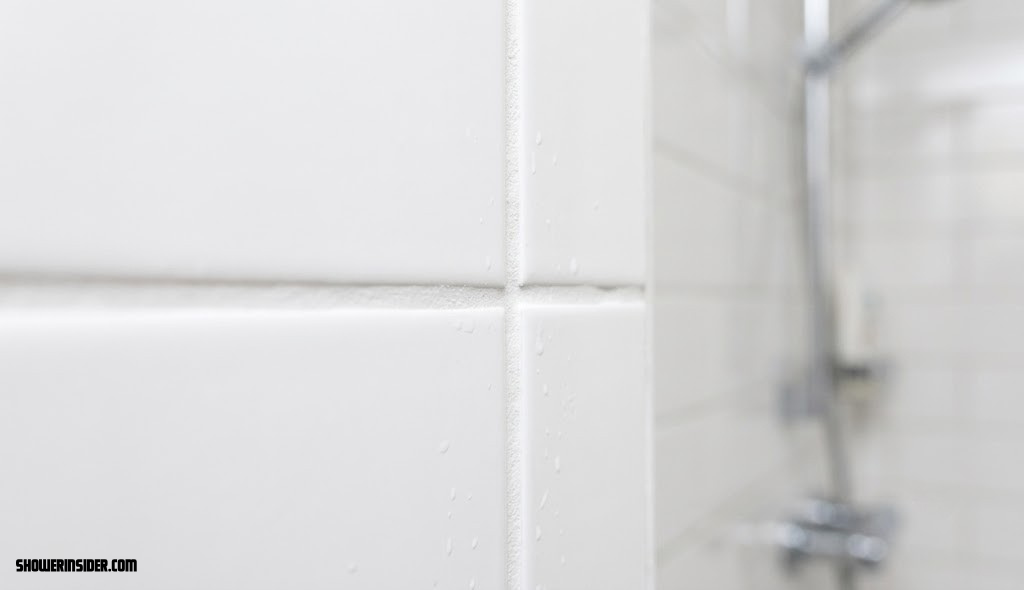
Grout is the unsung hero of every tiled shower. It fills the gaps between tiles, keeps water from creeping behind the wall, and holds the whole surface together visually. But grout is porous, and constant exposure to hot water, soap film, and humidity means it doesn’t last forever. Over time you’ll notice hairline cracks, crumbling corners, dark mildew staining, or joints that have simply disappeared in places.
Ignoring failing grout isn’t just a cosmetic issue. Once water finds a gap, it can seep behind the tile and into the substrate, leading to soft drywall, mold growth, and eventually much more expensive repairs than a tube of grout and an afternoon of work. If you’ve been dealing with a musty smell that won’t go away even after cleaning, it’s worth reading our guide on a musty shower smell after cleaning — failing grout is often the root cause.
The good news: regrouting a shower is one of the most beginner-friendly tile repairs there is. It doesn’t require specialized tile-setting skills, the tools are inexpensive, and most showers can be fully regrouted in a single weekend.

A carbide-tipped scraper set makes hollowing out old grout dramatically faster and safer for your tile edges.
Check Price on AmazonTools & Materials You’ll Need
Before you start chiseling anything out, gather everything up front. Stopping mid-project to run to the hardware store is the fastest way to lose a Saturday.
| Item | Purpose | Approx. Cost |
|---|---|---|
| Grout saw or oscillating multi-tool | Removing old grout | $10–$60 |
| Carbide scraper | Cleaning stubborn residue | $8–$15 |
| Shop vacuum | Removing dust and debris | $40–$100 |
| New grout (sanded or unsanded) | Filling joints | $15–$25 |
| Rubber grout float | Applying and packing grout | $8–$15 |
| Grout sponge | Wiping excess grout | $5–$10 |
| Bucket of clean water | Rinsing sponge and tools | — |
| Grout sealer | Protecting cured grout | $10–$20 |
| Painter’s tape | Protecting fixtures & tub edge | $4–$8 |
| Safety glasses & mask | Protecting eyes/lungs from dust | $10–$15 |
If your shower head is old or leaking anyway, this is also a smart time to inspect it — see our guide on why your shower head is leaking before you close everything back up.
Choosing the Right Grout Type
Not all grout is created equal, and picking the wrong type is one of the most common regrouting mistakes. Here’s a quick breakdown.
Sanded Grout
- Best for joints wider than 1/8 inch
- More resistant to cracking and shrinkage
- Cheaper per square foot
Unsanded Grout
- Best for joints narrower than 1/8 inch
- Smoother finish, ideal for polished tile
- Can shrink/crack in wide joints
Epoxy grout is a third option worth considering for showers specifically, since it’s essentially waterproof and highly stain resistant, though it’s pricier and less forgiving to apply than cement-based grout. If mold has been a recurring issue in your bathroom, epoxy grout paired with a good exhaust fan habit can make a real difference — pair this project with our tips on the best shower mold cleaners for ongoing upkeep.
Prepping the Shower Before You Start
Clear the shower completely — shampoo bottles, caddies, mats, everything. Tape off the shower head, handles, and drain with painter’s tape to keep grout dust and debris out of the mechanisms. If your drain has been slow lately, this is a good moment to also look into how to unclog a shower drain naturally before you’re generating extra debris.
Lay down towels or a drop cloth on the bathroom floor just outside the shower to catch dust, and open a window or run the exhaust fan — grout removal is a genuinely dusty job.
Step 1 — Score the Grout Joints
Start by running your grout saw or oscillating tool blade down the center of each joint to score a guide line. This keeps your removal tool centered and prevents you from chipping the tile edges.
Step 2 — Remove the Old Grout
Working slowly, dig out the old grout along your score line until you reach the substrate or backer board. Go joint by joint rather than trying to rush an entire wall — patience here prevents cracked tiles.
Step 3 — Clean and Vacuum the Joints
Vacuum every joint thoroughly, then wipe the tile faces and joints with a damp sponge to remove fine dust. Any leftover debris will weaken the bond of your new grout, so don’t rush this step.
Step 4 — Mix the New Grout
Mix grout powder with water according to the package instructions until it reaches a thick, peanut-butter-like consistency — not soupy, not crumbly. Let it slake (rest) for the time specified on the bag, then remix briefly before use.
Step 5 — Apply the Grout with a Float
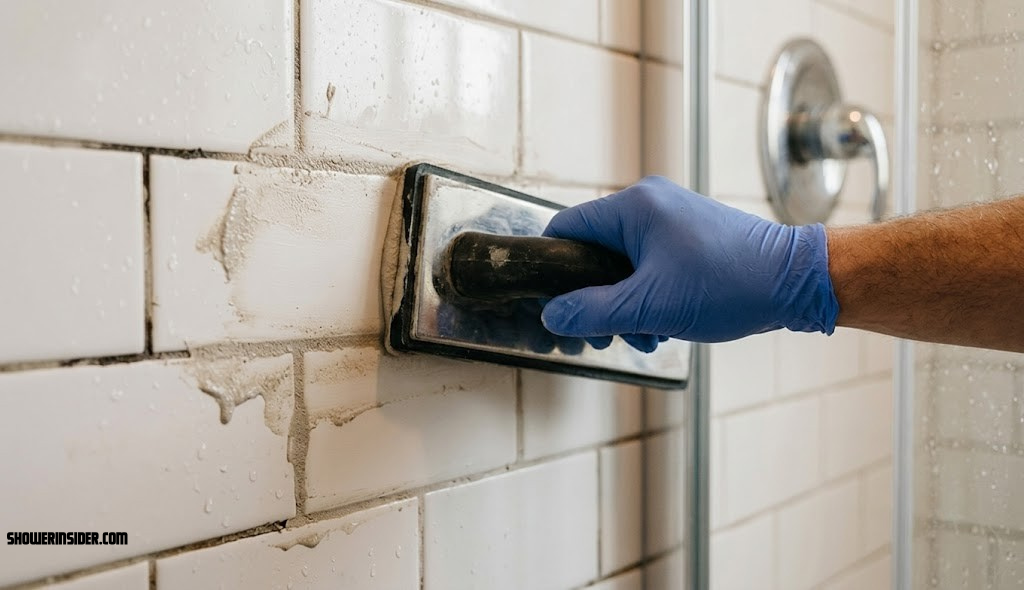
Scoop grout onto your rubber float and press it into the joints at roughly a 45-degree angle, working diagonally across the tile pattern so the float edge packs grout deep into each gap rather than dragging it out.
Step 6 — Wipe and Shape the Joints
After about 15–20 minutes (check your product label), wipe the tile surface with a damp sponge in a circular motion to remove excess grout, then run a finger or a shaping tool lightly along each joint for a clean, slightly concave line. Rinse the sponge frequently.
Step 7 — Cure and Seal the Grout
Let the grout cure fully — typically 48 to 72 hours — before running water in the shower. Once cured, apply a penetrating grout sealer to help resist staining and moisture absorption going forward.

A quality sealer applied after curing dramatically slows staining and mildew growth in shower grout.
Check Price on AmazonCommon Regrouting Mistakes to Avoid
- Skipping full removal: Leaving old grout dust or fragments behind weakens the new grout’s bond.
- Mixing too wet: Soupy grout shrinks and cracks as it dries.
- Wiping too soon: Wiping before the grout sets slightly can pull it right back out of the joint.
- Skipping the sealer: Unsealed grout stains and absorbs moisture much faster.
- Using water too soon: Running the shower before the cure window is one of the top causes of premature grout failure.
If your grout keeps failing quickly even after a proper regrout, the underlying issue could be excess water pressure driving moisture into joints — it’s worth reviewing our guide on shower water pressure for context, since both too little and too much pressure can contribute to long-term wear in different ways.
Maintaining Your New Grout Long-Term
Freshly regrouted joints can last five to ten years or more with basic care. Run the bathroom exhaust fan or crack a window after every shower, squeegee the walls to cut down on standing moisture (our best shower squeegees review can help you pick one), and clean grout lines regularly using a non-abrasive method — see how to clean shower grout without scrubbing for gentler techniques that won’t wear down the sealer.
Reseal grout roughly once a year in high-use showers. A simple water-bead test — splash water on the grout and see if it beads up or soaks in — tells you when it’s time to reapply sealer.
Regrouting vs. Retiling: Which Do You Need?
| Situation | Recommended Fix |
|---|---|
| Grout cracked, stained, or crumbling but tiles intact | Regrout |
| Tiles loose, hollow-sounding, or cracked | Retile / repair substrate |
| Soft drywall or visible mold behind tile | Full tear-out and repair |
| Just want a color refresh | Regrout (consider a grout colorant) |
If you discover deeper water damage during this process, it may be part of a larger project — see our guide on how long it takes to remodel or retile a shower for realistic timelines, or check whether a tub-to-shower conversion makes more sense than a repair.

A well-balanced float and a high-absorption sponge make the application and wipe-down steps far less messy.
Check Price on AmazonSigns You Need to Regrout Your Shower
Most homeowners wait too long to regrout simply because the signs creep in slowly. Here’s what to watch for so you can catch the problem before it turns into a bigger repair.
- Crumbling or powdery joints: If you can scrape out grout with a fingernail, it has lost its structural integrity.
- Hairline cracks running through joints: Small cracks let water in even if the joint still looks mostly solid.
- Persistent dark staining that won’t lift: Once mildew has worked its way into the grout’s pores, surface cleaning stops helping — see our best shower mold cleaner roundup for what actually works on set-in stains, and our guide on removing hard water stains in a shower if the discoloration looks mineral rather than mold-based.
- Gaps or missing sections: Any spot where you can see bare substrate or backer board needs attention immediately.
- A musty smell even after cleaning: This usually points to trapped moisture behind failing grout rather than a surface issue.
- Loose tiles nearby: Failing grout is often the first symptom of a tile that has started to detach from the wall.
Catching these signs early keeps a simple regrouting weekend from turning into a full tear-out. If your bathroom already has broader issues — slow drains, weak pressure, or aging fixtures — it may be worth bundling this project with related fixes like replacing a shower faucet or installing a rainfall shower head while the space is already torn apart.
How Much Does It Cost to Regrout a Shower?
One of the biggest appeals of this project is how inexpensive it is compared to a full renovation. Materials for an average shower stall typically run well under a professional’s minimum service call.
| Approach | Typical Cost Range | Notes |
|---|---|---|
| Full DIY (tools + materials) | $40–$120 | Higher if you need to buy a multi-tool |
| DIY with tools already on hand | $20–$50 | Just grout, sealer, float, and sponge |
| Professional regrouting | $300–$900+ | Varies heavily by region and shower size |
| Epoxy grout upgrade (DIY) | $60–$150 | Pricier material, longer-lasting result |
Compared to a full remodel — which can run into the thousands once you factor in labor, materials, and downtime — regrouting is one of the highest-value maintenance jobs a homeowner can do. For perspective on where regrouting fits into bigger projects, see our breakdown of general shower maintenance priorities.
Removing Grout Haze After the Job
Even with careful wiping, a thin cloudy film called grout haze often forms on tile faces as the grout cures. It’s easy to fix but easy to miss, and it can make an otherwise perfect regrouting job look unfinished.
Once the grout has cured for at least 24–48 hours, buff the tile surface with a dry microfiber cloth or a haze-removal product designed for your tile type (cementitious grout haze remover is different from what you’d use on natural stone). Avoid acidic cleaners on natural stone tile, since they can etch the surface. Work in small circular sections and switch to a clean part of the cloth often so you’re not just redistributing the film.
Re-Caulking Corners and Transitions
Grout and caulk serve different jobs, and a complete regrout usually isn’t finished until you’ve also refreshed the caulk. Grout is rigid and meant for the flat tile field; caulk is flexible and meant for corners, the tub-to-tile seam, and anywhere two different materials meet, since those joints naturally shift slightly and rigid grout would crack there.
Remove the old caulk line with a utility knife or caulk-removal tool, clean the seam thoroughly, and lay a fresh, even bead of 100% silicone caulk rated for wet areas. Smooth it with a caulking tool or a gloved finger dipped in soapy water for a clean, professional-looking line.
This is also a good moment to check nearby hardware while everything is exposed — for example, if your shower door track or a fiberglass surround has been hard to keep clean, our guide on the best cleaner for fiberglass showers pairs well with a fresh caulk line.
DIY vs. Hiring a Professional
DIY Regrouting
- Far cheaper — mostly just material costs
- Flexible timeline, no scheduling a contractor
- Good learning project for future tile repairs
Hiring a Professional
- Faster turnaround, especially for large showers
- Better for suspected substrate or waterproofing damage
- Often includes a workmanship warranty
If, once you start removing old grout, you find soft backer board, active leaks, or widespread loose tile, that’s usually the point to call in a professional rather than continue as a DIY project — those issues go beyond a simple regrout and into waterproofing repair territory.
Best Time to Regrout Your Shower
Because the shower needs to stay completely dry for 48–72 hours after grouting, timing matters more than people expect. Avoid starting the project right before house guests arrive or during a stretch when it’s the household’s only shower. Many people find a slow weekend — with a second bathroom available, or the option to shower elsewhere for a couple of days — works best.
Humidity also affects cure time: in a muggy climate or during a rainy season, run a dehumidifier or fan in the bathroom to help the grout cure fully and evenly. Cooler, drier air generally gives more predictable results than a hot, steamy bathroom.
Regrouting Shower Floors vs. Shower Walls
Most people picture the same process for every surface in the shower, but floors and walls actually behave quite differently once you start working on them, and treating them identically is a common source of frustration. Wall joints are typically narrow, often between a sixteenth and an eighth of an inch, and they run in clean, mostly vertical and horizontal lines that are easy to reach and easy to see. Floor joints are a different story. Shower floors are usually built with small-format tile, sometimes called shower floor mosaic or pebble tile, specifically because tiny tiles create more grout lines per square foot, and more grout lines mean more traction underfoot and better accommodation of the slope toward the drain.
That slope is the part people most often forget about. A shower floor isn’t flat; it pitches gently toward the drain from every direction, which means every joint on the floor sits at a slightly different angle than the one next to it. When you’re packing grout into floor joints, work in small sections and check your float angle constantly, because a float held at the same angle you used on the wall will skip across the low points near the drain and overfill the high points near the curb.
Floor joints also take far more abuse than wall joints. They deal with standing water, soap scum, hair, and the direct impact of bare feet, so they wear out roughly twice as fast as wall grout in most households. If you’re only regrouting one part of the shower because of budget or time, the floor is usually the higher priority, since a failed floor joint sits directly above the most vulnerable part of the waterproofing membrane below.
Because floor tile is usually more porous by design (for slip resistance), it’s worth taping off the drain cover completely before you begin, not just loosely covering it. Grout dust and slurry that get into a drain assembly can be genuinely difficult to flush out afterward, and a clogged drain right after a regrouting project is a frustrating way to end an otherwise successful weekend.
How Much Grout Do You Actually Need?
Buying too little grout means an awkward mid-project trip to the store trying to match a batch number you don’t remember; buying too much means a half-used bag hardening in your garage for the next five years. A rough rule of thumb: a 25-pound bag of sanded grout covers somewhere between 90 and 200 square feet of standard subway or field tile with a joint width of about an eighth of an inch, but that range narrows dramatically depending on tile size and joint width.
The math that actually matters is simple once you break it down. Smaller tiles with the same joint width need more grout per square foot than larger tiles, because there’s more total joint length packed into the same area. A shower with four-inch tiles will eat through noticeably more grout than the same square footage covered in twelve-inch tiles, even with identical joint widths. Wider joints obviously use more material than narrow ones, and thicker tile (which creates a deeper joint) will use more grout than thin tile of the same face size.
For an average shower stall, somewhere in the 32 to 40 square foot range of tiled surface, a single 10-pound bag of sanded grout is usually enough for standard subway tile with typical joint spacing, with some left over. If you’re working with mosaic floor tile, plan on buying at least one extra bag beyond what a standard calculator suggests, since the sheer number of joints in mosaic work consumes grout much faster than the square footage alone would suggest.
One more practical tip: buy your grout in a single batch from a single production lot if at all possible. Grout color can vary slightly between manufacturing runs, and mixing two different lots partway through a wall is one of the more common ways an otherwise perfect regrouting job ends up with a visible color seam once everything cures.
Choosing a Grout Color That Actually Works Long-Term
Grout color is one of those decisions that feels purely cosmetic in the store and turns out to have real practical consequences a year later. White and light gray grout photograph beautifully and make a small shower feel brighter, but they also show every trace of soap scum, mildew, and hard water mineral buildup far sooner than a mid-tone or darker shade would.
Charcoal, slate, and other mid-to-dark gray tones have become the practical favorite for exactly this reason: they hide the gradual discoloration that happens to every grout joint over time, while still reading as a clean, intentional design choice rather than a compromise. If you love the look of bright white grout, consider it primarily for well-ventilated bathrooms with strong exhaust fans, or commit to a more frequent cleaning and resealing schedule than you might with a darker color.
Color-matching an existing installation, such as when you’re only regrouting a section rather than the whole shower, is its own challenge. Grout manufacturers use different naming conventions and slightly different pigment formulas, so a “sable” from one brand might not match a “sable” from another. Bring a small chip of your old grout, or better, a few days-old dried sample from a test batch, directly to the store and compare it under different lighting, since fluorescent store lighting and your bathroom’s lighting can make the exact same color look surprisingly different.
Some manufacturers also offer grout colorants and sealers with built-in tint, which can refresh the color of existing grout without a full removal and regrout. These are worth considering if your grout is structurally sound but simply looks dated or stained, since they’re dramatically less labor-intensive than a full regrout, though they don’t address any underlying cracking or gaps.
Regrouting Around Niches, Benches, Shelves, and Fixtures
The flat field of tile on a shower wall is the easy part of any regrouting job. Where people run into trouble is around the built-in shower niche, a bench seat, a corner shelf, or the trim around a valve or shower arm, because these spots combine tight angles, awkward tool access, and a much higher risk of water intrusion if the joint isn’t done well.
Niches in particular deserve extra attention. Because a niche interrupts the flat wall plane with its own small ceiling, floor, and side walls, it collects several transition points where tile meets tile at odd angles, all of which need to be packed carefully with a smaller float or even a putty knife in the tightest corners. Standard-size grout floats are often too large to fit inside a niche cleanly, so a margin trowel or a small flexible spreader designed for tight spaces will save you a lot of frustration.
Around fixtures like the shower valve trim plate or the shower arm flange, resist the temptation to grout directly up against the metal. These transition points move slightly with temperature changes and vibration over the life of the shower, and rigid grout packed tightly against metal trim is prone to cracking at exactly that seam. A thin bead of matching-color caulk, applied after the surrounding grout has cured, is the better long-term solution for these specific transitions, even though the rest of the tile field uses grout.
Corners where two tiled walls meet, and the corner where the walls meet the shower floor or the tub deck, should also generally be caulked rather than grouted, for the same reason: these are movement joints, not static joints, and grout simply cannot flex enough to survive years of a house settling and temperature swinging without cracking.
Working With Mosaic and Small-Format Tile
Mosaic tile, whether it’s classic penny rounds, hexagons, or modern linear mosaics, is usually sold pre-mounted on mesh sheets, and that mesh backing changes the regrouting process in a few important ways. Because the tiles are so small and closely spaced, there’s simply far more total joint length per square foot than with standard field tile, which means slower, more deliberate work and, as mentioned earlier, meaningfully more grout consumption.
When removing old grout from mosaic sheets, be extra cautious with a rotary or oscillating tool. The individual tiles in a mosaic sheet are thinner and more fragile than standard wall tile, and it’s much easier to chip or crack one by accident when the blade has less margin for error between joints. Many experienced tilers switch entirely to hand tools, like a small grout saw or a carbide scraper, for mosaic removal rather than risking a power tool in such tight quarters.
Application is where mosaic tile actually gets easier, in one sense: because the joints are so numerous and close together, a rubber float dragged diagonally across the surface tends to fill mosaic joints very efficiently in a single pass. The tradeoff is in the wipe-down stage, where the sheer density of joints means more total sponge passes and a higher chance of pulling grout back out of a shallow joint if you wipe too aggressively or too soon.
If your mosaic tile has an irregular or tumbled surface, such as pebble tile or tumbled marble mosaic, expect grout haze removal to take noticeably longer than with flat, glazed tile. The textured surface holds onto haze in every little dip and crevice, and a stiff-bristled (but non-metal) brush alongside your microfiber cloth is often necessary to fully clear it.
Dust, Silica, and Ventilation: Staying Safe During Removal
Grout removal generates a genuinely significant amount of fine dust, and that dust deserves more respect than it typically gets in casual DIY discussions. Cementitious grout contains crystalline silica, and repeated or prolonged exposure to airborne silica dust is a recognized respiratory health concern, particularly with power tools that generate dust faster than hand tools do.
A well-fitted N95 or P100 respirator, rather than a basic paper dust mask, is the right equipment for this job, especially if you’re using an oscillating multi-tool or a grout removal attachment on a rotary tool. Safety glasses or goggles matter just as much, since debris frequently kicks up and back toward your face in the confined space of a shower stall.
Ventilation helps more than people expect. Running the bathroom exhaust fan continuously during removal, propping the bathroom door open, and, if the weather allows, opening a window all help clear dust from the air rather than letting it settle and get kicked back up repeatedly throughout the project. Some DIYers also attach a shop vacuum directly to a dust-collecting grout removal tool, which captures a large percentage of dust right at the source rather than letting it become airborne in the first place.
After the removal stage, a thorough vacuum and damp-wipe of the entire bathroom, not just the shower itself, helps clear settled dust from nearby surfaces, since a fine cementitious dust film has a way of traveling further than you’d expect through an open door.
Renting Tools vs. Buying: What Makes Sense for a One-Time Project
If this is a one-and-done project rather than the start of an ongoing interest in tile work, it’s worth thinking honestly about which tools are worth owning and which are better rented or borrowed. An oscillating multi-tool is genuinely useful well beyond grout removal, for everything from trimming door jambs to cutting drywall, so it’s usually a reasonable long-term purchase even if grout removal is the only reason you’re buying one today.
A dedicated grout saw, on the other hand, is a fairly single-purpose hand tool, inexpensive enough that buying one outright rarely makes financial sense to avoid, even for a single project; renting one would barely save any money over just purchasing it. Rubber grout floats and grout sponges fall into the same low-cost, keep-it-forever category, since they’re inexpensive and useful for any future touch-up work, like re-grouting a single cracked joint down the road.
Where rental genuinely makes sense is with heavier-duty equipment, like a full-size angle grinder with a diamond grout removal wheel for a very large or heavily grouted project, or a wet tile saw if your project has expanded to include cutting replacement tiles. Most hardware and home improvement stores offer daily rental rates for this kind of equipment that are far more economical than purchasing outright for a single weekend project.
Troubleshooting: Why New Grout Cracks or Fails Quickly
Few things are more discouraging than noticing a crack in grout you installed just a few weeks earlier, but the good news is that premature failure almost always traces back to one of a small handful of causes, and most are preventable next time.
Mixing the grout too wet is the single most common culprit. Excess water in the mix means excess water has to evaporate out as the grout cures, and that evaporation process shrinks the grout slightly as it dries, which shows up as fine cracking, especially in wider joints. Following the manufacturer’s water ratio precisely, rather than eyeballing it, solves this in most cases.
Grouting over movement joints is the second most common cause. As covered in the corners and niches section above, any joint where two different materials meet, or where the structure naturally flexes slightly, needs caulk rather than rigid grout. If you grouted a corner or a tile-to-tub transition instead of caulking it, cracking there isn’t really a grout failure at all; it’s a case of the wrong material being used for that particular joint.
Underlying substrate movement is a less common but more serious cause. If the backer board behind your tile has any flex to it, whether from improper installation, water damage, or an inadequately supported wall, that flex transmits directly through the tile and grout above it. Grout cracking in a clear pattern, such as diagonally across several joints in the same direction, especially near a corner or seam in the backer board, can be a sign of this deeper issue and is worth investigating before you simply regrout the same spot again.
Finally, using the wrong grout for the joint width causes cracking too. Unsanded grout used in a joint wider than about an eighth of an inch doesn’t have the aggregate structure to resist shrinkage the way sanded grout does, and it’s a common mismatch when people default to unsanded grout because it feels smoother to work with.
Grout Product Types Worth Knowing
Beyond the basic sanded, unsanded, and epoxy categories, there are a few specific product formulations worth understanding before you shop, since manufacturers now market several hybrid options that blur the traditional lines.
| Grout Type | Best For | Drawbacks |
|---|---|---|
| Standard cement-based (sanded/unsanded) | Most residential showers, budget-friendly projects | Porous, needs regular sealing |
| Epoxy grout | High-moisture areas, stain-prone households | Harder to work with, shorter working time, pricier |
| Single-component “pre-mixed” grout | Small repair jobs, touch-ups | More expensive per square foot, limited color range |
| Polymer-modified cement grout | Improved flexibility over standard cement grout | Still requires sealing, costs more than standard mix |
| Urethane grout | DIY-friendly stain resistance without full epoxy complexity | Curing sensitive to humidity and temperature |
Pre-mixed, single-component grouts have become popular with DIYers specifically because they remove the guesswork of mixing ratios entirely; you open the tub and apply it directly. They tend to cost more per square foot than powder you mix yourself, but for a smaller shower or a touch-up repair, the convenience and reduced risk of a bad mix often justifies the price difference.
Urethane grout sits in an interesting middle ground between traditional cement grout and full epoxy: it offers meaningfully better stain and crack resistance than standard cement grout without the steep learning curve and short working time that makes epoxy intimidating for first-time users. It’s worth asking about specifically at a tile supply store if you want an upgrade over standard grout without committing to epoxy’s more demanding application process.
Low-VOC and Eco-Friendly Grout and Sealer Options
If indoor air quality is a concern, whether because of sensitivities in your household or simply a general preference for lower-emission products, it’s worth knowing that both grout and sealer come in low-VOC and water-based formulations, and the performance gap between these and traditional solvent-based products has narrowed considerably in recent years.
Standard cement-based grout is inherently low in volatile organic compounds since it’s primarily a mineral product, so the bigger consideration is usually the sealer rather than the grout itself. Traditional solvent-based penetrating sealers can have a noticeable odor during application and curing, while water-based penetrating sealers offer similar stain protection with significantly less odor and off-gassing.
Epoxy grout is where VOC content varies the most between products, since some epoxy formulations use stronger solvents than others. If you’re set on epoxy grout for its durability but want to minimize VOC exposure, look specifically for products marketed as low-VOC or water-based epoxy systems, and plan for extra ventilation regardless, since even low-VOC epoxy benefits from a well-ventilated curing environment.
Whichever products you choose, good ventilation during both application and curing remains the single most effective way to minimize any indoor air quality impact from a regrouting project, regardless of how the specific product is formulated.
How Weather and Season Affect a Regrouting Project
Grout cure times listed on packaging assume roughly average indoor conditions, but real bathrooms rarely sit at a perfectly average temperature and humidity, and the difference can meaningfully change how your project goes. In a cold, damp basement bathroom during winter, cement-based grout cures more slowly than the package label suggests, since the chemical curing reaction that hardens grout depends partly on ambient temperature. If your bathroom regularly sits below the mid-60s Fahrenheit during the project, consider running a space heater safely nearby (well away from any water source) for the first day or two after grouting to help the cure along.
Humid climates present the opposite challenge in some ways. High ambient humidity slows the evaporation of surface moisture from the grout, which can extend both the initial set time and the full cure window beyond the standard 48 to 72 hours. In these conditions, a dehumidifier or even just a small fan aimed to keep air moving across the tile surface, without blasting it directly, helps the grout cure evenly rather than skinning over on the surface while staying soft underneath.
There’s also a seasonal argument for timing this project deliberately rather than tackling it whenever frustration with old grout peaks. Late spring and early fall tend to offer the most forgiving indoor humidity levels in much of the country, without the extremes of a humid summer or a heating-season winter. If your household has any flexibility in scheduling, choosing one of these windows can shave meaningful uncertainty off your cure time and reduce the odds of a soft or under-cured joint failing early.
Keeping the Project Safe Around Kids and Pets
A regrouting project turns the bathroom into a genuinely hazardous space for a few hours at a time, and it’s easy to overlook that fact when you’re focused on the tile work itself. Fresh grout dust, uncured grout, sharp scraping tools, and open containers of sealer or solvent are all things curious kids and pets can get into surprisingly quickly if the door is left open even briefly.
The simplest solution is also the most effective one: close the bathroom door and, if possible, use a doorstop or hook latch positioned high enough that small children can’t easily open it, for the full duration of active work as well as the curing period afterward. A “wet paint” style sign taped to the door is a low-effort reminder for other household members not to wander in out of habit.
Pets deserve particular caution around wet grout and sealer specifically, since curiosity about a new smell or texture can lead a dog or cat to walk through or lick a freshly worked joint before it’s had any chance to set. If your pet has access to the bathroom under normal circumstances, it’s worth relocating their usual routine, like a litter box or water bowl kept in that room, somewhere else entirely for the two to three days your project and cure time will realistically take.
Finally, store any leftover grout, sealer, or solvent well out of reach once you’ve wrapped up for the day, ideally in a latched cabinet rather than just set aside on a counter. Many sealers and some grout additives carry warning labels for a reason, and a half-used container left within reach overnight is an easily avoidable risk.
Should You Also Watch a Video Before Starting?
Written guides like this one are great for reference while you’re mid-project, since you can quickly scan back to a specific step without re-watching several minutes of footage. But regrouting has enough hands-on, feel-based nuance, particularly around float angle, grout consistency, and knowing exactly when a joint has set enough to wipe, that a short video demonstration beforehand genuinely helps most first-time DIYers build confidence before they start.
If you do watch a video first, pay closest attention to two things that are hard to fully convey in text: the exact visual texture of properly mixed grout, since “peanut butter consistency” can still mean different things to different people until you’ve seen it, and the motion of the float itself, since the diagonal packing angle described in Step 5 above is much easier to understand once you’ve watched someone do it than it is to picture from a written description alone.
That said, don’t let video-watching turn into procrastination. Most people find that the actual physical process clicks within the first foot or two of real, hands-on joint work, faster than most tutorials suggest. Watching one solid demonstration, then getting started on your own project with this guide open for reference, tends to work better than watching several videos back to back trying to find the “perfect” one before beginning.
Regrouting a Rental: What to Check First
If you’re a renter rather than a homeowner, regrouting a shower is a project worth approaching a little differently. Start by checking your lease agreement and, ideally, getting written confirmation from your landlord or property manager before doing any work, even though regrouting is generally considered maintenance rather than a structural alteration. Some landlords are glad to have a tenant proactively address failing grout, since it protects their property from water damage, while others prefer to handle it themselves or through their own contractor, and it’s better to know which situation you’re in before you start scoring joints.
If you do get the go-ahead, keep receipts for any materials you purchase. Some landlords will reimburse tenants for maintenance-related material costs, particularly if the alternative would have been an even more expensive professional service call on their end. Even if reimbursement isn’t offered, having a clear record of what you did and when can be useful if any dispute comes up later about the condition of the unit.
One more consideration specific to rentals: stick to a grout color that closely matches the original rather than using the project as an opportunity for a personal style update. A close color match protects your security deposit and keeps the space looking consistent with the rest of the unit, whereas a dramatic color change, however nice it looks to you, could be seen as an unauthorized alteration depending on your lease terms.
Grout Additives: Boosters, Colorants, and Anti-Microbial Formulas
Beyond the base grout itself, manufacturers sell a range of additives that can meaningfully change how your finished joints perform, and it’s worth knowing what’s available before you check out at the store. Liquid latex or polymer additives, used in place of plain water when mixing sanded or unsanded grout, increase flexibility and bond strength compared to a water-only mix. They’re not strictly necessary for a straightforward shower wall, but they can be a worthwhile upgrade for floor joints or any area that sees more movement or foot traffic than a typical wall.
Anti-microbial or mold-inhibiting grout additives, sometimes built directly into the grout formula and sometimes sold as a separate additive mixed in at the time of application, are specifically designed to slow the growth of mildew and mold within the porous structure of the grout itself, rather than just on the surface. These are particularly worth considering for bathrooms with weaker ventilation, north-facing bathrooms that get less natural light and airflow, or households that have dealt with recurring mold issues in the past regardless of cleaning habits.
Colorant additives, distinct from buying a pre-colored grout, allow you to tint a neutral base grout to a custom shade, which is most useful for matching older or discontinued grout colors, as mentioned earlier in the context of vintage tile. These colorants need to be mixed in carefully and consistently across every batch to avoid visible color variation between different mixing sessions, so if you’re using a colorant across a project that requires more than one batch, mix a larger single batch when possible rather than several smaller ones.
Whichever additives you consider, always check compatibility with your specific grout product first. Not every additive is formulated to work with every grout type, and mixing an incompatible additive in can affect cure time, final strength, or color in ways that are frustrating to discover only after the joints have already set.
Cleaning and Storing Your Tools When You’re Done
How you clean up at the end of a regrouting project has a real effect on whether your tools are usable for the next touch-up job or quietly ruined in the garage. Grout, unlike many building materials, hardens permanently once it cures, which means any tool left with grout residue on it for more than about thirty minutes can become significantly harder to clean, and in some cases essentially unsalvageable.
Rinse your rubber float and grout sponge in clean water immediately after each use throughout the project, not just at the very end. Grout that dries in the texture of a sponge or in the grooves of a float edge is difficult to fully remove later, and a float with dried grout embedded in its surface will drag unevenly and leave a rougher finish the next time you use it.
Buckets used for mixing grout or rinsing tools should never be dumped directly down a drain once you’re done. Cement-based grout slurry can harden inside pipes over time, gradually narrowing the drain diameter with repeated small deposits, which is a slow but real path toward a clogged main line. Instead, let any leftover slurry settle to the bottom of the bucket, pour off the clearer water on top down the drain, and let the settled solids dry out completely before scraping them into the trash.
Metal tools like a grout saw blade, a carbide scraper, or a caulking tool should be wiped dry after cleaning and lightly oiled if they’re prone to rust, particularly if you live in a humid climate or plan to store them in a garage or shed rather than a climate-controlled space. A few extra minutes of tool care at the end of a long project is easy to skip, but it’s the difference between a toolkit that’s ready for the next small repair and one that needs to be partially replaced before you can use it again.
Special Considerations for Older Homes and Vintage Tile
Showers in older homes often present challenges that a typical modern regrouting guide doesn’t fully address, mainly because the materials and installation methods used decades ago differ meaningfully from what’s standard today. If your home was built before the 1980s, there’s a reasonable chance your shower was installed over a mortar bed rather than modern cement backer board, and that mortar bed can behave differently when you’re scoring and removing old grout, particularly if it has developed hairline cracks of its own over the decades.
Vintage tile, especially small hexagonal floor tile or colorful mid-century wall tile, can also be more brittle than modern tile, and some vintage tile bodies are more porous, meaning they can absorb pigment from dark grout during application if they aren’t properly sealed beforehand. If you’re regrouting a shower with tile you’d like to preserve rather than replace, consider applying a tile sealer or grout release product to the tile face before you begin, which prevents pigment staining and makes cleanup significantly easier regardless of the tile’s age.
Older homes are also more likely to have lead-based paint or, in rare cases, asbestos-containing materials in older mastic or backing materials, particularly in homes built before 1980. If your project involves disturbing anything beyond the grout itself, such as removing tile entirely or working near old adhesive, it’s worth doing some research on your home’s specific age and construction before assuming a straightforward regrout, since disturbing certain older materials calls for different precautions than fresh grout removal alone.
Finally, matching new grout to genuinely vintage tile colors can be its own small project. Many original grout colors from decades past aren’t available off the shelf today, so a custom-tinted grout, mixed by adding pigment to a neutral base, is sometimes the only realistic way to get a close match, and it’s worth budgeting extra time for a few test batches before committing to a full wall.
Frequently Asked Questions
How long does regrouting a shower take?
For an average shower stall, expect 4–8 hours of hands-on work spread across removal, application, and cleanup, plus a 48–72 hour cure period before use.
Can I regrout over old grout?
No. New grout won’t bond properly to old grout residue — full removal down to the substrate is necessary for a lasting repair.
Sanded or unsanded grout for shower floors?
Most shower floor joints are wider than 1/8 inch, so sanded grout is typically the better, more crack-resistant choice.
How soon can I shower after regrouting?
Wait the full cure time listed on your grout packaging — usually 48 to 72 hours — before exposing the joints to running water.
Do I need to seal grout right after grouting?
No — seal only after the grout has fully cured, not immediately after application.
What causes grout to turn black or moldy?
Trapped moisture and organic buildup in porous, unsealed grout is the main culprit. Ventilation and sealing both help prevent it.
Is epoxy grout worth it for a shower?
Yes, if budget allows — it’s more stain- and water-resistant than cement-based grout, though it’s trickier to apply and costs more.
Can I use a caulk gun instead of a grout float?
Caulk is meant for corners and expansion joints, not the flat tile field — use grout for the tile joints and caulk only where tile meets tub, floor, or another material.
How do I match my new grout color to the old grout?
Bring a small dried sample or a clear close-up photo to your hardware store’s tile department, or opt for a slightly darker shade, which tends to hide future staining better.
Do I need to remove the shower head before regrouting?
Not usually — taping it off is generally sufficient. If it’s leaking anyway, it may be worth addressing separately.
Why is there a hazy film on my tile after regrouting?
That’s grout haze, a normal byproduct of curing. Buff it off with a dry microfiber cloth or a haze remover once the grout has cured for at least a day or two.
Should I regrout or re-caulk first?
Regrout first, let it fully cure, then re-caulk the corners and transitions last so the fresh caulk isn’t disturbed while you’re working on the tile field.