
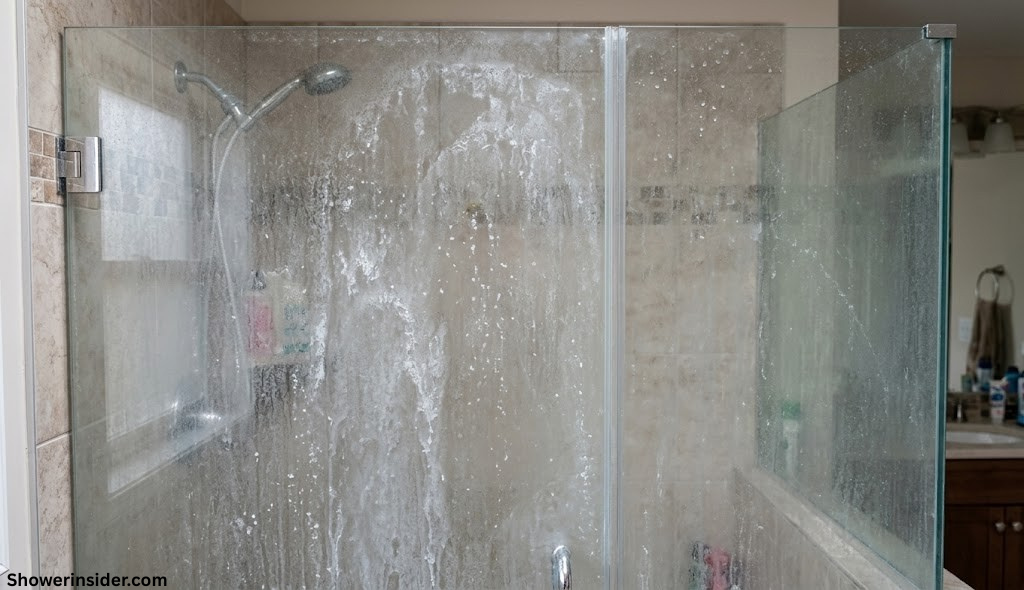
How to Remove Hard Water Stains From Shower Glass (Complete Guide)
Six tested methods, the tools that actually work, and the exact routine that stops stains from ever coming back.
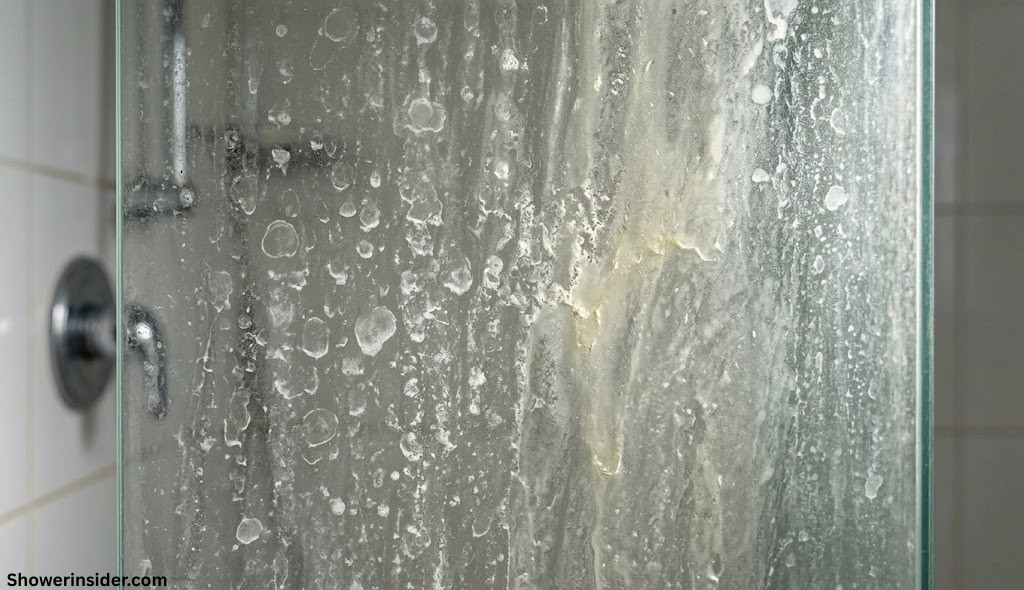
If you’ve ever pulled back your shower door and squinted at a hazy, chalky film that just won’t wipe away, you already know how stubborn hard water stains can be. What starts as a faint cloudiness on the glass can, within a few months, harden into a crusty white or grayish buildup that makes an otherwise spotless bathroom look neglected. The good news is that hard water stains — even years-old ones — are almost always removable with the right method, the right tools, and a little patience.
This guide walks through exactly why these stains form, six field-tested removal methods ranked from gentlest to most aggressive, a full comparison table so you can pick the right approach for your situation, and a prevention routine that will keep your glass looking freshly installed. Whether you’re dealing with a light haze or a decade of mineral buildup, there’s a method here that will work for you.
It’s worth setting expectations up front: not every method here will apply to every bathroom, and part of getting a great result is matching the right technique to your specific glass type and stain severity rather than reaching for the strongest option by default. We’ll cover exactly how to make that call as we go, along with the handful of mistakes that tend to turn an easy cleaning session into an accidentally scratched shower door. By the end of this guide, you should be able to confidently diagnose your situation, pick the right method, and — just as importantly — set up a simple routine that keeps you from ever having to do this kind of deep clean again.
Why Hard Water Stains Form on Shower Glass
Hard water stains aren’t dirt in the traditional sense — they’re mineral deposits. When water containing high concentrations of calcium and magnesium evaporates off a glass surface, it leaves those minerals behind as a fine, chalky residue. Over time, layer after layer of evaporation builds this residue into a visible, textured film. This is why the problem tends to get dramatically worse the longer it goes unaddressed: each shower adds another microscopic layer.
The severity of the problem depends heavily on your local water supply. Homes on well water or municipal water with high mineral content (often labeled “hard water” on a water quality report) will see staining develop far faster than homes with soft water. If you’ve noticed similar buildup on your faucets, showerheads, or glass shelving, that’s a strong sign your water hardness is the underlying cause rather than a cleaning habit issue. In fact, if your shower water pressure has also dropped, mineral buildup inside your pipes and showerhead could be a contributing factor worth investigating separately.
There’s also a chemistry reason stains cling so stubbornly to glass specifically. Calcium carbonate deposits are alkaline (basic) in nature, which means they respond best to acidic cleaners. This is the entire logic behind why vinegar — a mild acid — is the go-to first line of defense, and why alkaline cleaners like most all-purpose sprays barely touch these stains no matter how hard you scrub.
It also helps to understand what’s actually happening at a microscopic level. Glass, even tempered glass, has a surface that isn’t perfectly smooth — under magnification it has tiny pores and irregularities. When mineral-laden water sits in these microscopic imperfections and evaporates, the dissolved calcium and magnesium ions crystallize and lodge themselves into those pores. Each subsequent shower adds another thin crystalline layer on top of the last, which is why stains that seem to wipe away easily in the first few weeks eventually become a bonded, almost ceramic-like coating that ordinary wiping simply cannot budge.
How Water Hardness Is Measured
Water hardness is typically expressed in grains per gallon (GPG) or parts per million (PPM) of dissolved calcium carbonate. Most municipal water utilities publish an annual water quality report that includes this figure, and it’s worth checking yours if you’re trying to understand why your shower glass seems to stain faster than a friend’s in a different zip code.
| Classification | Grains Per Gallon | What to Expect |
|---|---|---|
| Soft | 0–1 | Minimal staining, rare deep cleans needed |
| Slightly Hard | 1–3.5 | Light haze after several weeks |
| Moderately Hard | 3.5–7 | Visible film within 1–2 weeks without a squeegee routine |
| Hard | 7–10.5 | Noticeable buildup within days; frequent cleaning needed |
| Very Hard | 10.5+ | Rapid, heavy buildup; whole-home softening strongly recommended |
If you fall into the “hard” or “very hard” categories, don’t be discouraged by how quickly stains seem to reappear after cleaning — this is expected, and it simply means the prevention routine later in this guide is going to matter more for your bathroom than the average household.
Hard Water Stains vs. Soap Scum: Know the Difference
Many people lump “shower grime” into one category, but hard water stains and soap scum are chemically different problems that sometimes respond to different treatments:
| Characteristic | Hard Water Stains | Soap Scum |
|---|---|---|
| Cause | Mineral deposits (calcium, magnesium) | Soap residue reacting with minerals and body oils |
| Appearance | Chalky white, gray, or cloudy film | Waxy, filmy, sometimes slightly yellow |
| Feel | Rough, crusty texture when severe | Slippery or tacky to the touch |
| Best treatment | Acidic cleaners (vinegar, citric acid) | Degreasing cleaners or dish soap |
| Typical location | Anywhere water evaporates and sits | Areas soap and shampoo run down and dry |
In most real bathrooms, you’re dealing with a combination of both, which is exactly why the methods below layer an acidic treatment with a light abrasive step — one handles the minerals, the other lifts the residual film.
Before You Start: Tools and Safety Basics
Gathering everything ahead of time saves you from mid-cleaning trips out of the shower with soapy hands. Here’s a general supply list that covers every method in this guide — you won’t need all of it for a single session, but having options on hand means you can escalate to a stronger method without stopping to shop.
You’ll typically need
- White vinegar (distilled)
- Baking soda
- A spray bottle
- Microfiber cloths
- A non-scratch scrub sponge
- Rubber gloves
- A squeegee
Optional, for stubborn cases
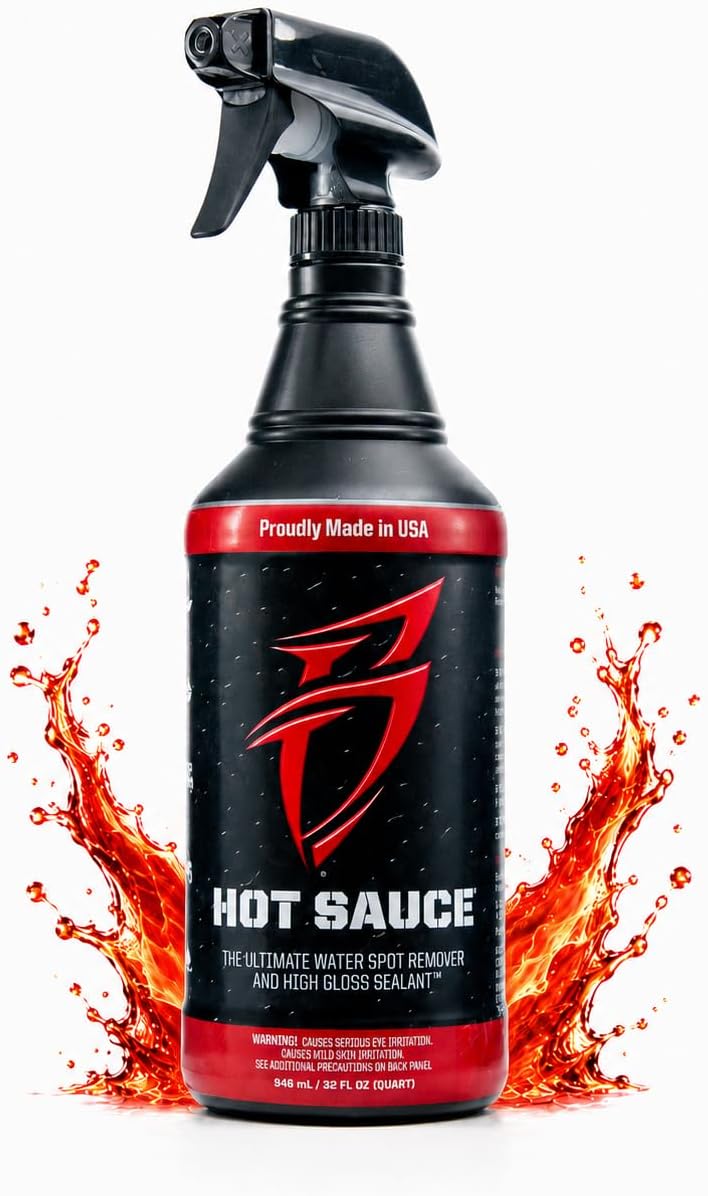
- A commercial hard water stain remover
- A single-edge razor blade scraper (glass-safe)
- 0000 grade steel wool
- A melamine foam pad
- Safety goggles
It’s also worth doing a quick spot test if your shower door has any decorative coating, tinting, or a low-iron “clear” glass finish that’s more delicate than standard tempered glass. Apply your chosen cleaner to a small, inconspicuous corner first and wait ten minutes to confirm there’s no discoloration or dulling before treating the whole panel.
Know Your Glass Type Before You Begin
Not all shower glass is created equal, and the method you choose should be informed by what you’re actually working with. Taking two minutes to identify your glass type up front can save you from an expensive mistake.
| Glass Type | Common Signs | Safe Methods | Avoid |
|---|---|---|---|
| Standard Clear Tempered | No visible tint, uncoated, common in most builder-grade doors | All six methods | N/A if spot-tested first |
| Low-Iron / Ultra-Clear | Noticeably less green tint on the edge compared to standard glass | Vinegar, baking soda, commercial remover | Steel wool, aggressive scraping |
| Coated “Easy-Clean” Glass | Water beads noticeably; often labeled at purchase | Vinegar, mild commercial remover | Steel wool, melamine foam, razor blade |
| Frosted / Textured | Visibly patterned or matte surface | Vinegar, baking soda, commercial remover | Razor blade, steel wool |
| Tinted (Bronze/Gray) | Visible color cast throughout the pane | Vinegar, baking soda | Strong acidic commercial removers without spot testing |
If you’re unsure which category your glass falls into, check any documentation from your shower door installation, or contact the manufacturer directly — many coated glass products have a model number etched discreetly into a corner of the frame.
Why Non-Scratch Sponges Matter More Than You’d Think
It’s tempting to reach for whatever sponge is already sitting in the shower caddy, but the scouring side of a standard kitchen sponge is often abrasive enough to leave fine, hairline scratches on glass over repeated use — scratches that are barely visible individually but accumulate into a permanently dulled surface over months. A dedicated non-scratch pad, by contrast, is engineered specifically to clean effectively without the risk, which is why it shows up as the default recommendation across nearly every method in this guide.
Method 1: The White Vinegar Soak (Best First Step)
White vinegar is the single most effective household solution for hard water stains because it’s genuinely acidic enough to dissolve calcium and magnesium deposits, yet gentle enough to use on glass without risk of scratching. This should be your starting point for nearly every case, regardless of severity — even if you end up needing a stronger method afterward, the vinegar soak softens the deposits and makes every following step easier.
1Saturate the glass
Fill a spray bottle with undiluted white vinegar and spray it generously over the entire stained area, focusing on the thickest deposits. For stains near the bottom of the door or on a fixed glass panel, you can soak paper towels in vinegar and press them directly against the glass so the acid stays in contact longer instead of dripping away.
2Let it dwell
Give the vinegar at least 15–20 minutes of contact time for moderate staining, or up to an hour for heavy buildup. If you’re using vinegar-soaked paper towels, this is the point where they should stay pressed against the glass, undisturbed. The acid needs time to break down the calcium bonds — rushing this step is the number one reason people think vinegar “doesn’t work.”
3Scrub and rinse
Remove the paper towels and, using a non-scratch scrub sponge, work in small circles over the treated area. You should feel the deposits start to release almost immediately. Rinse thoroughly with warm water and check the surface — light-to-moderate staining should come off almost completely at this stage.
Why Undiluted Vinegar Beats a Watered-Down Mix
Some cleaning guides recommend diluting vinegar with water to reduce the smell, but for actively removing existing mineral deposits, full-strength vinegar is meaningfully more effective. Dilution is fine for routine maintenance wipe-downs, but when you’re trying to break down bonded calcium deposits, you want the acid at its full working concentration. If the smell is a concern, a few drops of dish soap or a splash of lemon juice added to the spray bottle can mask it somewhat without significantly reducing effectiveness, and the odor dissipates quickly once you rinse and ventilate the room.
Heating the Vinegar for Stubborn Spots
For particularly resistant patches, gently warming the vinegar (microwaving it for 20–30 seconds in a microwave-safe container works well) noticeably speeds up the chemical reaction with mineral deposits. Warm vinegar penetrates crusty buildup faster and often cuts the required dwell time roughly in half. Just be cautious not to overheat it — vinegar doesn’t need to be hot, only slightly warm, to see the benefit.
Method 2: Baking Soda Paste for Textured Buildup
Baking soda brings mild abrasion to the table, which makes it the ideal follow-up to a vinegar soak. Where vinegar dissolves the mineral bonds chemically, baking soda physically lifts the loosened residue without scratching glass — its hardness is well below that of glass, so it’s safe for daily-use surfaces.
4Mix the paste
Combine baking soda with just enough white vinegar to form a thick, spreadable paste — expect some fizzing as the two react. Apply it directly to the stained glass with a sponge or your gloved fingers, covering the area completely.
5Work it in with circular motions
Using a soft-bristle brush or non-scratch sponge, scrub in small, overlapping circles for 60–90 seconds per section. You’ll notice the paste turning gray or chalky as it lifts mineral residue — that discoloration is a good sign the treatment is working.
6Rinse and squeegee dry
Rinse thoroughly with warm water until no paste residue remains, then immediately squeegee the glass dry. Drying immediately matters more than people expect — leaving water to air-dry on freshly cleaned glass just restarts the mineral-deposit cycle.
Method 3: Commercial Hard Water Stain Remover
For stains that laugh off vinegar and baking soda, a dedicated commercial remover is the next logical step. These products use stronger acids — often phosphoric or sulfamic acid — engineered specifically to dissolve calcium carbonate quickly without the extended dwell times household ingredients require.

7Apply per label instructions
Every commercial formula differs slightly in required dwell time and dilution, so read the label first. Most gel-based removers are applied directly to dry glass and left for 5–10 minutes before agitation.
8Agitate with a non-scratch pad
Work the product in with a non-abrasive pad, applying light, even pressure. Avoid pressing hard — the chemical is doing the heavy lifting here, not friction.
Pros
- Fast-acting on moderate to heavy buildup
- Less scrubbing required than DIY methods
- Widely available and inexpensive
Cons
- Stronger fumes — requires ventilation
- Not safe on natural stone or some finishes
- Overuse can dull certain glass coatings
Reading the Active Ingredient List
Not all commercial hard water removers are formulated the same way, and understanding the active ingredient can help you choose the right one for your situation. Products built around phosphoric acid tend to be gentler and better suited for regular maintenance cleaning, while those using sulfamic or stronger mineral acids are typically reserved for heavier, more established buildup and often come with more explicit ventilation and glove recommendations on the label. If you have sensitive skin or a smaller bathroom with limited airflow, starting with a phosphoric-acid formula is generally the more comfortable choice, even if it means a slightly longer dwell time to achieve the same result.
Gel vs. Spray Formulas
Spray formulas are convenient for quick applications and work well on horizontal or lightly stained surfaces, but on vertical shower glass, a thin spray can run and drip before it has time to work, reducing effective contact time. Gel formulas are specifically designed to cling to vertical surfaces, which is why they tend to outperform sprays on shower doors specifically, even when the underlying active ingredient is similar. If you’re treating a mix of surfaces — glass, tile, and a showerhead, for example — a spray may still be the more practical all-purpose choice, but for the glass itself, gel is usually worth the slightly higher price.
Method 4: Razor Blade Scraping (For Crusty, Raised Deposits)
When mineral buildup has hardened into a raised, crusty texture you can feel with your fingertips, chemical treatments alone often aren’t enough to fully clear it. A single-edge razor blade — the same kind used for scraping paint off glass — can physically remove this buildup safely, provided the glass is kept wet throughout.
9Wet the glass thoroughly first
Never scrape dry glass. Spray the area with water or leftover vinegar solution so the blade glides rather than digs, which prevents scratching.
10Scrape in one direction, low angle
Hold the blade at a shallow angle — roughly 15 to 20 degrees relative to the glass — and push in a single direction rather than sawing back and forth. Rinse the blade frequently to clear away lifted residue, and re-wet the glass as needed.
Choosing the Right Blade
A dedicated glass scraper tool with a retractable single-edge blade is generally safer and easier to control than a bare utility blade, since the housing keeps the cutting edge at a consistent, shallow angle automatically. These tools are inexpensive and widely sold alongside paint and glass cleaning supplies, and the added control is well worth the small cost, especially for anyone attempting this method for the first time.
What to Do If You Notice a Scratch
If you do notice a fine scratch forming, stop immediately and switch to a gentler method for the remainder of the session. Minor surface scratches on glass are sometimes improved — though rarely fully eliminated — with a cerium oxide glass polishing compound applied with light, even pressure. Deeper scratches are generally permanent and, depending on severity and location, may only be addressed through professional polishing or panel replacement, which is exactly why the wet-glass, low-angle, single-direction technique described above matters so much.
Method 5: Melamine Foam Pad for Final Polish
Melamine foam (the material behind most “magic eraser” style pads) works through micro-abrasion — its rigid open-cell structure acts almost like extremely fine sandpaper on a microscopic level. On shower glass, it’s excellent for buffing away the last faint haze after a chemical treatment, giving you that streak-free, showroom-glass finish.
11Wet the pad and glass
Dampen both the melamine pad and the glass surface. Working dry will make the pad wear out fast and reduce its effectiveness.
12Buff gently in overlapping passes
Use light pressure only — melamine foam is abrasive enough on its own without added force. Work in overlapping passes across the whole panel for a uniform finish, then rinse and squeegee dry.
Method 6: 0000 Grade Steel Wool (Extreme Cases Only)
This is the most aggressive method on this list and should be reserved for genuinely severe, years-old buildup on flat tempered glass only — never on coated, tinted, textured, or acrylic surfaces. Extra-fine “0000” grade steel wool is soft enough to avoid scratching plain glass when used correctly, but any other grade risks permanent damage.
Safe to use on
- Flat, uncoated tempered shower glass
Never use on
- Low-iron or coated “easy-clean” glass
- Acrylic or fiberglass shower panels
- Textured, frosted, or patterned glass
- Chrome, brushed nickel, or oil-rubbed bronze fixtures nearby
Keep the glass and the steel wool wet at all times, use very light pressure, and work in small, straight passes rather than circles. Rinse frequently to check your progress, and stop the moment the surface feels smooth again. If you’re at all unsure whether your glass has a protective coating, skip this method entirely and stick with the commercial remover from Method 3 instead — a slower result beats a permanently scratched shower door.
It’s also worth pairing this method with a vinegar soak beforehand rather than using it as a standalone treatment. Softening the deposits chemically first means you’ll need far less physical abrasion to finish the job, which directly reduces the already-elevated risk this method carries. Think of the steel wool as a finishing touch for whatever the vinegar couldn’t fully dissolve on its own, rather than the primary tool doing the bulk of the work.

Don’t Forget the Door Track and Hardware
Shower glass gets most of the attention because it’s the most visible surface, but the aluminum or vinyl track at the base of a sliding door, along with the hinges and handles, tends to accumulate even heavier mineral deposits — largely because water pools there far longer than it does on the vertical glass panels. A gleaming glass door paired with a chalky, crusted track undermines the whole effort, so it’s worth treating both at the same time.
Cleaning the Bottom Track
Tracks are notoriously difficult to reach with a sponge, so an old toothbrush or a dedicated grout brush works far better for this job. Saturate the track with vinegar and let it sit for the same 15–20 minutes recommended for the glass itself, since the same mineral chemistry applies. For tracks with especially heavy buildup, filling the channel with vinegar-soaked paper towels overnight before scrubbing the next morning can make an enormous difference with very little scrubbing effort required afterward.
Handles, Hinges, and Metal Fixtures
Chrome, brushed nickel, and similar finishes respond well to the same vinegar-based approach, though you’ll want to avoid baking soda paste or any abrasive pad on polished or plated finishes, since these can be more prone to micro-scratching than glass. A vinegar-soaked cloth wrapped around hinges and handles for ten minutes, followed by a gentle wipe and dry, is usually sufficient. If your shower includes a dual shower head combo or handheld unit with a metal hose, the same connectors are worth checking periodically, since mineral buildup there can eventually affect flow and, in some cases, contribute to a leaking shower head.
Method Comparison: Which One Should You Use?
With six different approaches on the table, it helps to see them side by side. Use this table to match your stain severity and glass type to the right starting method.
| Method | Best For | Time Needed | Risk Level | Cost |
|---|---|---|---|---|
| Vinegar Soak | Light to moderate haze | 20–60 min | Very Low | $ |
| Baking Soda Paste | Moderate, textured film | 15–30 min | Low | $ |
| Commercial Remover | Moderate to heavy buildup | 10–20 min | Low–Medium | $$ |
| Razor Blade Scraping | Crusty, raised deposits (flat glass only) | 15–30 min | Medium | $ |
| Melamine Foam | Final polish, light haze | 10–15 min | Low–Medium | $ |
| 0000 Steel Wool | Severe, years-old buildup (flat glass only) | 20–40 min | High | $ |
A practical order of operations for most bathrooms: start with the vinegar soak, follow with the baking soda paste, and reach for a commercial remover only if visible haze remains. Reserve the razor blade and steel wool methods for the rare case of hardened, textured buildup that nothing else has touched — and always confirm your glass type first.
A Simple Decision Framework
If you’re still unsure where to start, walk through these questions in order:
- Is the glass smooth to the touch but visibly hazy? Start with the vinegar soak. This alone resolves the majority of cases.
- Does the haze remain after vinegar and a squeegee dry? Move to the baking soda paste for the added mild abrasion.
- Still hazy after both, or is this your first deep clean in a year or more? Reach for a commercial remover to save time on heavier buildup.
- Can you feel raised, crusty texture on flat, uncoated glass? Consider razor blade scraping, always on wet glass.
- Is the haze extremely light but the glass otherwise clean? A melamine foam pad alone may be all you need for a quick polish.
- Is this years of untouched buildup on flat, uncoated glass, and nothing else has worked? 0000 steel wool is your last resort, used carefully and only after confirming glass type.
Working through this list in order — rather than jumping straight to the most aggressive option — will save you both time and unnecessary risk to your glass in nearly every real-world scenario.
Dealing With Permanently Etched Glass
Sometimes what looks like a stubborn stain isn’t a stain at all — it’s etching. Hard water minerals, when left untreated for years, can actually eat into the microscopic surface of glass, leaving a permanent cloudy texture that no cleaning method will fully remove because it’s not sitting on top of the glass anymore, it’s part of it.
A simple way to tell the difference: after a thorough vinegar treatment, run your fingernail lightly across the area. If it feels perfectly smooth but still looks hazy, you’re likely dealing with etching rather than active buildup. Unfortunately, etched glass generally can’t be restored to its original clarity with household methods — professional glass polishing services use fine abrasive compounds and buffing wheels to physically resurface the glass, which is really the only true fix. For less severe etching, a dedicated glass polish product can meaningfully improve clarity even if it doesn’t achieve a perfect restoration.
The Fingernail and Flashlight Test
Beyond the fingernail check mentioned above, a flashlight test can give you additional confidence in your diagnosis. Shine a flashlight across the glass at a low, raking angle in a darkened bathroom rather than straight on. Active mineral buildup tends to show clear texture and unevenness under this angled light, almost like a topographic map, while true etching typically presents as a uniform, matte-like dullness with no discernible texture variation, because the damage has occurred evenly across the affected zone rather than sitting as a distinct deposited layer.
Can Etched Glass Be Polished at Home?
Consumer-grade glass polishing compounds — often cerium oxide based — exist and can be used with a buffing pad attachment on a household drill or orbital polisher. These products work by removing an extremely thin layer of the glass surface itself to reveal fresh, unetched glass beneath, rather than removing a deposit sitting on top. Results vary considerably depending on the severity of the etching and the evenness of your technique, and there’s a genuine risk of introducing new, uneven dullness (sometimes called “polishing haze”) if the compound isn’t worked consistently across the entire panel. For a small, contained etched area, this can be worth attempting; for widespread etching across an entire door, most people find professional results more reliable and, ultimately, more cost-effective than multiple DIY attempts with consumable polishing compounds.
Replacement as a Practical Option
For badly etched glass on an older shower enclosure, replacing just the glass panel — while keeping the existing frame and hardware — is sometimes more economical than professional polishing, particularly for a single fixed panel rather than an operable door. Local glass shops can often cut a replacement panel to match your existing frame dimensions, and this route also gives you the opportunity to upgrade to a coated, easier-to-maintain glass for the replacement, which can meaningfully reduce how often you’ll be dealing with this problem going forward.
How to Prevent Hard Water Stains From Coming Back
Removing existing stains is only half the job — without a prevention routine, the same buildup will simply return within a few weeks. The good news is that prevention takes far less effort than removal, and a consistent 60-second habit after each shower will keep your glass looking clean indefinitely.
Squeegee after every shower
This is, without question, the single highest-impact habit you can build. Wiping the glass dry with a squeegee immediately after showering removes the water before it has a chance to evaporate and leave mineral deposits behind. Keep the squeegee mounted on a suction hook inside the shower so it’s never more than an arm’s reach away.
Apply a rinse-free glass protectant
Hydrophobic glass coatings create a surface that water beads and slides off of rather than clinging to and evaporating in place. These treatments typically last several weeks to a few months per application and dramatically reduce how often deep cleaning is needed.

Consider a water softener for whole-home relief
If hard water is affecting more than just your shower glass — dull hair, spotty dishes, faucet buildup — a water softening system addresses the root cause rather than the symptom. This is a bigger investment but eliminates the majority of hard water issues throughout your home, including on shower heads and fixtures.
Do a light weekly wipe-down
Even with a squeegee habit, a quick weekly pass with a vinegar-dampened cloth catches anything that’s started to build up in corners, seals, and tracks the squeegee can’t reach — keeping heavy cleaning sessions a rare event rather than a monthly chore.
Improve Bathroom Ventilation
Standing humidity in a poorly ventilated bathroom slows evaporation just enough to change how mineral deposits form, often making them more concentrated in specific low-airflow zones like corners and the lower third of the glass. Running your exhaust fan for at least 15–20 minutes after every shower, or cracking a window if you have one, helps water evaporate more evenly and reduces how much residue is left behind in any one spot. This is a small habit that pairs well with the squeegee routine rather than replacing it.
Switch to a Liquid Body Wash Instead of Bar Soap
This tip addresses the soap scum half of the equation rather than hard water directly, but the two problems compound each other, so it’s worth mentioning. Bar soap tends to leave more residue on glass surfaces than liquid body wash or shower gel, largely due to the fillers and hardening agents used in traditional bar formulations. Households that make this switch often notice a genuine reduction in the waxy film that builds up alongside mineral deposits, making each cleaning session a bit easier.
Building the Routine Into Your Schedule
The habits above only work if they actually happen consistently, so it helps to anchor them to something you’re already doing rather than treating them as an extra chore to remember. Mounting the squeegee directly next to the shower controls, for example, puts it in your direct line of sight as you finish rinsing off, which is a far more reliable trigger than trying to remember a separate task after you’ve already left the bathroom. Similarly, keeping the glass protectant spray on the same shelf as your regular cleaning supplies — rather than tucked away — makes the monthly reapplication far more likely to actually happen on schedule.
| Habit | Frequency | Time Required | Impact |
|---|---|---|---|
| Squeegee glass dry | After every shower | 60 seconds | Very High |
| Glass protectant spray | Every 4–8 weeks | 5 minutes | High |
| Weekly vinegar wipe-down | Weekly | 5 minutes | Medium |
| Whole-home water softener | One-time install | N/A | Very High |
Common Mistakes to Avoid
- Using bleach on hard water stains. Bleach is alkaline and does nothing to dissolve mineral deposits — worse, mixing it with vinegar or acidic cleaners releases dangerous chlorine gas. If you want a disinfecting step for mildew alongside your mineral treatment, do it as a completely separate session with full ventilation and a thorough rinse in between.
- Scrubbing dry glass with an abrasive pad. Any abrasive method used dry dramatically increases the risk of fine scratches, since there’s no liquid layer to help the pad glide over the deposits rather than grinding directly against the glass surface. Always wet the surface first, and keep it wet throughout the entire scrubbing process, re-wetting as needed if a section starts to dry out mid-session.
- Skipping the spot test on coated or tinted glass. Low-iron and coated glass finishes can react differently to acids and abrasives than standard glass, and a reaction that only shows up after treating the entire door is a far more frustrating outcome than a two-minute test on a hidden corner beforehand.
- Letting glass air-dry after cleaning. This immediately restarts the mineral deposit cycle, undoing the work you just did. Even a thorough deep clean followed by air-drying will show early signs of new haze within days in a hard water household.
- Assuming stronger is always better. Jumping straight to steel wool or harsh commercial acids for light haze causes unnecessary risk when a simple vinegar soak would have worked just as well with none of the downside.
- Using the wrong tool for textured or frosted glass. Abrasive pads and blades interact unpredictably with irregular surfaces, often catching on raised texture in a way that doesn’t happen on flat glass, which is why chemical-only methods are the safer default for these surfaces.
- Forgetting to rinse cleaning residue completely. Leftover paste or commercial cleaner residue can itself dry into a new hazy film if not rinsed thoroughly, effectively undoing part of the progress made during the session.
Overusing Aggressive Methods “Just to Be Safe”
A surprisingly common mistake is defaulting to the strongest method available out of an abundance of caution, reasoning that if a little scrubbing helps, more must help faster. In practice, this almost always backfires — aggressive methods used on light staining tend to introduce fine scratching that then traps even more mineral deposits going forward, creating a worse long-term problem than the original haze ever was.
Ignoring the Silicone Seals and Caulking
Mineral deposits and mildew often creep into the silicone seals around a shower door frame, and these areas are frequently overlooked during a glass-focused cleaning session. A soft toothbrush dipped in the same vinegar solution works well here, though deeply discolored or deteriorating caulk is usually a sign it’s due for replacement rather than cleaning.
When to Call a Professional Instead
Most hard water staining is a manageable DIY project, but there are a handful of situations where bringing in a professional glass restoration service makes more sense than continuing to fight the problem yourself.
- Confirmed etching across a large area. Once minerals have actually degraded the glass surface rather than just sitting on top of it, professional polishing equipment is typically the only way to meaningfully restore clarity.
- Frameless glass with expensive hardware. High-end frameless enclosures often use specialty coated glass that’s costly to replace if a DIY method goes wrong — for these installations, the cost of a professional cleaning is often worth the peace of mind.
- Recurring staining despite a solid prevention routine. If you’re squeegeeing consistently and still seeing rapid buildup, the underlying issue may be your home’s water hardness rather than your cleaning technique, and a water treatment professional can test and recommend a whole-home solution.
While you’re addressing shower glass, it’s worth checking a few related trouble spots in the same space. Mineral buildup in the same environment can also affect your shower drain, and grout lines nearby often develop their own version of this problem — our guide on cleaning shower grout without scrubbing covers that process in detail. If you’re using a squeegee as part of your prevention routine, our breakdown of the best shower squeegees can help you pick a model that won’t leave streaks.

DIY vs. Commercial Products: A Real Cost Breakdown
One of the most common questions people have before starting is whether it’s actually worth buying dedicated products or if pantry staples will genuinely get the job done. The honest answer depends on the severity of your staining and how much you value your time, but it’s worth laying out the real numbers rather than assuming either approach is automatically better.
A gallon of white vinegar typically costs only a few dollars and, used consistently, can handle the vast majority of routine shower glass maintenance for months. Baking soda is similarly inexpensive and long-lasting since only small amounts are needed per session. For most households dealing with light-to-moderate staining, the total annual cost of DIY ingredients is genuinely minimal compared to buying a new bottle of commercial cleaner every few weeks.
Where commercial products earn their cost is in time savings and effectiveness against heavier, more established buildup. A dedicated hard water remover formulated with a stronger acid can accomplish in ten minutes what might take three separate vinegar sessions to achieve, which matters if you’re working with limited time or dealing with a guest bathroom that needs to look presentable quickly. There’s also a convenience factor — a spray-on gel formula requires no mixing, no separate paste preparation, and no waiting around for a DIY reaction to occur.
A reasonable middle-ground approach that many households land on: keep vinegar and baking soda on hand for routine weekly maintenance and touch-ups, but keep a bottle of commercial remover in reserve specifically for the periodic deep clean or for tackling buildup that’s gotten away from you after a busy stretch without regular squeegee use. This hybrid approach minimizes ongoing cost while still giving you a fast, reliable option when you need one.
How Climate and Bathroom Conditions Affect Staining Speed
Water hardness is the primary driver of how quickly hard water stains develop, but it isn’t the only factor. Bathroom conditions play a meaningful secondary role that explains why two homes with identical water hardness readings can still experience noticeably different staining timelines.
Humidity and Airflow
Bathrooms with poor ventilation retain more ambient humidity between uses, which slows the overall evaporation rate but tends to concentrate mineral deposits more heavily in specific low-airflow areas rather than spreading evaporation evenly across the whole glass surface. Homes in already humid climates, or bathrooms without an exhaust fan, will generally need to lean more heavily on the prevention habits outlined earlier in this guide.
Water Temperature
Hotter water evaporates faster than cooler water, and faster evaporation on glass surfaces can actually accelerate the rate at which mineral layers build up, since the water doesn’t have as much time to run off the glass toward the drain before it evaporates in place. This is part of why steamy, long, hot showers — while relaxing — tend to leave more residue on glass compared to shorter, cooler showers, all else being equal.
Frequency of Shower Use
This one is fairly intuitive, but worth stating directly: a shower used by a large household multiple times a day will see mineral deposits accumulate considerably faster than a guest bathroom shower used once a week. If you have a high-traffic shower, consider shortening the interval between your weekly wipe-downs and reapplying glass protectant more frequently than the general four-to-eight-week guideline mentioned earlier.
| Condition | Effect on Staining Speed | Recommended Adjustment |
|---|---|---|
| Poor ventilation / high humidity | Increases, concentrated in low-airflow zones | Run exhaust fan 15–20 min post-shower |
| Frequent hot, long showers | Increases due to faster in-place evaporation | Squeegee immediately after each use |
| High-traffic household shower | Increases with use frequency | Shorten wipe-down interval; reapply protectant more often |
| Cooler, shorter showers with good airflow | Decreases relative to above conditions | Standard weekly maintenance is usually sufficient |
Frequently Asked Questions
What is the fastest way to remove hard water stains from shower glass?
For light-to-moderate staining, a vinegar soak followed by a baking soda scrub is usually fastest, typically resolving the issue in under an hour. For heavier buildup, a commercial hard water remover applied per label instructions often works faster than repeated DIY treatments.
Does vinegar actually remove hard water stains?
Yes. White vinegar is a mild acid, and hard water stains are alkaline mineral deposits, so the acid effectively dissolves the calcium and magnesium bonds holding the residue to the glass, provided it’s given enough dwell time.
Can I use a razor blade on my shower glass?
Only on flat, uncoated tempered glass, and only while the surface is thoroughly wet. Razor blades should never be used on textured, tinted, coated, acrylic, or fiberglass shower surfaces, as they can cause permanent scratching.
Will hard water stains eventually damage my shower glass permanently?
Yes, if left untreated long enough. What begins as a removable surface deposit can progress into permanent etching, where the minerals actually degrade the glass’s surface. This is why addressing staining early makes a meaningful difference.
Is CLR safe to use on shower glass?
Most CLR-type calcium, lime, and rust removers are formulated for glass and are generally safe when used per label directions, but always spot test first on coated or tinted glass, and never mix with bleach-based products.
How often should I clean hard water stains from my shower door?
With a consistent squeegee habit after each shower, a deep clean is typically only needed every few months. Without that habit, visible buildup can reappear within two to four weeks depending on your water hardness.
Why do hard water stains look worse at the bottom of the shower door?
Water tends to pool and evaporate more slowly along the bottom edge and door track, which means more mineral deposit layers accumulate in that zone compared to areas that dry quickly.
Can hard water stains be removed from frosted or textured glass?
Yes, but stick to non-abrasive chemical methods like vinegar, baking soda paste, or a commercial remover. Avoid razor blades and steel wool on textured or frosted glass, since the irregular surface makes scratching far more likely.
Does a water softener really stop shower glass staining?
A whole-home water softener significantly reduces the calcium and magnesium content in your water supply, which directly reduces how quickly mineral deposits form on glass, fixtures, and appliances throughout the house.
What household item works better than vinegar for hard water stains?
For most households, nothing common outperforms vinegar in terms of accessibility and effectiveness. Lemon juice works on a similar principle since it’s also acidic, though it’s typically less concentrated and less economical for larger areas.
Can I use a magic eraser on shower glass every day?
It’s better reserved as an occasional final-polish step rather than a daily tool, since melamine foam is a mild abrasive and frequent daily use can gradually dull the glass surface over months of repeated contact.
Is it normal for new shower glass to develop hard water stains quickly?
Yes, especially in homes with hard water — new glass has no protective coating built up yet, so it’s just as susceptible as older glass. Applying a hydrophobic glass protectant shortly after installation can meaningfully delay the first signs of buildup.
Can I mix vinegar with dish soap for a stronger cleaner?
Yes, this combination is safe and can actually help with mixed hard water and soap scum staining, since the dish soap adds a mild degreasing effect while the vinegar handles the mineral deposits. Just avoid adding bleach to the mix under any circumstances.
How long does a glass protectant spray actually last?
Most consumer hydrophobic glass protectants last roughly four to eight weeks under regular shower use before reapplication is needed, though this varies based on water hardness and how often the squeegee routine is followed in between applications.
Are hard water stains covered by a shower door warranty?
Generally no. Most shower door manufacturers classify mineral deposit staining as a maintenance issue related to water quality rather than a manufacturing defect, so it typically falls outside standard warranty coverage. Always check your specific documentation, since coated “easy-clean” glass sometimes carries separate coverage terms.
Can hard water stains transfer from shower glass to my skin or hair?
The mineral deposits themselves aren’t harmful to skin or hair in the way they affect glass, but hard water in general is commonly associated with dryness and dullness, which is one of the reasons some households pursue a water softener beyond just the glass staining issue.
Pingback: Can You Shower With Earrings? Safe Guide & Tips