
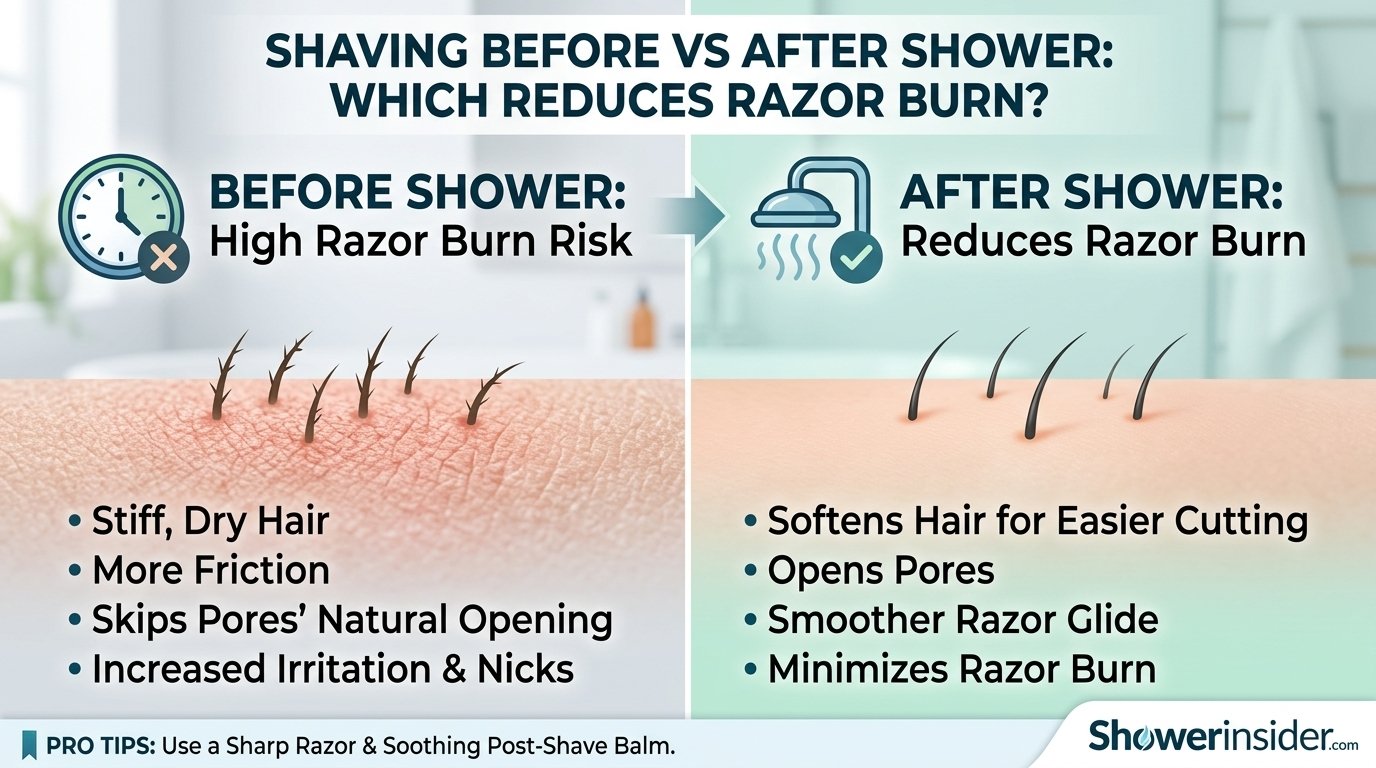
Should You Shave Before or After You Shower?
My Own Thoughts, Observations, and the Science Behind the Shave
This is an old argument that won’t go away. I’ve tried both ways more times than I can remember. I have strong feelings about this, so be aware of that. Let’s talk about the pros and cons of each, why I chose one over the other, and how you can get the most out of your shaving process. We’re going deep into the mechanics of hair hydration, skin elasticity, and the modern tools available to help you make the absolute best decision for your face.
Shaving is often treated as a mundane chore, something to rush through in the morning fog before grabbing a coffee. However, treating it as a ritual—understanding the “why” and “how” behind the blade meeting the skin—can transform it from a daily irritation into a moment of self-care. The debate between pre-shower and post-shower shaving isn’t just about timing; it’s about biology. Your skin is the largest organ in your body, and your facial hair has tensile strength comparable to copper wire of the same diameter. How you prepare that landscape determines whether you walk away with a baby-smooth face or a map of red bumps and cuts.
The First Thing I Did Was Shave Before I Got in the Shower
In my teens, I didn’t give shaving much thought. I would just get my razor, wet my face, and start shaving. I was always in a hurry, so I would shave before getting in the shower. It felt like the logical order of operations: do the messy work first, then wash it all away. I viewed the shower as the “cleanup crew” for the shaving process. If I nicked myself, the shower would wash the blood away. If I missed a spot with the cream, the shower soap would fix it. It was a utilitarian approach born out of impatience and a lack of understanding regarding how hair follicles actually work.
This method relies heavily on the sharpness of the blade rather than the preparation of the skin. When you wake up, your face is often slightly puffy from fluid retention during sleep. Your hair follicles are also resting in a dry state. Dry hair is incredibly tough. Without the softening agent of sustained moisture, the razor blade has to apply significantly more force to slice through the keratin. This force translates directly to friction against the skin. For years, I assumed that “razor burn” was just the price of shaving, a necessary evil that every man had to endure. I didn’t realize that by shaving before the shower, I was essentially taking a dull knife to a dry piece of wood—it works, but it’s going to be rough, splintery, and unpleasant.
Furthermore, the pre-shower shave often suffers from poor lubrication. Splashing water on your face for ten seconds isn’t enough to hydrate the hair shaft. Shaving cream sits on top of the dry hair rather than penetrating it. This creates a barrier, sure, but it doesn’t change the fundamental structure of the hair you are trying to cut. The result is often a “tug and pull” sensation where the razor catches on the hair, pulling the follicle up before cutting it. When that follicle snaps back below the skin surface, you get the dreaded ingrown hair. Despite these drawbacks, there are scenarios where this method makes sense, particularly for electric razor users or those with extremely resilient skin who prioritize speed over comfort.
Better if You Shave Before You Shower:
- Faster Process: Seemed faster to shave first and wash off residue in the shower. You don’t have to worry about rinsing your face carefully at the sink because you know a full body wash is coming next. It streamlines the morning workflow for those who hit the snooze button one too many times.
- Dry Beard (Electric Only): Facial hair was stiff, which helped me see where I was cutting. For electric shavers, especially rotary ones, dry, stiff hair is actually easier to capture and cut than soft, limp hair. If you use an electric device, pre-shower is often the superior choice.
- No Post-Shave Residue: Washing my face after felt clean. Shaving creams and gels can leave a slick or sticky film. Stepping into the shower ensures every trace of chemical and cut hair is completely removed from your pores, preventing potential breakouts from clogged follicles.
Not Cool to Shave Before the Shower:
- Itchy Skin: My skin always felt raw, often leading to razor burn. The lack of hydration meant the blade was scraping against the top layer of my epidermis (the stratum corneum) more harshly. This micro-abrasion leads to immediate redness and that stinging sensation when you apply aftershave.
- Razor Drag: The razor would tug on un-softened hair, which was painful. This is the mechanical resistance of the hair against the blade. It increases the likelihood of nicks because you instinctively press harder to compensate for the blade not cutting smoothly.
- Clogged Razor: My razor got clogged up much faster with dry hair and thick cream. Without the constant, heavy steam and flow of shower water, the slurry of hair and soap turns into a paste that jams multi-blade cartridges instantly, reducing their effectiveness and lifespan.
The Science of Hydration: Why “Wet” Matters
Before we jump into the post-shower benefits, let’s look at the biology. Hair is hygroscopic, meaning it absorbs water. When facial hair is fully saturated with warm water (which takes about 3 to 5 minutes), it expands and the keratin structure softens. Studies suggest that hydrated hair is roughly 30% to 60% easier to cut than dry hair. The force required to slice through the hair drops dramatically.
Additionally, warm water causes vasodilation (widening of blood vessels) and relaxes the arrector pili muscles (the tiny muscles attached to hair follicles). This relaxation allows the skin to become more pliable and the hair to stand up slightly more, presenting a better angle for the blade. Conversely, cold, dry skin is rigid. Dragging a sharp metal edge across a rigid surface creates friction and “skipping,” which are the primary causes of cuts.
The keratin protein that makes up your hair shaft has a specific molecular structure. When dry, the hydrogen bonds between keratin chains are tight and rigid. Water molecules infiltrate these bonds, breaking the hydrogen links and allowing the chains to slide against each other more freely. This is why a dry twig snaps cleanly while a wet green branch bends. Your facial hair behaves the same way. The warmer the water, the faster this infiltration happens, which is why a hot shower is superior to simply splashing warm water on your face for a few seconds.
There is also the matter of sebum. Your skin produces natural oils (sebum) through sebaceous glands attached to each hair follicle. Overnight, this oil accumulates and coats the hair shaft. While sebum is a natural moisturizer, it also creates a hydrophobic barrier that repels water-based shaving creams and soaps. The sustained heat and steam from a shower help melt and distribute this sebum, allowing your shaving cream to actually contact the hair shaft rather than sitting on top of the oil layer. This is a critical step that most people skip entirely when they rush through a pre-shower shave.
Making a Change: Shaving After the Shower
One day, just for fun, I decided to switch things up and shave after taking a shower. In all honesty, it changed everything. It wasn’t just a minor improvement; it was a paradigm shift in my grooming routine. The steam from the shower had acted as a natural pre-shave treatment, doing the heavy lifting of softening my beard that no amount of expensive pre-shave oil could replicate on dry skin.
The difference was palpable from the first stroke. The razor didn’t “scrape” across my face; it glided. The sound was different too—instead of a harsh scratching noise, it was a smooth, quiet swish. I realized that by showering first, I had effectively “cooked” the hair, making it tender and ready for removal. The steam had also opened my pores and cleared away the surface oil and dead skin cells that usually accumulate overnight. This meant the razor had a clean surface to work on, unobstructed by microscopic debris. It felt less like a battle against my face and more like a maintenance routine.
Furthermore, the post-shower shave allowed me to take my time. Since I was already awake and refreshed from the shower, I wasn’t rushing. I could see exactly what I was doing in the mirror (once I wiped the fog away). I noticed that the quality of the shave lasted longer, too. Because the hair was cut cleanly rather than torn or pulled, the regrowth seemed less jagged and irritating. For men with curly hair or those prone to pseudofolliculitis barbae (razor bumps), this softening phase is non-negotiable. It allows the hair to be cut flush with the skin without the blade digging in, significantly reducing the chance of the hair curling back into the skin.
Why Shaving After a Shower Is a Good Idea:
- Hair Softer: The warm water and steam made my facial hair much softer. As mentioned, hydrated hair offers significantly less resistance. This preserves the edge of your blade, meaning you don’t have to buy expensive cartridges as often.
- Open Pores: My skin felt calmer, and the razor glided more smoothly. While pores don’t technically “open” and “close” like doors, the warm water relaxes the skin and loosens the sebum and dirt inside the follicle, allowing for a cleaner, less obstructed path for the razor.
- Closer Shave: I could get a much closer shave with fewer passes. Because the hair is soft, the blade cuts through it effortlessly on the first pass. You don’t need to go over the same sensitive spot three or four times, which is the main cause of irritation.
- Less Irritation: I had significantly less razor burn and fewer ingrown hairs. The combination of clean skin, soft hair, and less friction results in a post-shave feel that is smooth rather than raw. Your face doesn’t look red and blotchy afterwards.
Not So Good Things About Shaving After a Shower:
- Time-Taking: My routine took a little longer overall. You have to shower, dry off, then stand at the sink and shave, then rinse your face again. It adds a solid 10-15 minutes to the morning routine compared to a quick dry shave.
- Skin that Was Wet: Sometimes my skin felt too soft, making cuts easier. If you spend too long in a hot shower, your skin can prune or become overly fragile. There is a “Goldilocks” zone of hydration; too much and the skin loses its tension, making it harder to get a clean cut.
- Mirrors that Fog Up: It’s hard to see what you’re doing. This is the classic logistical annoyance. You step out of the shower, ready to shave, and the mirror is a wall of gray fog. You have to wipe it down or use a hairdryer, which breaks the flow of the routine. (Pro tip: dedicated anti-fog mirrors or a quick blast of warm air helps).
Comparison: Pre-Shower vs. Post-Shower
| Feature | Shaving Before Shower | Shaving After Shower |
|---|---|---|
| Hair Texture | Stiff, dry, resistant | Soft, hydrated, pliable |
| Razor Glide | Low (high friction) | High (low friction) |
| Irritation Risk | High (razor burn likely) | Low (smoother cut) |
| Best For | Electric shavers, speed | Manual razors, sensitive skin |
| Clean Up | Easy (wash off in shower) | Moderate (rinse at sink) |
Understanding Razor Types: A Complete Breakdown
Before you can optimize your shaving routine, you need to understand the tools at your disposal. The razor you choose has a profound impact on your skin, your shave quality, and your wallet. Each type of razor operates on a different mechanical principle, and each has its own set of advantages and trade-offs. Let’s break down the four main categories that dominate the market today.
Multi-Blade Cartridge Razors
The cartridge razor is what most people picture when they think of shaving. Brands like Gillette and Schick have dominated this space for decades. The concept is simple: a plastic handle with a disposable cartridge head containing anywhere from two to seven blades arranged in a row. The theory behind multi-blade cartridges is called the “hysteresis effect.” The first blade grabs the hair and pulls it slightly forward, the second blade cuts it, and subsequent blades cut it again at progressively lower points. This is supposed to give you a shave that’s closer than a single blade could achieve.
In practice, the hysteresis effect is a double-edged sword (pun intended). While it does cut the hair very close to the skin, the pulling action also cuts the hair below the skin line. When the hair retracts back into the follicle, it can curl and grow into the surrounding skin, causing ingrown hairs and razor bumps. For men with curly or coarse hair, this is a serious problem. Additionally, more blades mean more surface area scraping across your skin. Each blade removes a microscopic layer of skin cells along with the hair. Five blades making two passes means your skin has been scraped ten times. This is why cartridge razor users often experience more irritation than safety razor users, despite the marketing claims of “comfort strips” and “lubricating guards.”
The other significant drawback is cost. Cartridge refills are notoriously expensive. A four-pack of replacement heads can cost anywhere from fifteen to twenty-five dollars, and each cartridge typically lasts only five to seven shaves before the blades dull. Over a year, you could easily spend one hundred to two hundred dollars on cartridges alone. The initial handle is cheap or even free (they often come in starter kits), but the ongoing cost of blades is where the manufacturers make their profit. This “razor and blades” business model is designed to lock you into their ecosystem.
Safety Razors (Double-Edge)
The safety razor is the grandfather of modern shaving. It consists of a metal handle with a head that holds a single, double-edge blade. The blade is a thin piece of stainless steel that you replace every three to five shaves. The key difference between a safety razor and a cartridge razor is that the safety razor uses only one blade. There is no hysteresis effect, no pulling, and no cutting below the skin line. The blade cuts the hair cleanly at the surface, which dramatically reduces ingrown hairs and irritation.
Using a safety razor requires more skill than a cartridge razor. You need to learn the correct angle (usually about thirty degrees), use very light pressure (let the weight of the razor do the work), and map the grain of your beard. The learning curve is real—expect a few nicks during the first week. But once you master the technique, the results are superior. Many men report that their first safety razor shave was a revelation. The irritation they had accepted as normal simply disappeared.
The economics are compelling. A decent safety razor handle costs between thirty and sixty dollars and will last a lifetime if properly cared for. Replacement blades cost between ten and thirty cents each, depending on the brand. Over a year, your blade cost might be ten to twenty dollars. Compare that to the cartridge razor’s ongoing expense, and the safety razor pays for itself within a few months. There is also the environmental angle: safety razor blades are a single piece of steel that can be recycled, while cartridge heads are complex assemblies of plastic, rubber, and metal that end up in landfills.
Straight Razors (Cut-Throat)
The straight razor is the original shaving tool. It’s a single blade that folds into a handle, like a pocket knife. Using a straight razor is the closest thing to an art form in the shaving world. It requires significant skill, a steady hand, and regular maintenance (honing and stropping). The blade must be kept razor-sharp at all times, which means investing in a quality strop and honing stone.
Straight razor shaving is not for everyone. The learning curve is steep, and the risk of cuts is real, especially during the first few months. However, devotees swear by it. A properly maintained straight razor gives the closest shave possible because the blade is honed to an edge that is sharper than any factory-sealed cartridge blade. The single blade also means minimal skin irritation. There is a meditative quality to straight razor shaving—the ritual of stropping, lathering, and executing each stroke with precision—that many men find deeply satisfying.
The cost of entry is higher than other razors. A quality straight razor costs between one hundred and three hundred dollars, and you will also need a strop (thirty to sixty dollars), honing stones (fifty to one hundred dollars), and potentially a professional honing service once or twice a year. However, once you own the equipment, your ongoing costs are essentially zero. A well-maintained straight razor will last generations. Some men shave with razors that are over a hundred years old.
Electric Razors
Electric razors come in two main types: foil and rotary. Foil shavers use a thin, perforated metal foil that covers the cutting blades. The hair enters the holes in the foil and is cut by the oscillating blades underneath. Rotary shavers use three circular heads that spin and cut the hair as it enters the openings in each head. Both types are designed for dry shaving, though some newer models are marketed as wet/dry and can be used with shaving cream or in the shower.
Electric razors are the fastest shaving option. A full face shave can be completed in two to three minutes with no water, no cream, and no cleanup. For men who travel frequently or have very little time in the morning, this is a significant advantage. Electric shavers also cause fewer cuts than manual razors because the blades never directly contact the skin. The foil or rotary head acts as a protective barrier.
The trade-off is closeness. Electric razors cannot achieve the same closeness as a manual blade. The foil or rotary head needs to maintain a small gap between the cutting element and the skin to prevent irritation, which means a small amount of stubble is always left behind. For men with very dark or coarse hair, this shadow can be visible even immediately after shaving. Electric razors also require regular maintenance: cleaning the heads, replacing foils or cutters every twelve to eighteen months, and keeping the battery charged. The initial cost is high (one hundred to three hundred dollars for a quality model), but the ongoing costs are moderate compared to cartridges.
| Feature | Cartridge | Safety Razor | Straight Razor | Electric |
|---|---|---|---|---|
| Closeness | Very close | Very close | Closest possible | Moderate |
| Irritation | High (multi-blade) | Low (single blade) | Lowest (skill required) | Low (no skin contact) |
| Learning Curve | Minimal | Moderate | Steep | Minimal |
| Upfront Cost | Low ($5-$15) | Moderate ($30-$60) | High ($100-$300) | High ($100-$300) |
| Annual Cost | High ($100-$200) | Very Low ($10-$20) | Nearly Zero | Moderate ($30-$50) |
| Speed | Fast | Moderate | Slow | Fastest |
| Eco-Friendly | No (plastic waste) | Yes (recyclable steel) | Yes (lifetime tool) | Moderate (e-waste) |
Shaving Cream, Soap, and Gel: What You’re Putting on Your Face Matters
The lubricant you use during shaving is just as important as the razor. It creates a protective barrier between the blade and your skin, reduces friction, and helps hydrate the hair. However, not all shaving products are created equal. Understanding the differences between canned foams, shaving creams, and shaving soaps can save your skin and your money.
Canned Foam and Gel
Canned shaving foam is what most men grow up using. You press the button, a mountain of foam appears, and you spread it on your face. It’s convenient, cheap, and widely available. However, canned foams contain propellants (like butane and propane), alcohol, and synthetic fragrances that can dry out and irritate the skin. The foam itself is mostly air, which means it provides very little actual lubrication between the blade and your skin. The alcohol content strips away natural oils, leaving your skin tight and dry after shaving.
Canned gel is slightly better than foam because it’s denser and provides more lubrication. However, it still contains many of the same synthetic ingredients. If you’re currently using canned products and experiencing irritation, switching to a traditional shaving soap or cream is one of the single biggest improvements you can make to your routine.
Traditional Shaving Soap
Shaving soap is a hard puck of soap that you lather with a shaving brush and water. It comes in a variety of formulations, from triple-milled hard soaps (which last a very long time) to softer “croap” (cream-soap hybrid) formulations. The ingredients are typically far superior to canned products: natural oils (coconut, olive, palm), glycerin, shea butter, and essential oils for fragrance. When properly lathered with a brush, shaving soap produces a thick, creamy lather that provides excellent lubrication and protection.
The act of lathering with a brush also has physical benefits. The brush bristles exfoliate the skin slightly, lifting the hairs away from the face so the blade can catch them more easily. The circular motion of building lather on your face also helps the soap penetrate the hair shaft, further softening it. Many men find the ritual of building lather to be a meditative, enjoyable part of their morning routine. It forces you to slow down and pay attention to your face, which results in a better shave.
Shaving Cream (Tube or Tub)
Shaving cream in a tube or tub is softer than soap and produces lather more easily. It’s a good middle ground between the convenience of canned foam and the quality of traditional soap. High-quality shaving creams from brands like Taylor of Old Bond Street, Proraso, or Cella contain nourishing ingredients and produce a slick, protective lather with minimal effort. If you’re new to traditional shaving, starting with a cream is easier than learning to lather a hard soap.
The key difference between a good shaving cream and a canned product is the concentration of active ingredients. A quality cream is packed with moisturizers and lubricants, while a canned foam is mostly compressed gas and water. The cream also tends to stay wet on your face longer, which keeps the hair hydrated throughout the shave. Canned foam dries out quickly, which means the protection degrades with each stroke.
Ingredients to Look For and Avoid
When choosing a shaving product, read the label. Look for these beneficial ingredients: glycerin (a humectant that draws moisture to the skin), aloe vera (soothes and heals), shea butter (deeply moisturizing), coconut oil (excellent lubricant), and vitamin E (antioxidant that promotes skin repair). Essential oils like tea tree, eucalyptus, and lavender provide natural fragrance and have antibacterial or soothing properties.
Avoid these ingredients: sodium lauryl sulfate (SLS) — a harsh detergent that strips natural oils and can cause irritation; alcohol (denatured alcohol, ethanol, isopropyl) — dries out the skin and causes stinging on freshly shaved skin; synthetic fragrances (listed as “parfum” or “fragrance”) — can cause allergic reactions and irritation; menthol in high concentrations — while cooling, too much can irritate sensitive skin; and parabens — preservatives that some studies suggest may disrupt hormone function, though the evidence is still debated.
Pre-Shave Products: Preparing the Battlefield
Pre-shave products are designed to prepare your skin and hair for the blade. While some men view them as unnecessary extras, others consider them essential, especially those with sensitive skin or coarse beards. The main categories are pre-shave oils, pre-shave balms, and exfoliating scrubs.
Pre-Shave Oil
Pre-shave oil is a thin, lubricating oil that you apply to your face before your shaving cream or soap. It creates an additional layer of protection between the blade and your skin, reducing friction and preventing the blade from scraping off the top layer of your epidermis. Most pre-shave oils are blends of natural carrier oils (jojoba, grapeseed, castor, sweet almond) and essential oils for fragrance. A small amount—just a few drops—is massaged into the damp beard area before lathering.
The effectiveness of pre-shave oil is debated. Some men swear by it, claiming it transforms their shave from irritating to silky smooth. Others find it makes their razor glide too much, reducing the blade’s ability to cut the hair cleanly. The truth is that it depends on your skin type and the quality of your shaving cream. If you’re using a high-quality soap with excellent lubrication, pre-shave oil may be redundant. If you’re using a mediocre cream or have very sensitive skin, it can be a game-changer.
Pre-Shave Balm or Lotion
Pre-shave balms are thicker than oils and are designed to moisturize and protect the skin while also providing some lubrication. They often contain ingredients like allantoin, chamomile, and hyaluronic acid that soothe and hydrate the skin. Pre-shave balms are particularly useful in cold, dry climates where the skin is already compromised by environmental factors. They create a protective film that shields the skin from the blade’s edge.
Exfoliation Before Shaving
Exfoliating your face before shaving removes the layer of dead skin cells that can trap hairs and prevent the blade from making clean contact with the hair shaft. A gentle scrub or a chemical exfoliant (containing salicylic acid or glycolic acid) used the night before shaving can significantly improve your shave quality. However, exfoliating immediately before shaving is not recommended—it can over-sensitize the skin and lead to irritation. The sweet spot is exfoliating the evening before your morning shave, giving your skin time to recover overnight.
Physical exfoliants (scrubs with microbeads or natural abrasives like walnut shell) work by manually sloughing off dead skin. Chemical exfoliants dissolve the bonds between dead skin cells. For men who shave regularly, chemical exfoliation is often gentler and more effective because it doesn’t create the micro-tears that aggressive scrubbing can cause. Whichever method you choose, exfoliating two to three times per week (not daily) will keep your skin smooth and reduce the occurrence of ingrown hairs.
Aftershave: The Final Step That Most Men Get Wrong
What you do after shaving is just as important as what you do during the shave. Aftershave products serve three main purposes: disinfecting any micro-cuts, soothing irritation, and moisturizing the skin. However, many men use the wrong type of aftershave for their skin type, which can actually make things worse.
Aftershave Splash (Alcohol-Based)
Traditional aftershave splashes are alcohol-based liquids that sting when applied. The alcohol serves as an antiseptic, killing bacteria that might enter micro-cuts from the razor. The sting is the alcohol doing its job. However, alcohol also strips the skin of its natural oils and can cause significant dryness and irritation, especially on sensitive skin. If you have oily skin, an alcohol-based splash can help control shine and tighten pores temporarily. If you have dry or sensitive skin, avoid alcohol-based splashes entirely—they will leave your face feeling tight, dry, and irritated.
Aftershave Balm
Aftershave balms are alcohol-free, moisturizing lotions designed to soothe and hydrate the skin after shaving. They typically contain ingredients like aloe vera, chamomile, shea butter, and hyaluronic acid. Balms are the preferred choice for men with dry, sensitive, or normal skin. They absorb quickly, don’t sting, and leave the skin feeling soft and comfortable. Many modern aftershave balms also contain niacinamide (vitamin B3) which helps repair the skin barrier and reduce redness.
Aftershave Lotion
Aftershave lotions fall between splashes and balms in terms of consistency and alcohol content. They provide some moisturizing benefits while also offering mild antiseptic properties. Lotions are a good all-around choice for men with normal skin who want a balance of toning and moisturizing without the harsh sting of a splash or the heaviness of a balm.
Natural Alternatives
Some men prefer to skip commercial aftershave products entirely and use natural alternatives. Witch hazel is a popular choice—it’s a natural astringent that tightens skin and reduces inflammation without the harsh drying effects of alcohol. Coconut oil can be used as a moisturizer after shaving, though it’s comedogenic (pore-clogging) for some skin types. Aloe vera gel is another excellent option, especially for men with sensitive skin or razor burn. It cools, soothes, and promotes healing without any synthetic ingredients.
Know Your Skin Type: Tailoring Your Shave to Your Face
Not all skin is created equal, and the shaving routine that works perfectly for one man may be a disaster for another. Understanding your skin type is the first step toward a customized shaving routine that minimizes irritation and maximizes comfort. There are four main skin types that affect how you should approach shaving.
Oily Skin
Oily skin produces excess sebum, which gives the face a shiny appearance and can lead to clogged pores and acne. When shaving oily skin, the excess oil can actually work in your favor by providing natural lubrication. However, it can also clog your razor and reduce the effectiveness of your shaving cream. Men with oily skin should use a gel-based shaving product rather than a thick cream, as gels cut through oil more effectively. After shaving, use an alcohol-free toner or a light, oil-free moisturizer. Avoid heavy balms or oils that will exacerbate the shine. Exfoliating regularly is particularly important for oily skin types to prevent the buildup of dead skin cells and oil that trap hairs.
Dry Skin
Dry skin lacks natural moisture and can feel tight, flaky, or rough. Shaving dry skin is particularly challenging because the blade scrapes away what little moisture exists. Men with dry skin should always shave after a shower (never before) and use a rich, moisturizing shaving cream with ingredients like shea butter and glycerin. Pre-shave oil is highly recommended for dry skin types. After shaving, apply a thick, hydrating aftershave balm immediately while the skin is still slightly damp to lock in moisture. Avoid alcohol-based products entirely. In dry climates or during winter, consider applying a facial moisturizer before bed as well to keep the skin hydrated overnight.
Sensitive Skin
Sensitive skin reacts easily to products, friction, and environmental factors. It tends to get red, itchy, or bumpy after shaving. Men with sensitive skin need to be the most careful with their shaving routine. Use a single-blade safety razor rather than a multi-blade cartridge to minimize the number of times the blade contacts the skin. Choose fragrance-free, hypoallergenic shaving products. Shave only with the grain, never against it. Use minimal pressure and let the blade do the work. After shaving, apply a calming aftershave balm with ingredients like chamomile, aloe vera, or oat extract. Avoid any products containing alcohol, menthol, or synthetic fragrances.
Combination Skin
Combination skin is oily in the T-zone (forehead, nose, and chin) and dry or normal on the cheeks. This is actually the most common skin type. Shaving combination skin requires a balanced approach: use a medium-weight shaving cream that provides good lubrication without being too heavy. After shaving, you can apply a lighter moisturizer to the oily areas and a richer balm to the dry areas. The key is not to over-treat either zone—you don’t want to strip the oily areas or under-moisturize the dry areas.
Acne-Prone Skin
Shaving with acne is a delicate operation. The blade can pop active pimples, spread bacteria, and irritate inflamed skin. However, avoiding shaving entirely isn’t necessary—with the right technique, you can shave cleanly even over acne. Use a single-blade safety razor to minimize irritation. Shave very lightly, never going over active breakouts more than once. Use a non-comedogenic (won’t clog pores) shaving cream. After shaving, apply a spot treatment containing salicylic acid or benzoyl peroxide to the affected areas. Replace your blade after every two to three shaves to prevent bacteria buildup. If your acne is severe, consider using an electric shaver, which doesn’t contact the skin directly and is less likely to aggravate active lesions.
Ingrown Hairs: Prevention and Treatment
Ingrown hairs are one of the most common and frustrating side effects of shaving. They occur when the cut hair curls back into the skin instead of growing outward, causing a raised, often painful bump. Men with curly or coarse hair are particularly susceptible, but anyone can develop ingrown hairs with improper shaving technique. Understanding what causes them and how to prevent them is essential for a comfortable shave.
What Causes Ingrown Hairs
Ingrown hairs are primarily caused by shaving too closely or against the grain. When a multi-blade cartridge razor cuts the hair below the skin line (due to the hysteresis effect), the sharp tip of the hair can grow sideways into the surrounding skin instead of emerging from the follicle. Shaving against the grain also creates a sharper, more angled tip that is more likely to penetrate the skin as it grows. Dry shaving, dull blades, and excessive pressure all increase the risk of ingrown hairs because they cause the hair to be cut unevenly or pulled before cutting.
Prevention Strategies
The single most effective way to prevent ingrown hairs is to switch to a single-blade safety razor. Without the hysteresis effect, the hair is cut cleanly at the skin surface rather than below it. If you’re not ready to make that switch, there are other strategies. Always shave with the grain, not against it. Use a sharp blade—a dull blade tears the hair rather than cutting it cleanly, creating rough edges that are more likely to curl back. Don’t stretch your skin while shaving; this causes the hair to retract below the surface when the skin returns to its normal position. Exfoliate regularly (two to three times per week) to remove the dead skin cells that can trap hairs beneath the surface.
Treatment for Existing Ingrown Hairs
If you already have ingrown hairs, resist the urge to dig them out with tweezers. This can cause infection, scarring, and more ingrown hairs. Instead, apply a warm compress to the area for five to ten minutes to soften the skin. Use a sterile needle or lancet to gently lift the tip of the ingrown hair above the skin surface—do not pluck it out entirely. Apply an antiseptic aftershave or a product containing salicylic acid to the area to prevent infection and help the skin shed the trapped hair. If the ingrown hair is inflamed or infected (red, swollen, painful), see a dermatologist. They can prescribe topical antibiotics or corticosteroids to clear the infection and reduce inflammation.
Products That Help
Several products are specifically designed to prevent and treat ingrown hairs. Tend Skin is a popular liquid solution that contains acetylsalicylic acid (aspirin) and helps prevent ingrown hairs and razor bumps when applied after shaving. Glycolic acid and salicylic acid exfoliants help keep the skin surface clear so hairs can emerge freely. For men who are prone to ingrown hairs, using these products consistently after every shave can make a dramatic difference over time.
Razor Maintenance: Making Your Blades Last
A dull razor is the enemy of a good shave. It tears hair instead of cutting it, increases friction against the skin, and harbors bacteria that can cause infections and breakouts. Proper razor maintenance extends the life of your blades and ensures a consistently clean, comfortable shave.
Why Razors Dull Quickly
Most people assume that razors dull because the metal wears down from cutting hair. While hair does contribute to dulling, the primary cause is corrosion. After each shave, tiny water droplets remain on the blade edge. As the water evaporates, it leaves behind minerals and dissolved oxygen that cause microscopic rust spots on the cutting edge. These rust spots create rough patches that snag on hair and scrape skin. This is why a blade that has been used five times feels sharper if you dry it thoroughly after each use versus leaving it wet on the sink.
How to Maintain Your Razor
After each shave, rinse your razor thoroughly under hot water to remove all hair and shaving cream. Then, shake off as much water as possible and dry the blade by gently tapping it against a towel (don’t wipe the blade across the towel, as this can dull the edge). For maximum blade life, dip the blade head in rubbing alcohol after drying. The alcohol displaces any remaining water and evaporates quickly, leaving the blade completely dry. Store your razor in a dry location—not in the shower, where constant moisture will accelerate corrosion. Some men keep their razors in a small cup of mineral oil, which completely seals the blade from moisture and air.
When to Replace Your Blade
There’s no magic number of shaves that applies to every blade and every person. The lifespan depends on the blade quality, your hair type, how well you maintain the blade, and how much area you shave. As a general guideline, multi-blade cartridges last five to seven shaves, safety razor blades last three to five shaves, and straight razors need honing every few months with daily stropping. However, the best indicator is feel. If the blade starts pulling or tugging on your hair instead of gliding through it, it’s time to replace it. If you notice more irritation after shaving than usual, your blade is probably dull. Don’t try to squeeze extra shaves out of a dull blade to save money—the cost of treating razor burn and ingrown hairs far exceeds the cost of a fresh blade.
The Art of Lathering: Brushes, Bowls, and Technique
If you’re using a traditional shaving soap or cream, the way you build and apply your lather has a significant impact on your shave quality. A properly built lather should be thick, creamy, and slick—not foamy, airy, or runny. Learning to build a good lather is one of the most rewarding skills in traditional shaving.
Shaving Brush Types
The shaving brush is the tool that transforms soap or cream into lather and applies it to your face. There are four main types of bristles, each with distinct characteristics.
Badger hair brushes are the gold standard. Badger hair is soft, holds water exceptionally well, and produces a rich, creamy lather. There are several grades: “pure” badger is the most affordable and has coarser bristles; “best” badger is softer and denser; “super” and “silvertip” badger are the softest and most luxurious, with prices to match (fifty to three hundred dollars). Silvertip badger hair comes from the neck area of the badger, where the hair is finest. It holds the most water and produces the best lather, but it’s also the most fragile.
Boar hair brushes are stiffer than badger and less expensive. They’re excellent for men with thick beards because the stiffer bristles provide more exfoliation and can lift coarse hairs more effectively. Boar brushes need a break-in period of about fifteen to twenty shaves before the bristles split and soften. Once broken in, a good boar brush can rival a mid-grade badger brush in performance at a fraction of the cost.
Synthetic brushes have improved dramatically in recent years. Modern synthetic bristles (often made from nylon or a nylon/polyester blend) are soft, dry quickly, and don’t require any break-in period. They’re also cruelty-free, which is important to many shavers. High-quality synthetic brushes from brands like Muhle, Edwin Jagger, and Yaqi produce excellent lather and are often indistinguishable from natural hair brushes in performance. They’re also hypoallergenic, making them ideal for men with allergies to animal hair.
Horse hair brushes are less common but offer a unique middle ground between boar and badger. They’re softer than boar but have more backbone than badger, making them versatile. Horse hair brushes are also cruelty-free (the hair is collected during grooming, not from slaughtered animals). They have a distinct smell when new that dissipates after a few uses.
Bowl Lathering vs. Face Lathering
There are two main methods for building lather: in a bowl or directly on your face. Bowl lathering involves loading the brush with soap and then building the lather in a separate bowl (often a ceramic or stainless steel shaving bowl). This gives you more control over the consistency and allows you to add water incrementally until the lather is perfect. It’s a good method for beginners who are still learning what proper lather looks and feels like.
Face lathering involves loading the brush with soap and then building the lather directly on your face using circular motions. This method provides better exfoliation because the brush bristles are working against your skin throughout the process. It also allows you to feel the lather’s consistency in real-time and adjust as you go. Many experienced shavers prefer face lathering because it’s faster and more efficient—you don’t need an extra bowl, and the lather stays warm on your face rather than cooling in a bowl.
Water Temperature and Lather Quality
The temperature of the water you use to build lather matters. Warm water (not hot) produces the best lather because it helps the soap dissolve more easily and creates a more stable foam. Hot water can break down the soap’s structure and produce a thin, runny lather that doesn’t protect well. Cold water produces a stiffer lather that doesn’t spread as easily. The ideal temperature is warm to the touch but not uncomfortable—roughly body temperature or slightly above. If you’re building lather in a bowl, pre-warming the bowl with hot water (then dumping it out) helps maintain the lather’s temperature throughout the shave.
Multi-Pass Shaving: The Technique That Changes Everything
Most men shave in a single pass: lather up, shave once, rinse, done. While this works, it doesn’t give you the closest possible shave, and it often requires more pressure (and therefore more irritation) to get acceptable results. Multi-pass shaving is a technique where you shave the same area two or three times, reducing the hair gradually with each pass. This is the method used by barbers and shaving enthusiasts worldwide.
The Three-Pass Method
The classic three-pass method consists of: first pass with the grain (WTG), second pass across the grain (XTG), and third pass against the grain (ATG). Each pass reduces the hair by about a third, so by the third pass, you’re cutting very short stubble with minimal resistance. This approach is far gentler on the skin than trying to remove all the hair in one aggressive pass.
The first pass (with the grain) removes the bulk of the hair with minimal irritation because you’re cutting in the direction the hair naturally grows. The second pass (across the grain) shortens the stubble further by cutting perpendicular to the growth direction. The third pass (against the grain) achieves the closest shave by cutting the hair as short as possible. However, the against-the-grain pass is optional—if you have sensitive skin or are prone to ingrown hairs, stopping after two passes (with and across the grain) gives you a very close shave with much less risk of irritation.
Re-Lathering Between Passes
Each pass requires a fresh application of lather. Never shave over dry skin or previously shaved areas without re-lathering. The lather provides the protective cushion between the blade and your skin. Skipping this step is the fastest way to razor burn. Some shavers build enough lather in the bowl for all three passes at once, while others prefer to load the brush with more soap between passes. Either approach works as long as the lather quality remains consistent.
Pressure and Angle
The most common mistake men make when shaving is using too much pressure. With a safety razor, the weight of the razor head provides all the pressure you need. You should be barely touching the razor to your face—let gravity and the sharpness of the blade do the work. If you’re pressing hard, your blade is probably dull or your angle is wrong. The correct angle for a safety razor is approximately thirty degrees between the blade and the skin. Finding this angle requires some practice, but once you have it, the razor will glide effortlessly across your face with minimal resistance.
With a cartridge razor, pressure is harder to control because the pivoting head absorbs some of the force. However, the same principle applies: use the lightest pressure possible. If the razor isn’t cutting with light pressure, your blade is dull and needs replacing, not more force.
Mapping Your Beard Grain: The Foundation of a Good Shave
Before you can shave with the grain, you need to know which direction your grain grows. Many men assume their hair grows uniformly downward, but facial hair grows in a complex pattern of swirls, whorls, and direction changes. The cheeks might grow downward, but the jawline might grow backward, and the neck often grows in multiple directions. Mapping your grain is the single most important preparation step you can take.
How to Map Your Grain
Let your beard grow for two to three days—enough that you can feel the direction of the stubble. Run your fingers across your face in all directions: up, down, left, right, and diagonals. The direction that feels the smoothest (least resistance) is the direction your grain grows. The direction that feels the roughest (most resistance) is against the grain. Draw a mental map of your face, noting the growth direction for each zone: cheeks, jawline, chin, upper lip, neck (left side and right side separately), and Adam’s apple area.
Most men are surprised by what they find. The neck, in particular, is notorious for having hair that grows in multiple directions—sometimes even in a circular pattern. The hair under the jawline often grows sideways or backward, not downward. Knowing these patterns allows you to adjust your razor strokes accordingly, shaving with the grain in each zone rather than using a one-direction-fits-all approach.
Common Grain Patterns
While every face is unique, there are some common patterns. The cheeks typically grow downward and slightly backward. The chin grows downward or in a swirl. The upper lip grows downward from the nose. The neck is the most variable—many men have hair that grows sideways on the upper neck, downward on the middle neck, and upward on the lower neck (from the Adam’s apple down to the collarbone). The sideburn area often grows downward, but the area just below the ear might grow backward. Taking the time to understand your specific pattern will pay dividends in reduced irritation and a closer shave.
Hard Water vs. Soft Water: The Hidden Factor in Your Shave
One factor that most shavers never consider is the hardness of their water. Water hardness refers to the concentration of dissolved minerals, primarily calcium and magnesium, in your tap water. Hard water is common in many regions and has a significant impact on your shaving experience—almost always for the worse.
How Hard Water Affects Shaving
Hard water reacts with soap to form “soap scum”—that filmy, sticky residue that you see on shower doors and faucets. The same reaction happens on your face and in your shaving bowl. When you try to lather shaving soap with hard water, the minerals bind with the fatty acids in the soap, preventing it from producing a proper lather. Instead of thick, creamy foam, you get a thin, filmy substance that provides poor lubrication and protection. You end up using more product to get less lather, which is both frustrating and expensive.
Hard water also leaves mineral deposits on your razor blade, accelerating corrosion and dulling the edge faster. The calcium and magnesium residue builds up on the blade between uses, creating microscopic rough spots that increase friction during shaving. This is why some men find that their blades dull much faster than the advertised lifespan—it’s not the hair dulling the blade; it’s the water.
Solutions for Hard Water
If you live in a hard water area, there are several solutions. The simplest is to use distilled water for building your lather. Keep a gallon of distilled water in your bathroom and use it to soak your brush and build lather in your bowl. The difference in lather quality is immediately noticeable—you’ll get a thicker, slicker, more protective lather with less product. Some shavers use a water softening showerhead, which reduces mineral content for the entire shower. For your razor, rinsing in distilled water after each shave and before storage prevents mineral buildup and extends blade life.
Another approach is to choose shaving products that are formulated to work well in hard water. Some artisan soap makers specifically test their products in hard water conditions and add chelating agents (like EDTA) that bind with minerals and prevent them from interfering with lather. Reading reviews from other shavers in hard water areas can help you identify which products perform best in your conditions.
Common Shaving Mistakes (And How to Fix Them)
Most shaving problems are self-inflicted. The good news is that once you identify the mistake, the fix is usually simple. Here are the most common shaving mistakes men make and what to do instead.
Using Too Much Pressure
This is the number one mistake. Men press the razor into their skin like they’re sanding wood. The blade should glide across the surface, not dig into it. If the razor isn’t cutting with light pressure, the blade is dull. Replace it, don’t press harder.
Shaving Against the Grain on the First Pass
Shaving against the grain initially seems like it gives a closer shave, and technically it does. But it also causes massive irritation, ingrown hairs, and cuts. Always start with the grain and only go against it on a third pass if your skin can tolerate it.
Using a Dull Blade
Men will use a blade long past its prime to save a few cents. A dull blade tears hair, causes razor burn, and requires multiple passes that compound the irritation. Replace your blade at the first sign of tugging or discomfort.
Not Preparing the Skin
Splashing cold water on your face and immediately applying cream is not preparation. Your hair needs three to five minutes of warm water exposure to soften properly. If you’re not showering first, use a hot towel for at least sixty seconds.
Shaving the Same Spot Multiple Times Without Re-Lathering
Going over the same area repeatedly without cream is a recipe for razor burn. Each pass needs its own layer of lather. If you can’t get the hair in two or three passes with lather, your blade is dull or your technique needs work.
Skipping Aftershave
Walking away from the mirror without applying anything after shaving leaves your skin exposed to bacteria and environmental irritants. At minimum, apply a moisturizer or aftershave balm to protect and hydrate the freshly shaved skin.
Storing Your Razor in the Shower
The constant moisture in the shower accelerates blade corrosion dramatically. Store your razor in a dry location, ideally with the blade facing up so water can drain off it. This simple change can double your blade life.
Using Canned Foam as Your Only Product
Canned foam is mostly air and propellant. It provides minimal lubrication and dries out your skin. Switching to a traditional soap or cream with a brush will transform your shaving experience overnight.
Not Cleaning Your Razor Properly
Rinsing your razor under water for two seconds doesn’t remove the bacteria and skin cells trapped between the blades. Rinse thoroughly after each use, tap out excess water, and dry the blade. Consider dipping it in alcohol once a week for a deep clean.
Ignoring the Direction of Hair Growth
Shaving blindly without knowing your grain direction is like driving without a map. Take the time to map your beard grain once, and you’ll have a reference point for every future shave. It takes five minutes and pays off for years.
Shaving on a Budget: Quality Doesn’t Have to Be Expensive
You don’t need to spend a fortune to get a great shave. While the grooming industry would love you to buy a thirty-dollar razor handle, twenty-dollar replacement cartridges, fifteen-dollar canned foam, and a ten-dollar aftershave every month, there’s a more economical path that also happens to produce better results.
The Budget Starter Kit
A quality safety razor handle can be purchased for thirty to forty dollars and will last a lifetime. A hundred-pack of quality double-edge blades costs around ten to fifteen dollars—that’s roughly two years of shaving for the price of a single pack of cartridge refills. A tub of artisan shaving soap costs between eight and fifteen dollars and lasts three to six months. A decent synthetic shaving brush costs fifteen to twenty-five dollars. Add a bottle of witch hazel (three to five dollars) as aftershave, and you have a complete shaving setup for under a hundred dollars that will last for years.
Compare this to the cartridge razor approach: a handle costs ten dollars, but replacement cartridges run fifteen to twenty dollars every month or two. Canned foam is five to eight dollars per can, and you go through one every three to four weeks. Over a year, the cartridge approach costs two to three hundred dollars. Over five years, you’ve spent over a thousand dollars on an inferior shave. The safety razor approach costs under a hundred dollars upfront and less than fifty dollars per year in consumables. The math is overwhelming.
Where to Find Deals
The wet shaving community is large and active online. Forums, subreddits, and Facebook groups are excellent places to find deals on razors, brushes, and soaps. Many artisans sell sample packs of soaps and aftershaves, allowing you to try multiple scents and formulations without committing to a full tub. Vintage safety razors from brands like Gillette (the old ones, not the modern cartridge razors) can be found at estate sales, antique shops, and online marketplaces for a fraction of the cost of new razors, and they often shave better than modern equivalents because the build quality was superior.
Eco-Friendly Shaving: Reducing Your Environmental Footprint
The environmental impact of shaving is staggering when you consider the scale. An estimated two billion men shave regularly worldwide. If each man uses a cartridge razor, that’s billions of plastic cartridge heads ending up in landfills every year. Each cartridge head takes over a thousand years to decompose because it’s made of a complex mixture of plastic, rubber, and metal that cannot be easily separated for recycling.
The Plastic Problem
Canned shaving foam adds to the problem. The cans are made of steel or aluminum (which are recyclable) but contain propellants and chemicals that make them hazardous waste in many jurisdictions. The plastic caps are rarely recycled. Even the packaging—the blister packs, the cardboard boxes, the shrink wrap—contributes to the waste stream. It’s a linear, disposable model that generates enormous waste for a task that billions of people perform daily.
The Sustainable Alternative
Switching to a safety razor is one of the most impactful changes you can make in your grooming routine from an environmental standpoint. A safety razor is a single metal object that lasts a lifetime. The blades are a thin piece of stainless steel that can be recycled (many metal recyclers accept them, or you can collect them in a blade bank and recycle the entire container when full). Shaving soap comes in minimal packaging—often just a cardboard box or a simple tub. Shaving brushes are made from natural materials (badger, boar, horse hair, or synthetic fibers) with wooden or metal handles that last for years.
The total waste from a year of safety razor shaving might be a dozen thin steel blades and a cardboard box from a soap puck. Compare that to the mountain of plastic cartridges, aerosol cans, and packaging from a year of cartridge shaving. The difference is dramatic. For environmentally conscious men, switching to traditional shaving tools is a tangible way to reduce their daily waste without sacrificing quality of life.
Beyond the Razor
Eco-friendly shaving extends beyond the razor itself. Choose shaving soaps over creams in plastic tubes. Use a ceramic or stainless steel shaving bowl instead of a plastic one. Select an aftershave in a glass bottle rather than a plastic one. Use a reusable cotton towel for your hot towel prep instead of disposable wipes. These small choices add up when multiplied across millions of shavers. The traditional shaving community has always been ahead of the curve on sustainability—it’s only recently that the broader market has started to catch up.
Shaving Different Areas: Face, Neck, and Head
Not all skin is equal, and the technique you use on your cheeks may not work on your neck or scalp. Each area of your face and head has unique characteristics that require adjustments to your shaving approach.
The Cheeks
The cheeks are the easiest area to shave. The skin is relatively flat, firm, and resilient. Hair growth is usually uniform (downward and slightly backward). Use long, confident strokes with the grain. The cheeks can handle slightly more pressure than other areas, but still use less than you think you need. This is the area where beginners should practice their technique before moving to more challenging zones.
The Jawline
The jawline presents a challenge because of the sharp angle between the cheek and the neck. The skin here is thinner and less padded than the cheeks. To get a clean shave on the jawline, stretch the skin slightly by opening your mouth or tilting your head back. Use shorter strokes and adjust your razor angle to follow the contour. Many men find that they need to make multiple passes in different directions to catch all the hair along the jawline because the grain often changes direction at this boundary.
The Chin
The chin is one of the toughest areas to shave cleanly. The skin is thicker, the hair is often coarser, and the curved surface makes it difficult to maintain consistent razor contact. Stretch the skin by pushing your tongue against the inside of your lower lip. Use short, careful strokes. The hair on the chin often grows in a swirl pattern, so you may need to approach from multiple angles. Don’t rush this area—patience here prevents the nicks and irritation that many men experience on their chin.
The Upper Lip
The area between your nose and upper lip (the philtrum) is sensitive and difficult to access. The hair here is often coarse and grows straight down from the nose. Pull your upper lip down over your teeth to stretch the skin flat. Use very short, careful strokes. This area is prone to irritation because the skin is thin and the hair is stubborn. A sharp blade is essential here—a dull blade will tug painfully on the coarse lip hair.
The Neck
The neck is where most shaving problems occur. The skin is thin, sensitive, and often irregularly shaped (with the Adam’s apple creating a prominent obstacle). Hair growth on the neck is notoriously unpredictable—many men have hair that grows in swirls, whorls, or multiple directions. This makes it very easy to accidentally shave against the grain, which causes razor bumps and ingrown hairs. Map your neck grain carefully and shave in the direction that offers the least resistance. Use very light pressure and short strokes. Tilt your head back to stretch the skin flat. If your neck is particularly sensitive, consider shaving it in only one pass (with the grain) and accepting a slightly less close shave in exchange for comfort.
Head Shaving
Head shaving is a different beast entirely. The scalp has more blood vessels than the face, which means nicks bleed more profusely. The surface area is larger, so the shave takes longer. The curvature of the skull requires constant adjustment of the razor angle. Many head shavers prefer cartridge razors because the pivoting head adapts to the skull’s contours automatically. However, safety razors can also be used with practice. Start at the forehead and work backward, using short strokes and rinsing frequently. The back of the head is the hardest area to reach—use your free hand to feel for missed spots. Always use a mirror (or two mirrors for the back) and take your time. A nick on the scalp bleeds a lot and is hard to see.
Shaving with Skin Conditions: Rosacea, Eczema, and Psoriasis
Men with chronic skin conditions face unique challenges when shaving. The blade that glides effortlessly over healthy skin can cause flare-ups, pain, and lasting damage on compromised skin. Understanding how to adapt your shaving routine to your specific condition is essential for maintaining both your appearance and your skin health.
Rosacea
Rosacea causes persistent redness, visible blood vessels, and sometimes small, pus-filled bumps on the face. Shaving can aggravate rosacea because the friction and heat from the blade trigger inflammation. Men with rosacea should use a single-blade safety razor to minimize the number of times the blade contacts the skin. Shave after a lukewarm shower (not hot—hot water is a major rosacea trigger). Use a fragrance-free, hypoallergenic shaving cream. Avoid aftershave products containing alcohol, menthol, or fragrance. Apply a rosacea-specific moisturizer after shaving. If you’re experiencing a flare-up, skip shaving that day entirely—forcing a blade over inflamed skin will only make it worse.
Eczema
Eczema (atopic dermatitis) causes dry, itchy, inflamed patches of skin. Shaving over eczema-affected areas is painful and can cause the condition to spread (the Koebner phenomenon, where skin trauma triggers new lesions). If your eczema is active, avoid shaving the affected areas until the flare-up subsides. For general eczema-prone skin, use a moisturizing shaving cream with minimal ingredients (the fewer chemicals, the less chance of a reaction). Pre-shave oil is particularly beneficial for eczema sufferers because it provides an additional moisture barrier. After shaving, apply a thick, fragrance-free emollient (like CeraVe or Cetaphil) to lock in moisture and protect the skin barrier.
Psoriasis
Psoriasis causes thick, red, scaly patches on the skin. Shaving over psoriasis plaques is difficult because the raised, rough surface doesn’t allow the blade to make clean contact. Men with psoriasis should use an electric shaver when possible, as it doesn’t scrape the skin surface. If you prefer a manual razor, use a single blade, shave with the grain only, and apply very light pressure. Keep the skin well-moisturized at all times—dry psoriasis plaques are more likely to crack and bleed during shaving. Consult your dermatologist about topical treatments that can be used safely in conjunction with shaving.
How to Get the Most Out of Your Shaving
Whether you shave before or after, here are some tips to make the process better. Shaving is an art form that requires the right tools and technique. The fundamentals remain the same regardless of what products you use. It’s about preparation, execution, and aftercare. Neglecting any one of these three pillars will result in a subpar shave.
First, consider your “hardware.” The debate between multi-blade cartridges and safety razors continues. Cartridges are convenient but can cause irritation due to the hysteresis effect (the first blade pulls, the second cuts). Safety razors require more skill but offer a single, clean cut that is often better for ingrown hairs. Whichever you choose, maintenance is key. A blade is a breeding ground for bacteria. Leaving it wet on the sink promotes rust and bacterial growth. Always dry your razor or dip it in alcohol after use.
Second, the “software”—your creams and soaps—matters immensely. Canned foams are often full of alcohol and propellants that dry out the skin. Switching to a high-quality shaving soap or cream that you lather with a brush can change your life. The brush acts as a mild exfoliator, lifting the hairs away from the face so the blade can catch them, while the dense lather provides a cushion of protection. Finally, map your grain. Hair doesn’t grow in one direction. Rub your hand across your face to feel the grain. Shaving “with the grain” (in the direction of growth) is the golden rule for reducing irritation.
- Get Ready: Always use warm water to open up your pores, even if you shave before the shower. If you absolutely must shave first, use a hot towel. Soak a hand towel in hot water, wring it out, and hold it to your face for 60 seconds. It mimics the shower effect.
- Use Good Products: A sharp blade and quality shaving cream make a huge difference. Look for ingredients like glycerin, aloe vera, and shea butter. Avoid products with high alcohol content (like cheap splashes) which sting and dehydrate.
- Calm Your Face Down: Use a soothing aftershave or moisturizer post-shave. Cold water is your friend here. After your final rinse, splash your face with ice-cold water to shock the pores closed and reduce inflammation instantly.
- Clean Your Razor: Rinse your razor well between strokes to prevent clogging. A clogged razor is a dull razor. If you are shaving after a shower, the hair is soft but can still clump. Short strokes, rinse, repeat.
- Replace Your Blades Often: A dull blade is a fast track to cuts and irritation. Most cartridges are good for 5-7 shaves max. Safety razor blades are cheap enough to swap every 2-3 shaves. Don’t be stingy here; your face will thank you.
Travel Shaving: Maintaining Your Routine on the Road
Shaving while traveling presents unique challenges: limited counter space, unfamiliar water, restricted liquids for air travel, and the temptation to skip your routine entirely. However, with a little planning, you can maintain your shaving standards anywhere in the world.
What to Pack
For air travel, all liquids must be in containers of 3.4 ounces (100 milliliters) or less, stored in a single quart-sized clear plastic bag. This affects your shaving cream, aftershave, and pre-shave oil. Many shaving soap manufacturers offer travel-sized pucks and small containers that meet these requirements. A shaving soap puck is a solid, not a liquid, so it doesn’t count toward your liquid allowance—another advantage of traditional soap over canned foam or cream.
Invest in a travel razor case or cover to protect both the razor and your toiletry bag from blade damage. If you use a safety razor, wrap the head in a small cloth or use a dedicated travel case. Some safety razors have travel-specific designs with shorter handles and protective caps. For brushes, a travel-sized synthetic brush is ideal because it dries quickly—important when you’re packing and unpacking daily. A small collapsible shaving bowl can be useful, though many travelers simply face-lather to save space.
Dealing with Unfamiliar Water
Water quality varies dramatically around the world. If you’re traveling to an area with hard water or uncertain water quality, bring a small bottle of distilled water for building your lather. Alternatively, you can use bottled water. This might seem excessive, but if you’ve struggled with lather quality in hotels before, the reason is almost certainly the water, not your technique or products.
In some countries, tap water may contain bacteria or contaminants that your skin isn’t accustomed to. If you have sensitive skin, consider using bottled water for your final rinse as well. After shaving, apply your aftershave or moisturizer as usual—the protective barrier will help shield your freshly shaved skin from unfamiliar water and environmental factors.
Quick Shave Tips for Busy Travel Days
When you’re rushing to catch a flight or attend a meeting, a full three-pass shave isn’t realistic. In these situations, a single pass with the grain using a sharp blade and good lather will give you a socially acceptable shave in under five minutes. If you have an electric shaver, this is where it shines—dry shaving in a hotel room with no water, no cream, and no cleanup takes two to three minutes. Keep a small bottle of aftershave balm in your carry-on for a quick refresh after the shave.
The Shower Wins in the End
Even though everyone’s hair and skin are different, I’ve always had better results when I shave after I shower. It’s smoother, doesn’t itch as much, and feels better all around. The science supports it: hydrated hair is weaker and easier to cut, and warm skin is more pliable and forgiving. The minor inconvenience of a foggy mirror or a few extra minutes at the sink is a small price to pay for a face that feels like velvet rather than sandpaper.
However, grooming is personal. If you have incredibly tough skin or use an electric foil shaver, the pre-shower dry shave might legitimately work better for you because the dry hairs stand up stiffly for the electric cutters. But for the vast majority of men using manual blades, the post-shower routine is the gold standard. It turns a chore into a luxury. It allows you to start your day with a face that looks fresh, clean, and irritation-free. If you haven’t tried it yet, you should definitely do so, especially if you struggle with razor burn or ingrown hairs. The most important lesson? Experiment and see what works best for you. Your grooming routine should make you feel good about yourself at the end of the day.
Frequently Asked Questions (FAQ)
Usually, no. Unless you turn the water off while you are actually shaving, you are likely wasting gallons of water just letting it run while you concentrate on your face. Shaving at the sink after the shower is generally more eco-friendly.
Yes! In a pinch, hair conditioner is an excellent shaving lubricant. It is designed to soften hair, which is exactly what you want for shaving. It allows the razor to glide smoothly and leaves skin moisturized.
Neck hair often grows in swirling patterns or lies flatter against the skin than cheek hair. It’s easy to accidentally shave against the grain on the neck, causing ingrown hairs. Map your neck grain carefully and shave only with the grain in that area.
Some people swear by cold water shaving. It makes the hair stiff and the skin tight, which can result in a very close shave with less irritation for some. However, it lacks the hair-softening benefits of warm water. Cold water shaving works best for men with very oily skin or those who find that warm water makes their skin too soft and prone to cuts.
Never. Dry shaving with a manual blade is a recipe for disaster. It causes micro-tears, severe razor burn, and cuts. Always use some form of lubrication, even just water. If you have no access to shaving cream, hair conditioner, body wash, or even hand soap will work in a pinch.
Ideally, wait about 15-20 minutes. Facial puffiness from sleep (“morning face”) can hide parts of the hair follicle. Waiting allows the fluid to drain and the skin to tighten, exposing more of the hair. This is another reason why showering first helps—the shower gives your face time to de-puff naturally.
Yes, but at a cost. It cuts the hair below the skin line, which significantly increases the risk of ingrown hairs and irritation. It is safer to do one pass with the grain and a second pass across the grain. Only go against the grain on a third pass if your skin tolerates it well.
A styptic pencil or alum block is the best tool. They use astringent salts to constrict blood vessels and stop bleeding instantly. In a pinch, a small piece of tissue, lip balm, or even a dab of clear deodorant can help seal the wound. Applying pressure with a cold, wet cloth also works.
Exfoliating 2-3 times a week helps remove dead skin cells that can trap hairs and cause bumps. However, don’t exfoliate immediately after shaving as your skin is already sensitive. The best time to exfoliate is the evening before your morning shave.
Generally, yes. Electric shavers don’t cut as close as manual blades, meaning they don’t scrape the top layer of skin as much. This reduces the risk of cuts and razor burn, though the finish isn’t as smooth. Foil shavers tend to be gentler than rotary shavers for sensitive skin.
Shaving soap is a hard puck that you lather with a brush and water. It lasts longer and produces a thicker, more protective lather but requires more skill to build. Shaving cream is softer, lathers more easily, and is more forgiving for beginners. Both are far superior to canned foam in terms of ingredient quality and lubrication.
Switch to a single-blade safety razor to eliminate the hysteresis effect that cuts hair below the skin. Map your neck grain and shave only with the grain. Use a sharp blade and light pressure. Apply Tend Skin or a salicylic acid solution after shaving to prevent ingrown hairs. Exfoliate your neck regularly to keep the skin surface clear.
Yes, coconut oil works well as a pre-shave oil for many men. It’s moisturizing, has natural antibacterial properties, and provides excellent lubrication. However, coconut oil is comedogenic (pore-clogging) for some skin types. If you’re prone to acne, test it on a small area first or choose a non-comedogenic oil like jojoba or grapeseed.
Rust is caused by moisture sitting on the blade edge. If you leave your razor wet on the sink or in the shower, the water causes oxidation (rust) within hours. After each shave, rinse the blade thoroughly, shake off excess water, and store the razor in a dry location. Dipping the blade in rubbing alcohol after drying displaces remaining water and prevents rust entirely.
Both have advantages. Morning shaving gives you a fresh look for the day, but your face is often puffy from sleep. Night shaving allows your skin to recover overnight, and you don’t have the morning puffiness issue. If you have sensitive skin, shaving at night gives your skin eight hours to heal before facing environmental stressors like sun, wind, and pollution.
The key is preparation, sharp blades, and technique. Shave after a shower when your hair is fully hydrated. Use a quality shaving soap or cream with a brush. Use a single-blade safety razor with a fresh blade. Shave with the grain in short, light strokes. Re-lather between passes. Apply a soothing aftershave balm when finished. If irritation persists, try shaving every other day instead of daily to give your skin time to recover.
A synthetic brush is the best choice for beginners. It requires no break-in period, lathers easily, dries quickly, is cruelty-free, and is usually the most affordable option. A good synthetic brush from a reputable brand will perform as well as a mid-range badger brush at a fraction of the cost. Start with a medium-sized knot (24mm) for a good balance of face coverage and control.
Absolutely. The principles of shaving—hydration, sharp blades, proper lubrication, with-the-grain technique, and aftershave care—apply equally to all skin and hair types. Women shaving their legs, underarms, or bikini area will benefit from the same preparation and technique advice. Safety razors work excellently for body shaving and are increasingly popular among women for their superior results and lower cost.
Use two mirrors—one in front and one behind (or a three-way mirror). Start at the forehead and work backward in overlapping strokes. Use your free hand to feel for missed spots as you go. Rinse the razor frequently, as head shaving produces a lot of hair that clogs blades quickly. Take your time on the first few shaves until you learn the contours of your skull.
It depends on your skin and your shaving cream. If you use a high-quality shaving soap with excellent lubrication, pre-shave oil may be redundant. If you have dry or sensitive skin, or if your shaving cream is mediocre, pre-shave oil can make a noticeable difference in comfort and closeness. Try shaving with and without it for a week each and compare the results.
How About You?
Have you tried both ways? Which one do you prefer and why? Leave your thoughts below; I’d love to hear your shaving tips and stories.