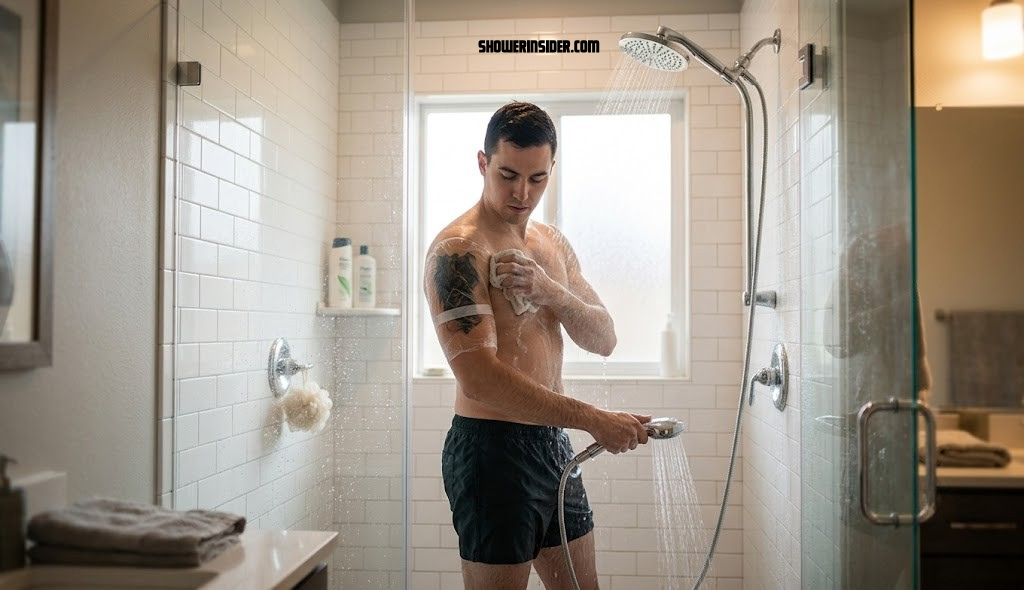
Showering With a New Tattoo: The Complete Aftercare Guide
Everything you need to know about washing, timing, water temperature, and product choices so your new ink heals cleanly, comfortably, and without complications.
Why Showering Technique Matters for a New Tattoo
A fresh tattoo is, medically speaking, an open wound. The needle has punctured the top layers of skin thousands of times per minute, depositing pigment into the dermis while triggering the body’s natural inflammatory response. That means the same skin you’re about to celebrate is also vulnerable — to bacteria, to friction, to harsh chemicals, and to anything that disrupts the delicate scab and plasma layer forming over it. Showering sits right at the center of that vulnerability, because water is both essential for keeping the area clean and, if handled carelessly, one of the easiest ways to slow healing or introduce infection.
Most people don’t think twice about their shower routine. You step in, you let hot water hit every inch of your body, you scrub with whatever soap is in reach, and you towel off vigorously. Every part of that routine is wrong for a new tattoo. Hot water can pull ink out of freshly opened skin. Scented soaps can irritate raw tissue. A rough towel can rip away the thin scab that’s trying to protect the healing pigment underneath. None of this is intuitive unless someone explains it to you first — which is exactly what this guide is for.
Tattoo artists spend years perfecting linework and shading, but the health of that art over the following decades depends heavily on what happens in the first two weeks after the needle stops. Showering incorrectly during this window is one of the leading causes of blotchy healing, patchy fading, and in more serious cases, infection that requires medical attention. The good news is that none of the adjustments required are difficult. They just require intention, a bit of patience, and knowing what “gentle” actually looks like in practice.
It’s also worth understanding that a tattoo isn’t a single uniform wound the way a cut or scrape might be. It’s thousands of tiny puncture points spread across a surface that might be a few square inches or an entire limb, each one at a slightly different micro-stage of healing depending on how deep the needle went and how much trauma that particular pass caused. This is part of why some areas of a tattoo scab more heavily than others, and why showering technique needs to account for the whole piece rather than treating it as one simple surface. Gentle, even coverage with water and soap — rather than concentrated scrubbing on any one spot — respects that uneven micro-healing pattern.
There’s also a psychological dimension worth naming. New tattoo owners are often anxious about “doing it wrong,” and that anxiety can push people toward two unhelpful extremes: either avoiding water and washing almost entirely out of fear, or over-cleaning out of an urge to be extra careful. Neither extreme actually protects the tattoo. Under-washing allows bacteria and dried plasma to accumulate, which raises infection risk, while over-washing strips the skin’s natural oils and can leave it more vulnerable to irritation. The goal, as with most things in aftercare, is a calm, consistent middle path — wash gently, once or as instructed, dry carefully, and move on with your day rather than obsessing over the area every hour.
It’s also useful to think of showering as just one piece of a larger daily rhythm rather than an isolated event. What you eat, how much water you drink, how well you sleep, and how much stress your body is under all play supporting roles in how efficiently skin repairs itself. None of this means you need to overhaul your entire lifestyle for two weeks, but staying reasonably hydrated and getting adequate rest genuinely does help the visible healing process along, complementing the careful showering habits covered throughout this guide.
Finally, it helps to remember that healing isn’t linear. A tattoo might look great on day three and slightly rougher on day six as peeling ramps up, only to look great again by day ten. Showering correctly throughout each of these fluctuations — rather than panicking and changing your routine every time the appearance shifts — gives the skin the consistency it needs to complete its natural repair cycle without interference.
This guide walks through every stage of that process — from the very first shower after leaving the tattoo studio, all the way through the final week of visible peeling and flaking. Along the way we’ll also touch on related topics like how long to wait after other skin treatments and general shower maintenance habits that support skin health more broadly.
When You Can First Shower With a New Tattoo
Timing is the single most common question new tattoo owners have, and the honest answer is: it depends on your artist’s specific instructions, the size of the piece, and which aftercare wrap they used. That said, general industry consensus gives a reliable starting framework.
The General Rule
Most studios recommend waiting a minimum of two to four hours before your first shower if you’re wearing a traditional plastic wrap, and often several hours longer if you were sent home with a modern adhesive bandage like Saniderm or Tegaderm. The reasoning is simple: your body needs time to begin forming the initial protective barrier, and disturbing that too early — even with water — can pull plasma, lymph fluid, and excess ink out before it has a chance to settle.
Why Some Artists Say “Same Day” and Others Say “Next Day”
You’ll find conflicting advice online, and that’s because tattoo aftercare philosophy varies by shop, by region, and even by individual artist preference. Some prefer a “wet healing” method, encouraging cleaning within a few hours to prevent bacteria buildup under the wrap. Others favor “dry healing,” keeping the tattoo covered and dry for a full 24 hours before the first wash. Neither approach is universally wrong — what matters is following the specific instructions given by the artist who did your work, since they know exactly what technique, ink, and wrap they used.
| Wrap Type | Typical Wait Before First Shower | Notes |
|---|---|---|
| Plastic cling wrap | 2–4 hours | Remove promptly; not breathable long-term |
| Adhesive second-skin (Saniderm/Tegaderm) | Can shower with it on immediately | Bandage itself is waterproof; gentle pat dry after |
| Breathable medical gauze | 3–6 hours | Follow artist’s specific removal timing |
| No wrap (some minimalist studios) | Artist discretion, often same day | Less common; requires extra care with clothing friction |
If you’re ever unsure, a quick call or message to your studio is always the right move over guessing. Every artist would rather answer a “silly” question than treat a tattoo that’s healed poorly because of a miscommunication.
Factors That Can Shift the Timing
A few practical factors can push your first shower earlier or later than the general rule of thumb, and it’s worth thinking through these before your appointment so you’re not caught off guard.
- Session length: A quick, small piece completed in twenty minutes generally causes less trauma than a multi-hour session, which can slightly change how soon your skin is ready for water contact.
- Placement: Areas with thinner skin, like wrists or ribs, sometimes benefit from a slightly longer wait before the first wash compared to thicker-skinned areas like the outer thigh or upper arm.
- Personal healing history: If you know from past tattoos that you tend to swell or ooze more than average, mentioning this to your artist can help them tailor their specific timing advice to you.
- Travel or work schedule immediately after your appointment: If you won’t have easy access to a private, controllable shower within the recommended window, it’s worth discussing alternatives with your artist ahead of time, such as a longer-lasting bandage option.
What Happens If You Wait Too Long
Delaying your first shower well beyond the recommended window — for example, skipping it for a full extra day out of excess caution — isn’t actually safer. Plasma, lymph fluid, and excess ink can dry onto the skin’s surface and become harder to remove gently later, sometimes requiring more vigorous cleaning than would have been necessary with a timely first wash. It can also create a more hospitable environment for bacteria to establish itself under a wrap that’s been left untouched for too long.
What Happens If You Shower Too Early
On the other end, showering within the first hour, particularly with anything other than a very brief, careful rinse, risks disturbing skin that hasn’t begun forming any protective barrier at all. This can pull more ink and plasma out than would naturally be lost, occasionally contributing to patchier healing in the treated area. Splitting the difference by following your artist’s stated window is almost always the better approach than guessing based on how you personally feel in the moment.

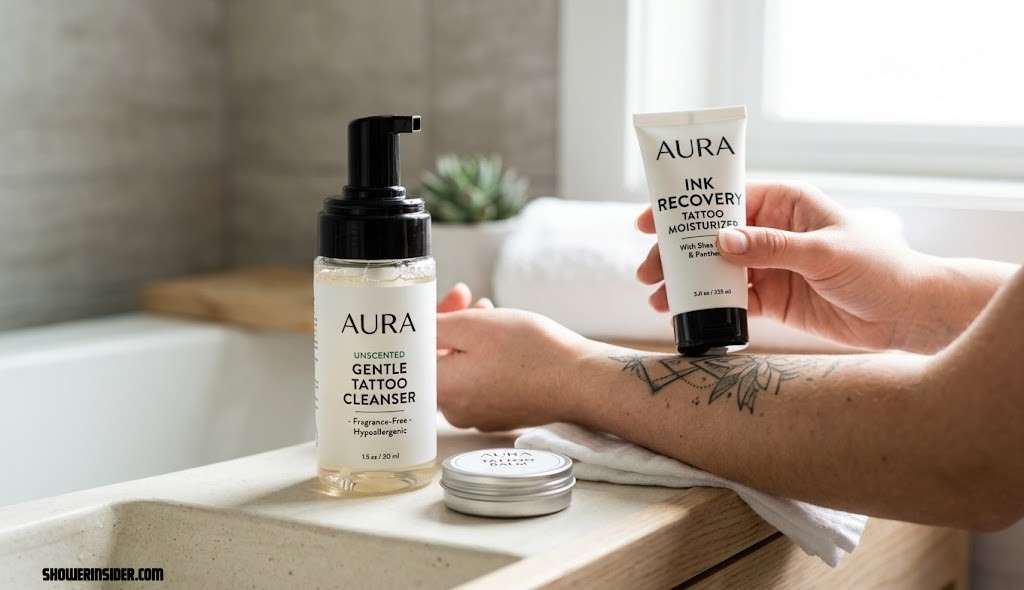
Gentle, Fragrance-Free Tattoo Wash
A dedicated tattoo cleanser takes the guesswork out of choosing a safe soap for your first showers.
Check Price on AmazonYour First Shower, Step by Step
The first wash sets the tone for how your tattoo heals over the following two weeks. Rushing it, scrubbing too hard, or using the wrong products at this stage can cause problems that are hard to reverse later. Here’s a dependable sequence to follow.
Step 1: Remove the Wrap Correctly
If you’re wearing plastic wrap, peel it away slowly under lukewarm running water rather than pulling it off dry. This prevents the plastic from tugging on the scabbing skin. Adhesive bandages, by contrast, are designed to stay on through showers, so there’s usually no need to remove them for the first wash at all.
Step 2: Rinse Before Applying Anything
Let lukewarm water run gently over the tattoo for a few seconds to loosen any dried plasma, blood, or excess ink without direct high pressure. Avoid pointing the shower head straight at the tattoo — instead let water cascade over it naturally or use cupped hands to pour water gently.
Step 3: Apply a Small Amount of Fragrance-Free Soap
Using clean fingertips (not a washcloth or loofah), work a small amount of unscented, mild soap into a light lather directly on the tattoo. The motion should be closer to a gentle pat-and-swirl than a scrub.
Step 4: Rinse Thoroughly
Soap residue left on the skin can cause irritation and dryness. Rinse until the water runs clear and no suds remain, again keeping water pressure low and temperature lukewarm.
Step 5: Pat Dry With a Clean Paper Towel
Skip the bath towel for now. Fabric towels can harbor bacteria and their texture can snag on delicate healing skin. A clean paper towel, used with light patting rather than rubbing, is the safer choice during the first week or two.
Step 6: Apply Aftercare Product (If Instructed)
Depending on your artist’s recommendation, this might be a thin layer of fragrance-free lotion, a specialized tattoo balm, or nothing at all for the first day if you’re using an adhesive bandage system. Never apply a thick layer — tattoos need to breathe, and over-moisturizing can trap bacteria and slow healing.
Choosing the Right Water Temperature
Water temperature might seem like a minor detail, but it has an outsized effect on how a new tattoo responds to its first several showers. Skin behaves differently at different temperatures, and a fresh tattoo is far more sensitive to those changes than healthy, unbroken skin.
Why Hot Water Is a Problem
Hot water opens pores and increases blood flow to the skin’s surface. On a healing tattoo, this can cause increased bleeding, faster fading of ink, and a higher chance of the scab softening prematurely and detaching before the skin underneath is ready. It can also simply be more painful, since fresh tattoos are often tender and inflamed, and heat amplifies that sensitivity.
Why Ice-Cold Water Isn’t Ideal Either
While cold water won’t damage the tattoo the way heat can, it isn’t particularly helpful either. Cold water can cause muscles near the tattoo to tense, which is uncomfortable on already-irritated skin, and it doesn’t rinse soap or debris away as effectively as lukewarm water does.
The Lukewarm Sweet Spot
Lukewarm water — think close to body temperature, neither hot nor cold — is the consistent recommendation across tattoo aftercare literature. It cleans effectively, doesn’t provoke excess bleeding or fading, and is gentle enough not to aggravate inflamed skin. If you share a bathroom with others, it may help to shower solo during the first week so you can control the temperature without needing to negotiate with a partner or roommate.
| Water Temperature | Effect on New Tattoo | Recommended? |
|---|---|---|
| Hot (104°F+ / 40°C+) | Increases bleeding, fading, and discomfort | No |
| Warm/Lukewarm (90–100°F / 32–38°C) | Cleans gently without provoking irritation | Yes |
| Cold (below 70°F / 21°C) | Uncomfortable, less effective rinsing | Not ideal |
If you’re someone who typically enjoys very hot showers, this is a good moment to also read up on how hot versus cold showers affect skin and circulation more broadly, since the same principles that protect a new tattoo often apply to sensitive or irritated skin in general.
Soap and Cleanser Choices That Won’t Irritate Fresh Ink
Not all soap is created equal, and this is one area where cutting corners can visibly affect how your tattoo turns out. The wrong cleanser can cause redness, itching, dryness, or even contact dermatitis on skin that’s already working hard to repair itself.
What to Look For
- Fragrance-free: Added fragrance is one of the most common irritants for healing skin.
- Dye-free: Artificial colorants offer no cleaning benefit and only add irritation risk.
- Low pH, mild formula: Skin’s natural barrier is disrupted by tattooing; a mild cleanser helps it recover faster.
- No exfoliating beads or acids: Physical or chemical exfoliants are far too aggressive for open or healing skin.
What to Avoid
- Antibacterial bar soaps with heavy fragrance
- Body washes marketed as “deep cleansing” or “exfoliating”
- Products containing alcohol as a primary ingredient
- Any soap you already know irritates your skin elsewhere on your body
| Product Type | Good for New Tattoos? | Why |
|---|---|---|
| Fragrance-free tattoo soap | Excellent | Formulated specifically for this purpose |
| Mild, unscented baby wash | Good | Gentle formula, widely available |
| Standard scented body wash | Avoid | Fragrance and dyes irritate healing skin |
| Exfoliating scrub | Avoid entirely | Too abrasive for broken skin |
| Antibacterial hand soap | Avoid | Often too harsh and drying |
If you’re building out a broader bathroom routine, it’s worth looking into a shower routine designed for healthy skin overall, since many of the same gentle-formula principles apply well beyond tattoo aftercare.
Reading Ingredient Labels Before You Buy
Product marketing can be misleading — a bottle labeled “sensitive skin” or “gentle” doesn’t automatically mean it’s suitable for a healing tattoo. Take a moment to check the actual ingredient list for common irritants such as added fragrance (sometimes listed simply as “parfum”), sulfates like sodium lauryl sulfate, and alcohol-based ingredients near the top of the list, which indicate a higher concentration. A short, recognizable ingredient list is generally a good sign for tattoo-safe products.
Liquid Soap vs. Bar Soap
Liquid, pump-dispensed soaps are usually easier to apply hygienically with clean fingertips compared to bar soap, which can accumulate bacteria on its surface between uses, especially in a shared household. If you do prefer bar soap for environmental or personal reasons, keeping a dedicated bar just for tattoo washing during the healing period is a reasonable compromise.
Foam Cleansers Designed Specifically for Tattoos
A growing number of products are formulated specifically with tattoo aftercare in mind, often combining a mild, fragrance-free base with additional soothing ingredients like aloe or panthenol. These aren’t strictly necessary — a plain, mild, fragrance-free cleanser works perfectly well — but they can simplify the decision-making process for people who’d rather not comb through ingredient lists themselves.

Fragrance-Free Aftercare Lotion
A thin layer of the right moisturizer helps prevent cracking and itching during the peeling phase.
Check Price on AmazonBandages, Wraps, and Second Skin: What Changes About Showering
The type of covering your artist sends you home with directly changes your shower routine, so it’s worth understanding the differences before you step under the water for the first time.
Traditional Plastic Wrap
This is the classic, low-cost option many shops still use. It’s not breathable and isn’t designed to stay on for more than a few hours, so it’s typically removed before your first proper shower. Once removed, the tattoo is washed directly as described in the step-by-step section above, then usually left uncovered or loosely covered with a breathable layer going forward.
Adhesive Second-Skin Bandages
Products like Saniderm and Tegaderm have become popular because they’re waterproof, allow you to shower normally without exposing the wound directly, and can typically stay on for three to six days. During this period, you can shower as usual, letting water run over the bandage, but should avoid soaking, scrubbing, or picking at the edges. Some plasma pooling under the bandage in the first 24 hours is normal and not a sign of a problem.
Breathable Medical Gauze
Less common today but still used by some artists, gauze needs to be replaced after removal for washing and shouldn’t be re-wrapped wet. If you’re using this method, plan your shower schedule around having fresh, dry gauze ready afterward.
Second-Skin Bandage Pros
- Can shower normally without direct water contact
- Reduces friction from clothing
- Fewer daily washing steps needed
Second-Skin Bandage Cons
- Can trap moisture if not applied correctly
- Some skin types react to the adhesive
- Removal itself requires care to avoid pulling ink
Whichever covering you’re using, always defer to your specific artist’s instructions over generic internet advice, since they’ve seen how their exact technique and ink respond to different aftercare products.
Applying a Second Bandage Yourself
If your artist sends you home with a spare adhesive bandage to apply after the first one is removed, doing so in a clean, dry environment — ideally right after a shower once the skin is fully patted dry — gives the adhesive the best chance of sticking properly. Trapped moisture underneath a freshly applied bandage is one of the most common reasons people experience early lifting at the edges.
Dealing With Bandage Lifting at the Edges
It’s common for the edges of an adhesive bandage to start lifting slightly after a day or two, especially around joints or areas with more movement. Small, clean scissors can be used to trim away a lifting corner rather than leaving it to catch on clothing, but the adhesive covering the tattoo itself shouldn’t be removed early just because the edges look imperfect.
What Plasma Buildup Under a Bandage Looks Like
It’s normal to see a yellowish or slightly cloudy fluid pooling under an adhesive bandage during the first 24 to 48 hours. This is plasma and excess ink, not a sign of infection, and it typically stops accumulating noticeably after the first day or two. If the fluid buildup is excessive, uncomfortable, or accompanied by a foul odor, that’s a reasonable point to reach out to your artist for guidance on whether an early bandage change is warranted.
What to Avoid in the Shower With a New Tattoo
Knowing what not to do is just as important as knowing the correct steps. A handful of common habits — often harmless for everyday skin — can meaningfully disrupt tattoo healing.
Avoid Long, Soaking Showers
Extended exposure to water softens the skin barrier and can cause the scab to become waterlogged, increasing the risk of it detaching too early and pulling ink with it. Keep your shower brief and efficient during the first week, saving the tattooed area for last if possible.
Avoid Baths Entirely
Baths involve prolonged submersion in standing water, which is far riskier than a shower’s brief, flowing water exposure. Standing water also carries more bacteria over time compared to fresh running water, raising infection risk considerably.
Avoid Direct High-Pressure Spray
Modern shower heads with massage or high-pressure settings can be uncomfortable and potentially damaging to a healing tattoo. If your shower head has adjustable settings, switch to a gentle, wide spray, or simply angle the tattoo away from the direct stream.
Avoid Sharing Towels or Washcloths
Anything that touches multiple people’s skin can transfer bacteria. Use a dedicated, clean paper towel or a freshly laundered towel used only by you during the healing period.
Avoid Loofahs and Washcloths on the Tattoo
These tools trap bacteria between uses and are far too abrasive for healing skin. Clean fingertips are the safest tool for washing a new tattoo.
Avoid Scented Body Sprays or Perfume Near the Area
Even outside the shower, spraying perfume, cologne, or scented body mist anywhere near a healing tattoo can cause irritation, since these products often contain alcohol and concentrated fragrance compounds. Apply any fragranced products well away from the tattooed area until healing is complete.
Avoid Swimming Pools, Hot Tubs, and Open Water
While this technically falls outside the shower itself, it’s worth repeating clearly: chlorinated pools, hot tubs, lakes, and oceans all pose a meaningfully higher infection risk than a home shower during the healing window, and should be avoided for at least two to three weeks, or longer for larger pieces.
Avoid Excessively Long Sessions Under Running Water
Beyond the tattoo itself, spending a long time under running water in general can dry out skin overall, which isn’t ideal when part of your body is already working hard to repair itself. Keeping showers reasonably brief during the healing window benefits your skin’s overall moisture balance, not just the tattooed area.
Day-by-Day Healing Timeline and How Showering Should Change
Tattoo healing isn’t a single event — it’s a multi-week process, and your shower routine should evolve as the skin moves through each stage.
Days 1–3: Oozing and Initial Scabbing
Expect some plasma, excess ink, and mild swelling. Showers should be brief, lukewarm, and followed by gentle patting and a thin layer of recommended product. This is the most delicate phase, so extra caution with water pressure and soap choice matters most here.
Days 4–7: Scabbing and Early Peeling
The tattoo may look duller and feel tight as scabbing sets in. Continue gentle washing, but resist any urge to pick at flaking skin in the shower — let water and soap do the work naturally rather than scratching or scrubbing loose skin away.
Days 8–14: Active Peeling
This stage often brings noticeable flaking, similar to a mild sunburn peeling. Showers remain important for hygiene, but moisturizing afterward becomes more important to reduce itching and prevent cracking. Avoid scratching even when it’s tempting — patting or light massaging with lotion instead can relieve itchiness safely.
Weeks 3–4: Final Healing and Ink Settling
By this point, most surface healing is complete, though the ink may look slightly cloudy as deeper layers finish settling. Normal showering can generally resume, though it’s still wise to avoid harsh exfoliants directly on the tattoo and to keep sun exposure minimal.
| Stage | Shower Duration | Special Care |
|---|---|---|
| Days 1–3 | Brief, tattoo washed last | Gentle rinse, mild soap, pat dry |
| Days 4–7 | Normal length, gentle on tattoo | No picking at scabs |
| Days 8–14 | Normal | Moisturize after every shower |
| Weeks 3–4 | Normal | Avoid direct sun and harsh scrubs |
Why the Timeline Varies From Person to Person
The stages above are a reliable general framework, but healing speed varies based on factors like age, overall skin health, hydration levels, immune function, and even how well you slept in the days following your appointment. Two people getting nearly identical tattoos on the same day might find one person’s piece looking fully settled at three weeks while the other still shows mild peeling. Neither pace is inherently wrong as long as the progression is moving in the right direction — less redness, less sensitivity, and less flaking as each week passes — rather than staying static or worsening.
Months Two and Three: The Ink Continues to Settle
Surface healing usually wraps up within the first month, but the deeper layers of skin where the ink actually sits can continue subtly settling for a couple of months afterward. Some tattoos appear slightly cloudy or less crisp during this period before sharpening back up once the skin fully completes its underlying repair process. Continuing gentle, consistent showering habits and moisturizing through this window supports that final settling phase, even though the tattoo may look essentially “done” to the casual observer.
Drying and Moisturizing After Every Shower
What happens in the sixty seconds after you step out of the shower matters almost as much as the wash itself. Skin that’s left damp too long can become a breeding ground for bacteria, while skin that’s dried too aggressively can lose its healing scab prematurely.
Patting, Not Rubbing
Always pat the tattooed area dry rather than rubbing it with a towel. Rubbing motion creates friction that can lift edges of the scab or irritate already sensitive skin.
Choosing a Clean Drying Surface
A fresh paper towel used once and discarded is often recommended over a bath towel during the first one to two weeks, simply because it eliminates any risk of bacterial transfer from a towel that’s been used elsewhere on the body or reused across multiple days.
Applying Moisturizer
Once fully dry, apply a thin layer of whatever product your artist recommended — often a fragrance-free lotion or specialized tattoo balm. The goal is a light sheen, not a thick, greasy layer. Over-moisturizing can trap heat and moisture against the skin, which paradoxically can slow healing and increase irritation.
Air Drying as a Complement, Not a Replacement
After patting most of the moisture away, giving the tattoo a minute or two of open-air exposure before getting dressed can help ensure it’s fully dry rather than just surface-dry. This is especially useful for larger pieces or areas prone to trapping moisture, like underarms or the backs of knees.
How Much Moisturizer Is Actually Enough
A helpful mental benchmark: if you can still see a visible white or shiny film on the skin two or three minutes after applying lotion, you’ve used too much. The goal is full absorption within a minute or two, leaving the skin feeling soft but not slick. This thin-layer approach also applies to specialized tattoo balms, which are often more concentrated than standard lotion and require even smaller amounts per application.
Building a Simple Twice-Daily Rhythm
Many people find it easiest to anchor their tattoo care around two consistent touchpoints each day — a morning check-and-moisturize and an evening shower-and-moisturize — rather than trying to remember sporadic touch-ups throughout the day. This rhythm is easy to sustain even on busy days and keeps the healing tattoo from being either neglected or fussed over excessively.

Soft, Disposable Drying Towels
Reduce bacterial transfer risk by patting your tattoo dry with a clean disposable towel after every shower.
Check Price on AmazonInfection vs. Normal Healing: What to Watch For
It’s completely normal for a new tattoo to look a bit alarming during the first week — redness, mild swelling, warmth, and oozing are all part of a healthy healing response. The challenge is knowing where “normal” ends and “something’s wrong” begins.
Normal Healing Signs
- Mild redness around the edges of the design, especially in the first 48 hours
- Light swelling, particularly on larger or more detailed pieces
- Clear or slightly yellow plasma oozing in the first day or two
- Itching during the peeling phase (days 8–14)
- Warmth to the touch during the first two to three days
Signs That May Indicate Infection
- Redness that spreads outward rather than staying localized, especially after day 3–4
- Pus that is green, gray, or foul-smelling (different from normal clear/yellow plasma)
- Increasing pain rather than gradually decreasing discomfort
- Fever, chills, or feeling generally unwell
- Red streaking extending away from the tattoo
- Swelling that worsens rather than improves after the first few days
Showering habits play a direct role in infection prevention — consistent, gentle washing with the right products removes bacteria before it has a chance to take hold, while skipping showers or using harsh products can tip the balance the wrong way.
Allergic Reactions vs. Infection
Occasionally, what looks like infection is actually an allergic reaction to a specific ink pigment, an adhesive bandage, or an aftercare product. Allergic reactions tend to cause raised, itchy bumps localized to specific colors within the design or to the exact border of a bandage, rather than the more diffuse spreading redness typical of bacterial infection. If you suspect a reaction to a product, switching to a different fragrance-free option and monitoring the change over 24 to 48 hours can help clarify what’s happening, though persistent or worsening symptoms always warrant a professional opinion.
When to See a Doctor vs. Your Tattoo Artist
Your tattoo artist has seen thousands of healing tattoos and can often offer a quick, informed opinion on whether something looks like normal healing or a cause for concern. However, if you notice fever, spreading redness, red streaking, or pus that looks abnormal, a medical professional — not your artist — is the right next step, since these can indicate an infection that needs treatment beyond topical aftercare.
Keeping a Simple Daily Log
For larger or more expensive pieces, some people find it reassuring to take a quick daily photo of the healing tattoo under consistent lighting. This makes it much easier to objectively compare how redness, swelling, or texture is changing day to day, rather than relying on memory or the natural anxiety that can make things seem worse than they are in the moment.
Pre-Shower Checklist for the First Two Weeks
Having everything ready before you step into the shower removes decision fatigue and reduces the temptation to reach for whatever’s convenient instead of what’s actually appropriate for healing skin.
- Fragrance-free, dye-free cleanser set out within reach
- Fragrance-free moisturizer or artist-recommended balm ready nearby
- Clean paper towels or a dedicated towel used only by you
- Shower head set to a gentle, wide spray rather than a massage or pulse setting
- Water temperature checked and adjusted to lukewarm before the tattoo is exposed
- Loose, breathable clothing laid out for after the shower
- Replacement adhesive bandage on hand, if your aftercare method requires periodic changes
- A few extra minutes budgeted so the process doesn’t feel rushed
Running through this list mentally before your first few showers helps build a routine that becomes second nature by the time the more sensitive early healing days have passed.
Special Situations and Tattoo Placements
Not every tattoo heals under the same conditions. Placement, size, and personal circumstances all change how showering should be approached.
Large Tattoos and Full Sleeves
Bigger pieces mean more surface area exposed to water and product, and often a longer healing timeline overall. Consider shorter, more frequent showers rather than one long session, and be extra mindful of water temperature since larger areas of irritated skin are more sensitive to heat.
Tattoos on the Hands or Feet
These areas are exposed to more friction and moisture throughout the day, which can slow healing. Extra care with drying — including between fingers or toes — helps prevent trapped moisture from causing problems.
Tattoos Near Joints
Elbows, knees, and other joints stretch skin constantly, which can cause scabs to crack if dried or moisturized incorrectly. Gentle patting and a slightly more frequent moisturizing schedule can help here.
Showering With a Baby or Young Children in the House
If your shower routine typically overlaps with childcare duties, it’s worth planning a few extra minutes for the more careful process described in this guide. Some new parents also find it useful to review resources like baby shower gift guides or baby shower invitation timing if a family celebration happens to coincide with tattoo healing — though obviously that’s a different kind of “shower” entirely.
Shared Bathrooms and Limited Hot Water
If you’re in a household where water temperature or shower length is harder to control, communicating your temporary needs to housemates for a week or two can make a meaningful difference in how smoothly your tattoo heals.
Tattoos on the Ribs, Chest, or Torso
These areas often involve more skin movement from breathing and daily activity than tattoos on the arms or legs, which can make scabbing feel more sensitive. Wearing loose-fitting tops during the healing window and being extra gentle when washing this area helps minimize discomfort.
Getting Multiple Tattoos in One Session
If you’ve had several smaller pieces done at once, possibly in different locations on the body, your shower routine needs to account for each one individually rather than treating the session as a single unit. Some areas may heal faster than others depending on placement and skin thickness, so keep an eye on each piece separately when deciding when to loosen up your routine.
Athletes and Physically Demanding Jobs
If your daily routine involves heavy sweating, frequent showers, or repetitive motion near the tattooed area, discuss this with your artist ahead of time. They may recommend a longer-lasting bandage option or adjust their aftercare advice to account for the additional friction and moisture exposure your lifestyle involves.
Ink Type, Color Saturation, and Skin Type Considerations
Not every tattoo responds identically to water and washing, and understanding a few variables about your specific piece can help you fine-tune the general advice in this guide to your situation.
Black and Grey Work vs. Color Pieces
Black and grey tattoos, especially those relying on fine shading and dot work, tend to be somewhat more forgiving of minor showering missteps than heavily saturated color work. Bright, solid color fills often require more passes with the needle to achieve full saturation, meaning the skin under a colorful piece may be slightly more traumatized and benefit from extra gentleness during the first several washes.
Fine Line and Micro-Realism Tattoos
Delicate linework, fine dot shading, and micro-realism styles are particularly sensitive to scrubbing or high water pressure, since even small amounts of lifted ink can visibly affect crisp, thin lines in a way that’s less noticeable on bolder traditional-style work. If you have this kind of piece, err on the side of extra caution with water pressure and always use fingertip application rather than any tool.
Heavily Saturated Traditional and Neo-Traditional Work
Bold, thickly outlined traditional pieces are generally more forgiving of everyday showering variables, since the heavier ink saturation and thicker linework tend to hold up well even through a slightly imperfect aftercare routine. That said, “more forgiving” doesn’t mean “no care needed” — the same fundamentals of lukewarm water, gentle soap, and careful drying still apply.
Sensitive or Reactive Skin
If you know you have skin that reacts easily to new products — frequent breakouts from new soaps, a history of eczema, or general sensitivity — it’s worth discussing this with your artist before your appointment so they can recommend a cleanser and moisturizer they’ve seen work well for similarly reactive skin. Patch-testing a new tattoo soap on a small area of unrelated skin a day or two before your appointment can also help avoid surprises.
Darker Skin Tones
Aftercare fundamentals don’t change based on skin tone, but visible signs like redness can be harder to spot on deeper skin tones. Paying closer attention to swelling, warmth, and texture changes — rather than relying solely on visible redness — can help you catch potential issues early regardless of your natural skin tone.
Oily vs. Dry Skin Types
People with naturally oilier skin may need less frequent moisturizing after showers, since their skin already produces more of its own protective oils, while those with naturally dry skin may benefit from a slightly more generous — though still thin — layer of moisturizer applied a bit more often. Paying attention to how your specific skin type responds during the first few days helps you fine-tune frequency without overthinking it.
Wet Healing vs. Dry Healing: How Each Changes Your Shower Routine
Beyond the type of bandage you’re sent home with, there’s a broader philosophy question that shapes tattoo aftercare: should the piece be actively washed multiple times a day, or should it be kept as dry as possible between minimal, careful washes? Both schools of thought have loyal followings among artists, and understanding the logic behind each will help you follow your own artist’s instructions with more confidence rather than second-guessing them based on something you read from a different studio’s aftercare sheet.
The Wet Healing Approach
Wet healing treats moisture and regular washing as the primary defense against bacteria. Under this approach, you might be instructed to gently wash the tattoo two to three times a day, applying a thin layer of ointment or lotion after each wash to keep the skin from drying out and cracking. Showers under this method tend to be more frequent touchpoints with the tattoo, though each individual wash should still be brief, gentle, and lukewarm.
Proponents of wet healing argue that a moist healing environment reduces scab formation, which in turn reduces the risk of scabs pulling ink out when they eventually fall away. The tradeoff is that more frequent contact with water and product means more opportunities to get a step wrong if you’re not paying attention to temperature, soap choice, or drying technique.
The Dry Healing Approach
Dry healing, by contrast, minimizes contact with water and product beyond the essential cleaning steps. Under this method, a single gentle wash per day is often the standard, with the tattoo otherwise left alone to form a natural scab and heal with minimal external interference. Showers under a dry healing protocol tend to be quick, focused sessions rather than an ongoing part of a multi-times-daily routine.
Supporters of dry healing point to its simplicity — fewer products, fewer touchpoints, and less risk of over-moisturizing or introducing irritants through excessive washing. The tradeoff here is that scabbing tends to be more pronounced, which some people find more uncomfortable or itchy during the peeling phase.
| Factor | Wet Healing | Dry Healing |
|---|---|---|
| Wash frequency | 2–3 times daily | Once daily, sometimes twice |
| Scab formation | Minimal, thinner scabbing | More pronounced scabbing |
| Product use | Frequent thin layers of lotion/ointment | Minimal product between washes |
| Common with | Larger, more detailed pieces | Simpler linework or artist preference |
Neither method is inherently superior, and many artists blend elements of both depending on placement and design complexity. What matters most is consistency — picking whichever method your artist recommends and sticking with it rather than mixing conflicting advice from multiple sources partway through healing.
Common Showering Mistakes That Slow Tattoo Healing
Even well-intentioned people make small errors during the first week or two of tattoo aftercare, often without realizing it. Recognizing these patterns ahead of time makes them much easier to avoid.
Mistake 1: Showering Too Soon or Too Late
Jumping in the shower minutes after leaving the studio can disturb the barrier your skin hasn’t started forming yet. On the flip side, waiting far too long — say, skipping a shower for an entire extra day out of caution — allows plasma and bacteria to build up under the wrap, which isn’t ideal either. Following your artist’s specific window is almost always the safer bet than improvising in either direction.
Mistake 2: Using a Washcloth or Loofah
These tools feel like a normal part of a shower routine, but they’re one of the easiest ways to introduce unnecessary friction and trapped bacteria onto healing skin. Clean fingertips remain the safest cleaning tool for at least the first two weeks.
Mistake 3: Letting Shampoo or Conditioner Run Over the Tattoo
If your tattoo is on your back, shoulder, or upper arm, hair products running down your body during a shower can be just as irritating as a harsh body wash. Try rinsing hair products with your back to the water and the tattoo angled away, or shower the tattoo separately from your hair-washing routine during the first week.
Mistake 4: Over-Moisturizing Right After the Shower
It’s tempting to apply a thick layer of lotion the moment you step out, especially if the skin feels tight. But too much product traps moisture against the skin and can create a breeding ground for bacteria, in addition to potentially clogging pores. A thin, even layer is genuinely more effective than a heavy one.
Mistake 5: Ignoring Water Pressure Settings
Many people don’t think to adjust their shower head at all during tattoo healing, defaulting to whatever setting they always use. A quick switch to a gentler, wider spray setting for the first week costs nothing and meaningfully reduces irritation.
Mistake 6: Rubbing Instead of Patting When Drying
This is perhaps the most common mistake of all, simply because rubbing dry is such an ingrained habit. Consciously switching to a patting motion, even if it feels slower, protects the scab and reduces irritation significantly.
Mistake 7: Picking at Peeling Skin in the Shower
Warm water can loosen peeling skin enough that it becomes tempting to help it along with your fingers. Resist this urge entirely. Let the shower’s water and gentle soap do the work of loosening only what’s genuinely ready to come away, and allow the rest to shed naturally over the following days.
Mistake 8: Switching Products Constantly
Trying a different soap or lotion every few days in search of the “best” one introduces more variables than your healing skin needs to deal with. Pick one fragrance-free cleanser and one fragrance-free moisturizer at the outset and stick with them consistently through the healing window unless you have a specific reason — like an adverse reaction — to switch.
Mistake 9: Showering Right Before Bed Without Fully Drying
Going to sleep with even slightly damp skin under pajamas or bedding creates a warm, moist environment that isn’t ideal for healing skin. Building in a few extra minutes to ensure the tattoo is completely dry before dressing for bed is a small habit that pays off.
Mistake 10: Assuming All Aftercare Advice Online Applies to Your Situation
Aftercare philosophies genuinely differ between studios, and following a routine you found online that contradicts your own artist’s instructions can create confusion during a period when consistency matters most. Use general guides like this one to understand the reasoning behind different approaches, but let your artist’s specific instructions take priority for your actual piece.
Clothing, Friction, and Sleep Considerations Around Showering
What happens before and after your shower matters almost as much as the shower itself, since clothing and bedding are two of the biggest sources of ongoing friction on a healing tattoo.
Choosing Post-Shower Clothing
Loose, breathable fabric — cotton is a reliable default — reduces friction against a freshly washed and moisturized tattoo. Tight clothing, especially synthetic fabrics that trap heat and moisture, can undo some of the benefit of a careful shower routine by rubbing against the healing skin throughout the day.
Timing Your Shower Around Sleep
Many people find it helpful to shower in the evening during the first week, allowing the tattoo to fully air-dry and settle before bedtime rather than going to sleep with slightly damp skin under pajamas or bedding. If your tattoo is in a spot that makes contact with sheets or a pillow, using a clean, breathable barrier — like fresh, dedicated bedding — can help reduce nighttime friction.
Gym Clothing and Sweat
Sweat isn’t inherently harmful to a healing tattoo, but combined with tight athletic wear and friction, it can increase irritation risk. Many artists recommend holding off on intense workouts involving heavy sweating or friction near the tattoo for the first several days, and always showering promptly afterward using the same gentle routine described earlier in this guide.
Backpacks, Bag Straps, and Seatbelts
Everyday items that create sustained pressure or rubbing — a backpack strap crossing a shoulder tattoo, a seatbelt sitting across a chest piece, a watch band near a wrist tattoo — are easy to overlook but can meaningfully add to irritation if worn constantly during the first week or two. Small adjustments, like switching which shoulder carries a bag or loosening a strap slightly, can reduce unnecessary friction during healing.
Pets and Healing Tattoos
If you have pets that tend to jump up or brush against you, it’s worth being mindful of accidental scratches or contact near a healing tattoo, particularly right after a shower when the area is freshly cleaned and slightly more exposed than usual.
Sun Exposure and Travel Considerations While Healing
Showering habits don’t exist in isolation — they interact with other parts of daily life, and sun exposure or travel plans are two of the most common variables people forget to plan around.
Sun Exposure
Fresh tattoos should be kept out of direct sunlight entirely during the first two to three weeks, and protected with clothing or a high-SPF, fragrance-free sunscreen once healed enough to apply product safely. Sun exposure combined with the drying effect of a shower can leave skin more prone to cracking and fading, so if you know you’ll be outdoors, plan your shower and moisturizing routine accordingly beforehand.
Traveling With a Fresh Tattoo
If travel plans fall within your healing window, pack your specific soap, moisturizer, and any bandages you’re using rather than assuming a hotel will have suitable alternatives. Hotel soaps are almost always heavily fragranced and unsuitable for healing skin. It’s also worth scouting whether your accommodation has a bath-only setup, since finding a shower — even a handheld attachment — is preferable to soaking a healing tattoo in a tub.
Flying With a New Tattoo
Air travel itself doesn’t directly harm a healing tattoo, but airport bathrooms and airplane lavatories aren’t ideal places for a proper aftercare wash. If you’re flying within the first week, plan your last shower before heading to the airport and your next one promptly after arrival, keeping the tattoo loosely covered with breathable clothing in between.
Beach and Vacation Trips
If you booked a beach vacation without realizing it would overlap with tattoo healing, it’s worth having an honest conversation with yourself about priorities. Salt water, sand, sun, and crowded pool areas are one of the least forgiving combinations for a fresh tattoo. If the trip can’t be moved, keeping the tattoo fully covered, out of any water beyond a careful home-style shower, and out of direct sun is the safest compromise, even if it means skipping some water activities you’d otherwise plan around.
Considering Timing Your Tattoo Around Travel Plans
For people who tattoo regularly, a useful long-term habit is scheduling new pieces with upcoming travel in mind, leaving at least three to four weeks of buffer before any trip involving pools, beaches, or extended sun exposure. This small planning step avoids most of the compromises discussed above entirely.
Long-Term Tattoo Care After the Healing Period
Once the visible healing process wraps up — usually around three to four weeks — your shower routine can return to normal, but a few small habits carried forward will help keep the tattoo looking sharp for years.
Moisturizing Becomes a Long-Term Habit
Well-moisturized skin holds ink more vibrantly over time than dry, cracked skin. Making a fragrance-free lotion part of your regular post-shower routine, even long after healing, is one of the simplest ways to protect your investment.
Sunscreen Protects Color and Detail
UV exposure is one of the biggest long-term threats to tattoo vibrancy, gradually fading both color and fine linework over years of exposure. Applying sunscreen to tattooed skin before extended sun exposure, well after the initial healing period, helps preserve detail far longer.
Gentle Products Remain a Good Habit
You don’t need to keep using dedicated tattoo soap forever, but sticking with gentle, fragrance-free body wash options long-term tends to keep tattooed skin looking more vibrant than harsh, heavily fragranced alternatives, especially for pieces with fine detail or lighter color palettes.
For broader guidance on keeping your bathroom routine supportive of healthy skin overall, our shower routine for healthy skin guide pairs well with long-term tattoo maintenance.
Touch-Ups Down the Road
Many tattoos benefit from a touch-up session at some point, whether to refresh faded color or sharpen linework that’s softened slightly over the years. When that day comes, the exact same showering principles from this guide apply again during the fresh touch-up healing window, even though the surrounding tattoo is otherwise fully settled.
Adjusting Your Routine as Skin Changes With Age
Skin naturally becomes drier with age, which can affect how a years-old tattoo looks and feels. Increasing moisturizing frequency over time, even long after the original healing period, helps keep tattooed skin looking supple and helps the ink continue to read clearly rather than looking dull against increasingly dry surrounding skin.
Recommended Aftercare Products
Having the right products on hand before your appointment makes the entire process smoother. Here are the categories worth having ready.
| Category | What to Look For | When to Use |
|---|---|---|
| Cleanser | Fragrance-free, mild, dye-free | Every shower for the first two weeks |
| Moisturizer | Fragrance-free lotion or tattoo-specific balm | After every shower, thin layer |
| Drying material | Clean paper towel or dedicated towel | Immediately after washing |
| Adhesive bandage | Breathable, waterproof second-skin | First 3–6 days, per artist instruction |
| Loose clothing | Breathable fabric, minimal friction | Throughout healing period |

Waterproof Adhesive Tattoo Bandage
Shower normally without exposing your fresh tattoo directly to soap and water for the first several days.
Check Price on AmazonBuilding a Complete Aftercare Kit Before Your Appointment
Rather than scrambling to buy products the same day you get tattooed, putting together a small kit in advance means you’re never tempted to substitute an unsuitable product out of convenience. A basic kit covering the first two to three weeks typically includes a fragrance-free cleanser, a fragrance-free moisturizer or specialized balm, a stack of clean paper towels or a dedicated towel, a few spare adhesive bandages if that’s your chosen method, and a couple of loose, breathable tops or bottoms depending on placement.
Travel-Sized Versions for On-the-Go Touch-Ups
If your daily routine involves being away from home for long stretches — commuting, work, or errands — a small travel-sized version of your chosen moisturizer can be useful for a quick midday touch-up if the skin starts to feel tight, without needing to carry a full-sized bottle everywhere.
Tips Experienced Tattoo Collectors Swear By
Beyond the core rules covered throughout this guide, people who’ve gone through the healing process many times over often develop small personal habits that make the first couple of weeks noticeably smoother.
Set a Phone Reminder for Wash Times
Especially in the first few days, it’s easy to lose track of when you last washed the tattoo, particularly if you’re managing pain medication, work, or general life admin at the same time. A simple recurring reminder removes the guesswork.
Keep a Small “Aftercare Station” Stocked
Rather than digging through cabinets each time, many experienced collectors keep a small dedicated container with their cleanser, moisturizer, and spare bandages in the bathroom for the full healing window, making the process feel less like a chore and more like a quick, automatic routine.
Photograph the Tattoo on Day One
Beyond monitoring for infection, a clear day-one photo taken right after the wrap comes off is a nice way to compare against the fully healed result later, and can be genuinely reassuring during the rougher-looking peeling days when it’s easy to forget how vibrant the piece looked at the very start.
Don’t Compare Your Healing to Someone Else’s
Healing pace, scabbing intensity, and peeling duration vary widely between individuals, placements, and even different tattoos on the same person. Comparing your progress to a friend’s healed piece, or to influencer content online, tends to create unnecessary anxiety rather than useful information.
Trust the Process During the “Ugly Phase”
Almost every tattoo goes through a rough-looking stretch somewhere around the one-week mark, with dull color, visible flaking, and an overall less polished appearance than either the fresh piece or the fully healed result. This is normal and temporary, and continuing your gentle shower and moisturizing routine through this stage — rather than panicking and changing your approach — is exactly what gets you to the vibrant, settled final result.
Frequently Asked Questions
Can I shower the same day I get a new tattoo?
Yes, in most cases, though usually after waiting a few hours rather than immediately. Follow your specific artist’s timing recommendation, since it depends on the wrap type used.
Should I take a bath instead of a shower with a new tattoo?
No. Baths involve prolonged submersion in standing water, which raises infection risk and can soften the scab too much. A brief, gentle shower is always the safer choice.
What water temperature is safest for a new tattoo?
Lukewarm water, close to body temperature, is safest. Hot water increases bleeding, fading, and discomfort, while very cold water is simply less effective at rinsing away soap and debris.
Can I use regular soap on a new tattoo?
Stick with fragrance-free, dye-free, mild cleansers. Regular scented body washes and exfoliating soaps are too harsh for healing skin and can cause irritation.
Is it okay to let shower water run directly on my tattoo?
Gentle water contact is fine and necessary for cleaning, but avoid direct high-pressure spray, especially during the first several days. A soft, wide spray or cupped-hand rinsing works better.
When can I remove my tattoo wrap before showering?
Traditional plastic wrap is usually removed within a few hours, while adhesive bandages like Saniderm can typically remain on and waterproof for several days. Always follow your artist’s specific instructions.
How do I dry my tattoo after a shower?
Pat gently with a clean paper towel rather than rubbing with a bath towel, which can transfer bacteria and cause friction on delicate healing skin.
Can I shower with a new tattoo before swimming or using a hot tub?
Showering is generally fine once cleared by your artist, but pools, hot tubs, and open water should be avoided for at least two to three weeks due to bacteria and chemical exposure risk.
Why does my tattoo sting a little during the first few showers?
Mild stinging is normal on fresh, slightly open skin, especially if soap isn’t fully rinsed away. If stinging is severe or worsens over several days, it’s worth checking in with your artist or a healthcare provider.
Can I shave near my tattoo while it’s healing?
It’s best to avoid shaving directly over or immediately around a healing tattoo until it’s fully closed, since razors can catch on scabbing skin and introduce bacteria.
Is it normal for ink to come off in the shower?
Some excess surface ink and plasma washing away in the first shower or two is completely normal and doesn’t mean your tattoo is fading. The ink deposited in the deeper dermis layer remains intact.
How long until I can shower completely normally again?
Most people can return to a fully normal shower routine — including regular soap and water temperature — around three to four weeks after getting tattooed, once peeling has finished and the skin has fully closed.
Can I use a shower filter or softened water on a new tattoo?
Shower filters and softened water are generally fine and don’t pose any special risk to a healing tattoo. If you have particularly hard water in your area, a filter may even help reduce mineral buildup on the skin, though it isn’t a required step in the aftercare process.
What if I accidentally scrub my new tattoo too hard?
A single instance of slightly firmer contact than intended usually isn’t cause for panic. Rinse gently, avoid repeating the mistake, and keep an eye on the area over the following day for any unusual redness, bleeding, or lifted skin that doesn’t settle down on its own.
Is it normal for my tattoo to feel warm during a shower?
Mild warmth during the first few days is a normal part of the body’s inflammatory healing response, especially right after warm water exposure. Warmth that intensifies over several days rather than gradually fading is worth monitoring more closely.
Can I shower with a new tattoo if I also just shaved the area beforehand?
Your artist typically shaves the area immediately before tattooing as part of the process, so this isn’t something you need to do yourself beforehand. Avoid shaving over the tattoo again until it’s fully healed, since a razor can easily catch on scabbing or peeling skin.
Should I shower before getting a tattoo as well?
Yes, arriving to your appointment freshly showered with clean skin is generally appreciated by artists and helps reduce the amount of surface bacteria present when the needle first breaks the skin.
Can hard water affect how my tattoo heals?
Hard water itself doesn’t cause direct harm, but the mineral residue it can leave on skin may contribute to slight dryness in some people. If you notice unusual dryness and have hard water at home, paying a bit more attention to thorough rinsing and consistent moisturizing can help offset this.
Final Thoughts on Showering With a New Tattoo
A new tattoo deserves the same care and attention you gave to choosing its design. Showering correctly — with lukewarm water, gentle fragrance-free products, brief exposure, and careful drying — protects the investment you just made in your skin and your art. None of these adjustments are complicated, but skipping them is one of the easiest ways to end up with patchy healing, unnecessary irritation, or worse, an infection that could have been avoided.
Keep this guide handy for the first two to three weeks after your appointment, and when in doubt, always defer to your specific artist’s instructions over generic advice, since they know your exact ink, technique, and skin best.
Healing well isn’t about being perfect with every single shower — it’s about building a calm, consistent routine and sticking with it even through the less glamorous peeling days. Gentle water, mild products, careful drying, and a bit of patience will carry you through to a tattoo you’ll be proud to show off for decades to come.
Shop Tattoo Aftercare Essentials