
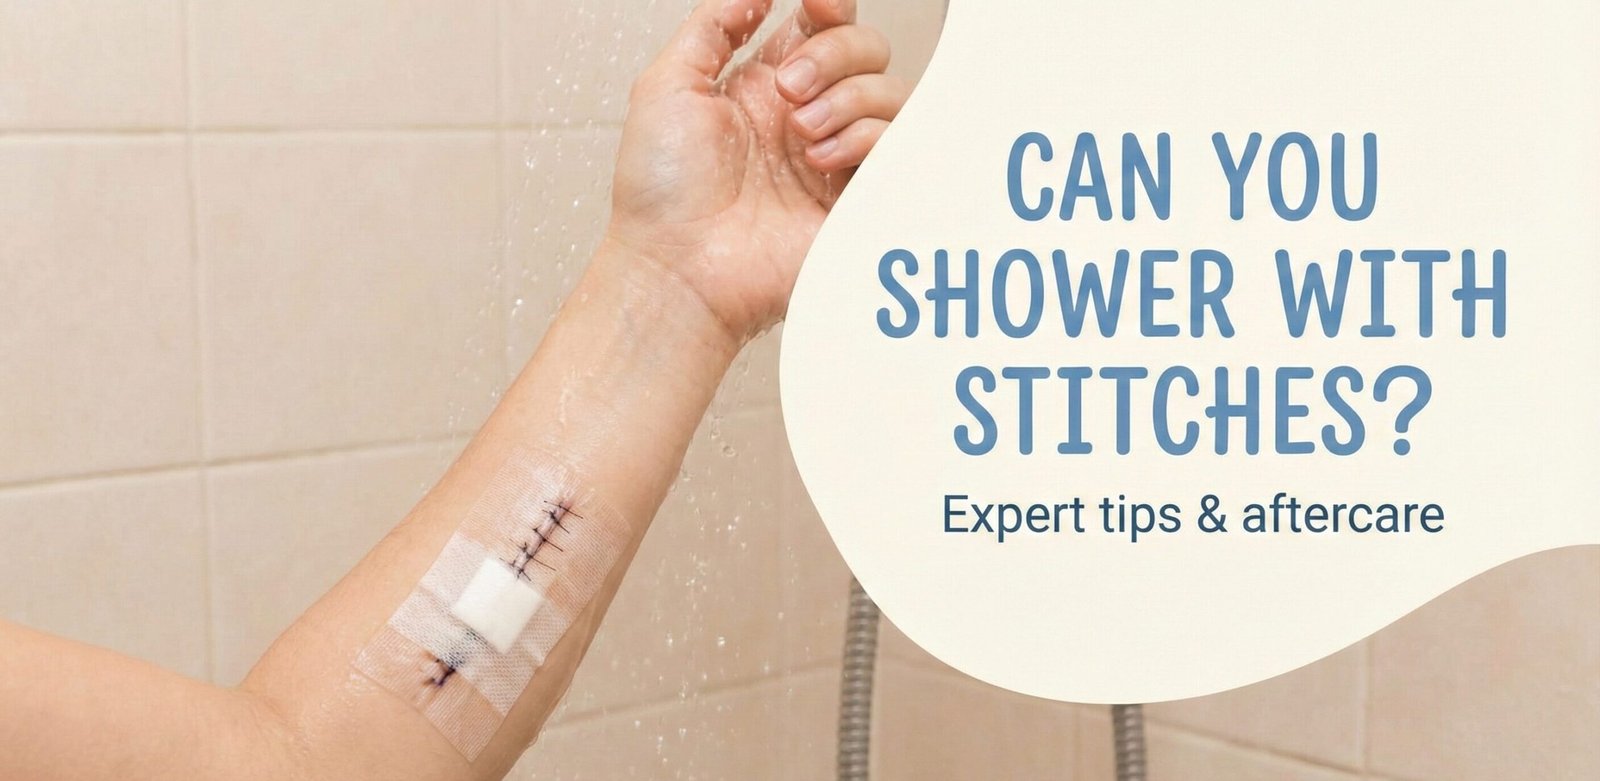
The Ultimate Guide to Showering With Stitches: Complete Post-Operative Wound Care
Emerging from surgery with a fresh set of stitches marks the beginning of a critical healing journey. The simple act of showering, once a mundane part of your daily routine, suddenly becomes a source of anxiety and uncertainty. You’re not alone in wondering: “Can I shower with these stitches, or will I ruin everything?” This comprehensive guide addresses every facet of post-operative wound care, from the moment you arrive home to the day your stitches are removed and beyond.
Beyond answering the core question, we delve deep into infection prevention, scar minimization, pain management, and the psychological aspects of recovery. Whether you’re recovering from a minor laceration requiring a few sutures or a major procedure like abdominal surgery, joint replacement, or cosmetic surgery, this guide provides evidence-based, practical advice to navigate your healing process confidently and safely.
In most cases, yes—you can shower with stitches after 24 to 48 hours. The critical period is the initial 1-2 days post-surgery, during which the wound edges begin to seal. After this window, brief, gentle showers are typically encouraged to maintain hygiene and reduce bacterial load. The golden rules: no soaking, no scrubbing, and meticulous drying. However, this is a general guideline. Your surgeon’s specific instructions, based on your procedure, location of stitches, and personal health factors, are the ultimate authority.
Preparing Your Bathroom Before Surgery: A Pre-Op Checklist
The best time to think through your showering plan is before surgery, not while standing outside the bathroom door with fresh stitches and no plan. A short round of preparation removes a lot of day-of stress.
- Deep clean the bathroom in advance. Wipe down the shower, replace an old shower curtain liner if it’s visibly mildewed, and clear clutter from the floor to reduce fall risk.
- Stock supplies ahead of time — mild fragrance-free cleanser, extra clean towels set aside specifically for wound care, spare dressings, and any waterproof cover you plan to use, so you’re not shopping post-op with limited mobility.
- Install or borrow safety equipment if relevant to your procedure — a shower chair, a handheld showerhead attachment, and grab bars are far easier to set up before surgery than to arrange while sore.
- Do a dry run. If you know you’ll need a shower chair or a particular technique (like sitting to avoid bending), practice the movements before surgery so they’re familiar once you’re recovering.
- Arrange help if you anticipate needing it, especially for procedures affecting mobility, an arm, or your dominant hand — decide in advance who will assist and when.
- Write down your questions for your surgical team about showering specifics — exact timing, whether a cover is needed, and which products are approved — so you leave your pre-op or discharge appointment with clear answers rather than guessing later.
Comprehensive Understanding of Surgical Wound Types and Healing Phases
To care for your stitches properly, it helps to understand what’s happening beneath the surface. Wound healing isn’t a single event but a complex, orchestrated biological process divided into four overlapping phases:
Hemostasis Phase (Minutes to Hours)
Immediately after injury, blood vessels constrict and platelets form a clot to stop bleeding. This creates a temporary seal and scaffold for new cells.
Inflammatory Phase (1-5 Days)
White blood cells arrive to clear debris and bacteria. This causes the initial redness, warmth, and mild swelling around your stitches—a normal part of healing, not necessarily infection.
Proliferative Phase (3 Days to 3 Weeks)
New tissue (granulation tissue) fills the wound. Collagen is deposited, and new blood vessels form. The wound edges contract. This is when your stitches are providing crucial mechanical support.
Maturation/Remodeling Phase (3 Weeks to 2 Years)
Collagen reorganizes and strengthens. The scar softens and flattens, though it only reaches about 80% of the original skin’s tensile strength. Proper care during earlier phases significantly impacts this final outcome.
Classification of Surgical Wounds
Your surgeon classifies your wound, which influences infection risk and care protocols:
| Class | Description | Examples | Infection Risk |
|---|---|---|---|
| Class I: Clean | Non-traumatic, no inflammation, respiratory/GI/urinary tracts not entered. | Cosmetic surgery, hernia repair, thyroidectomy. | 1-2% |
| Class II: Clean-Contaminated | GI or respiratory tract entered under controlled conditions, minor break in technique. | Appendectomy, gall bladder removal, hysterectomy. | 5-10% |
| Class III: Contaminated | Open, fresh traumatic wounds; major break in sterile technique; gross spillage from GI tract. | Open fractures, emergency bowel surgery. | 15-20% |
| Class IV: Dirty/Infected | Existing infection, perforated viscus, old traumatic wounds with devitalized tissue. | Abscess drainage, perforated diverticulitis. | 25-40% |
Knowing your wound class helps contextualize your surgeon’s specific instructions. A Class I wound might have more lenient showering guidelines than a Class III or IV wound, which requires more stringent protection.
Detailed Analysis of Suture Materials and Their Care Requirements
The material holding your skin together dictates specific care protocols. Here’s an expanded, in-depth look:
| Suture Type | Material & Properties | Typical Use | Showering Protocol | Removal Timeline |
|---|---|---|---|---|
| Non-Absorbable (Nylon/Prolene) | Synthetic, strong, elicits minimal tissue reaction. Must be removed. | Skin closure on extremities, trunk; areas under tension. | Shower after 48 hrs. Blot dry carefully. Avoid snagging on washcloths or shower curtains. | Face: 3-5 days Scalp: 7-10 days Trunk: 10-14 days Extremities: 10-14 days Joints: 14+ days |
| Non-Absorbable (Silk) | Natural, braided, handles easily but causes more tissue reaction. | Mucosal surfaces, ligatures, sometimes facial lacerations in children. | More prone to wicking moisture. Keep showers brief and dry thoroughly. | Same as nylon, but may be left slightly longer if used internally. |
| Absorbable (Vicryl, PDS) | Synthetic polymers that hydrolyze (dissolve) over weeks to months. | Deep tissue layers, pediatric skin closures (to avoid removal trauma), mucous membranes. | Fragile as they dissolve. Gentle water flow only. No direct spray. | Not removed. Outer portions may need trimming if they “spit” through skin. |
| Absorbable (Catgut) | Collagen from animal intestines. Rapid absorption but significant inflammatory response. | Rarely used on skin today; sometimes in oral or obstetrical repairs. | Dissolves quickly (7-10 days). Extra care needed as wound may still be weak. | Not removed. |
| Surgical Staples | Medical-grade stainless steel or titanium. Provide excellent wound eversion. | Long linear incisions (C-sections, orthopaedic, cardiovascular surgeries). | Waterproof but follow 48-hr rule. Pat dry thoroughly to prevent rust spotting. | 7-14 days, depending on location. Requires special remover tool. |
| Steri-Strips™ | Adhesive microporous tape reinforcing the wound after suture removal or for minor cuts. | Low-tension wounds, after suture/staple removal, fragile skin. | Avoid direct stream. Water loosens adhesive. Blot, don’t rub. Let air-dry or use cool hair dryer. | Fall off naturally in 5-10 days. May need replacement if they peel early. |
| Tissue Adhesive (Skin Glue) | Cyanoacrylate-based liquid that polymerizes, forming a flexible, waterproof seal. | Small, straight lacerations on face, extremities; pediatric wounds. | Fully waterproof. Can shower immediately. Do not scrub or pick at the glue. Pat dry. | Peels off in 5-10 days. Do not peel manually. |
Pro Tip: If you’re unsure what type of stitches you have, check your discharge paperwork or call your surgeon’s office. The nursing staff can usually tell you. This information is crucial for proper care.
Procedure-Specific Showering and Care Guides
Different surgeries present unique challenges. Here are detailed protocols for common procedures:
Abdominal Surgery (Appendectomy, Cholecystectomy, Hernia Repair, C-Section)
Incision is under constant movement and in a moist environment. Risk of dehiscence (wound separation) is higher.
- Initial 48 Hours: Sponge bath only. Use a basin and washcloth, avoiding the incision area entirely.
- First Shower (Day 2-3): Stand with your back to the shower stream. Use a handheld showerhead if possible, washing from the neck down. Let water run over your abdomen but do not direct spray onto the incision.
- Drying: This is critical. Gently pat with a clean towel, then use a hair dryer on the COOL setting to ensure the incision line and any skin folds are bone dry.
- Support: Hold a clean, dry pillow or your hand gently over the incision when coughing, sneezing, or laughing to reduce stress on the stitches.
- Special Product: Consider an abdominal binder (as recommended by your surgeon) for support during movement, but remove it for showering and ensure the skin underneath is completely dry before reapplying.
Orthopaedic Surgery (Knee/Shoulder/Hip Replacement, ACL Repair)
Mobility is limited, and incisions are often near joints. Stability is a major concern.
- Safety First: Use a shower chair or bench to prevent falls. Install grab bars if possible.
- Waterproof Protection: For extremity surgeries, a high-quality limb protector (like the one linked in our product grid) is invaluable. Ensure it creates a true seal above the dressing.
- If You Have a Cast: Even with a “waterproof” cast liner, avoid soaking. Use a cast cover and keep the shower brief. Moisture trapped next to skin for extended periods can cause maceration and infection.
- Movement: Follow your physical therapist’s guidance for moving the joint in the shower. The warmth can help with stiffness, but avoid sudden movements.
Facial Surgery (Cosmetic, Laceration Repair, Mohs Surgery)
The face is highly vascular (heals quickly) but also highly visible. Cosmetic outcome is paramount.
- Water Direction: Face away from the showerhead. Let water run down your back and over your shoulders. Wash your face separately at the sink using a soft cloth and gentle, patting motions.
- Product Ban: Absolutely no exfoliants, retinoids, acne treatments, or alcohol-based products near the incision for at least 6 weeks unless approved by your surgeon.
- Sunscreen: Once the incision is closed and stitches are out, sunscreen (SPF 30+) is non-negotiable. UV exposure can cause permanent hyperpigmentation in healing scars.
- Sleeping Position: Sleep on your back with your head elevated to reduce swelling, which puts less tension on facial stitches.
Chest/Cardiac Surgery (Mastectomy, Open Heart, Pacemaker Insertion)
Incisions are often on the torso with underlying sensitive structures. Arm mobility may be restricted post-mastectomy or with a pacemaker.
- Arm Restrictions: If you have instructions to limit arm movement (e.g., “no lifting above shoulder”), plan your showering routine. Use a long-handled sponge or loofah to wash your back and lower body.
- Drain Care: If you have surgical drains (e.g., Jackson-Pratt drains), they must be kept dry and secured. You can often shower with them covered in plastic wrap and medical tape, but confirm with your care team. Empty drains before showering.
- Pain Management: Time your pain medication so it’s effective during your shower, making movement easier and less painful.
Advanced Infection Prevention: Beyond Basic Cleaning
Infection is the primary complication patients fear. Here’s how to actively prevent it at every stage:
Environmental Control
Before your first shower, clean the bathroom. Wipe down surfaces with a disinfectant. Consider a shower head filter if you have hard water, as mineral deposits can irritate healing skin.
The Right Cleanser
Ordinary soap is insufficient. Use a chlorhexidine-based cleanser (Hibiclens) or benzalkonium chloride wipes on the intact skin around the wound (not in it) to create a persistent antimicrobial barrier.
Moisture Management
A moist wound heals faster than a dry one, but a wet environment breeds bacteria. The goal is “moist wound healing.” Use advanced dressings like hydrocolloids or silicone sheets if recommended, which maintain optimal moisture while being waterproof for showers.
Recognizing Infection vs. Normal Healing
It’s vital to distinguish normal inflammatory responses from true infection. Use this detailed comparison:
| Symptom | Normal Healing | Sign of Possible Infection | Action Required |
|---|---|---|---|
| Redness | Mild pink halo extending <1 cm from incision edges, fading after 2-3 days. | Increasing redness, streaks radiating from wound (lymphangitis), redness >2 cm wide. | Contact surgeon if expanding. Streaks = urgent care. |
| Swelling | Mild firmness along incision line, peaks at day 2-3, then gradually subsides. | Swelling increases after day 3, feels tense or hot, spreads beyond incision. | Elevate area, apply cold compress. Call if worsening. |
| Pain | Controllable with prescribed meds, improves steadily each day. | Sudden increase in pain, throbbing, or pain that returns after initial improvement. | Re-evaluate pain management. New/worsening pain needs assessment. |
| Drainage | Small amount of clear or pale pink (serosanguinous) fluid for first 24-48h. | Thick, cloudy, green, yellow, or foul-smelling pus. Increasing volume. | Contact surgeon immediately. Likely needs antibiotics. |
| Fever | Low-grade fever (<100.4°F / 38°C) common on first post-op day. | Fever >101°F / 38.3°C, especially after day 2, or with chills/rigors. | Call doctor. Systemic infection possible. |
| Wound Edges | Approximated, no gaping. Minor scabbing along suture line. | Edges pulling apart (dehiscence), visible fat or deeper tissue. | Emergency. Cover with sterile saline gauze, go to ER. |
The Complete Stitch Removal Process: What to Expect
Understanding removal reduces anxiety. Here’s a detailed timeline and process:
Pre-Removal (Day Before)
Shower normally, gently cleaning the area. This is your last chance to soften any scabbing. Do not apply lotions or ointments afterwards unless instructed.
At the Clinic (Appointment Day)
The provider will clean the area. Using sterile forceps and scissors, they’ll lift each suture knot and cut the thread beneath it, then gently pull the thread out. You may feel a brief, slight tugging or tickling sensation, but it should not be painful. For staples, a special remover bends the staple in the middle, causing the ends to lift out of the skin.
Immediately After Removal
The wound is now held together only by the new, fragile tissue underneath. It is at its most vulnerable to reopening. You may see small holes or slight bleeding at suture sites—this is normal. Steri-Strips are often applied for additional support.
Post-Removal Care (Next 2 Weeks)
Showering: You can shower 24 hours after removal if no Steri-Strips are present. If Steri-Strips are in place, avoid direct spray and let them air-dry. Do not pull them off. Activity: Avoid heavy lifting, strenuous exercise, or anything that puts tension on the scar for at least another 2 weeks.
Warning: Never attempt to remove your own stitches or staples. This can lead to incomplete removal, infection, wound dehiscence, and poor scarring. Leave it to a trained professional.
Comprehensive Scar Management and Minimization
Scarring is inevitable, but its appearance can be significantly influenced. The “remodeling phase” lasts up to 2 years, giving you a long window to improve your scar.
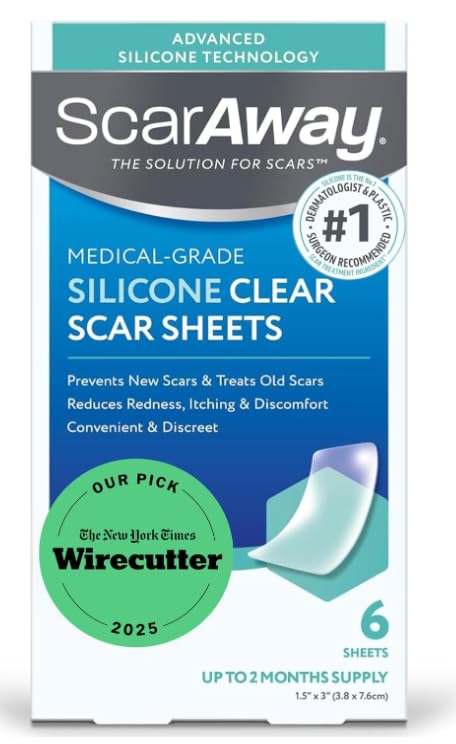
Silicone Scar Sheets
Gold Standard for Scar Therapy. Medical-grade silicone sheets hydrate the scar, flatten and soften it, and reduce redness. Proven in clinical studies. Can be worn for 12+ hours a day and are reusable.
Check Price on Amazon
Mederma Advanced Scar Gel
Topical gel containing onion extract. Best for newer scars. Apply once daily, massaging gently into the scar for 3-5 minutes. This massage breaks down scar tissue and improves blood flow.
Check Price on Amazon
Bio-Oil Skincare Oil
A popular multi-use oil containing vitamins and plant extracts. Helps improve skin elasticity and reduce the appearance of scars and stretch marks. Use on mature scars (once fully closed for 2-3 weeks).
Check Price on AmazonScar Massage Technique
Begin once the wound is fully closed (no scabs) and approved by your doctor, usually 2-3 weeks post-op.
- Wash hands and apply a small amount of silicone gel or vitamin E oil to the scar.
- Using two fingers, apply firm but gentle pressure.
- Massage in all directions: up and down, side to side, and in small circles.
- Continue for 5-10 minutes, 2-3 times daily.
- This breaks down collagen bundles, prevents adhesions to underlying tissue, and increases pliability.
Nutrition for Optimal Wound Healing
Your body requires specific nutrients to build new tissue. Optimize your diet:
| Nutrient | Role in Healing | Best Food Sources | Daily Target Post-Op |
|---|---|---|---|
| Protein | Building block for collagen and new skin cells. | Lean meat, poultry, fish, eggs, Greek yogurt, lentils, tofu. | 1.5-2.0 g per kg of body weight (e.g., 105-140g for a 70kg/154lb person). |
| Vitamin C | Essential for collagen synthesis and immune function. | Citrus fruits, bell peppers, strawberries, broccoli, kiwi. | 500-1000 mg (from food + supplement). |
| Zinc | Cofactor for enzymes in protein synthesis and cell division. | Oysters, red meat, pumpkin seeds, chickpeas, cashews. | 15-30 mg (do not exceed 40 mg long-term). |
| Vitamin A | Stimulates epithelial cell growth and immune response. | Sweet potatoes, carrots, spinach, eggs, fortified milk. | 700-900 mcg RAE (from food; avoid high-dose supplements unless deficient). |
| Iron | Necessary for oxygen transport to healing tissues. | Red meat, spinach, lentils, fortified cereals. | 8-18 mg (more if pre-op anemia). Pair with Vitamin C for absorption. |
| Hydration | Maintains skin turgor, delivers nutrients, removes waste. | Water, herbal tea, broth, water-rich fruits/vegetables. | 2-3 liters, or enough to keep urine pale yellow. |
Important: If you have diabetes, uncontrolled blood sugar is the single biggest modifiable risk factor for poor healing and infection. Work closely with your doctor to maintain tight glycemic control before and after surgery.
Higher-Risk Groups: Immunocompromised, Diabetic, and Elderly Showering Precautions
Standard showering guidance assumes a healthy adult with a straightforward, low-risk wound. Several groups need a more cautious approach, since their bodies either heal more slowly or fight off contamination less effectively.
| Group | Why the Risk Is Higher | Extra Precautions |
|---|---|---|
| Diabetics | Elevated blood sugar impairs white blood cell function and slows collagen formation. | Check blood glucose regularly around your surgery date, inspect the incision daily, and report any delayed closure sooner rather than later. |
| Immunocompromised Patients (chemotherapy, transplant medication, autoimmune therapy) | Reduced ability to mount an inflammatory response can mean infection signs appear later or look milder than they actually are. | Use sterile technique when changing dressings, avoid public pools and hot tubs even longer than typically advised, and set a lower threshold for calling your care team about any change. |
| Smokers | Nicotine constricts blood vessels, reducing oxygen delivery to the healing tissue. | Even a temporary reduction in smoking around the surgical period can measurably improve healing speed; discuss cessation support with your provider. |
| Patients on Blood Thinners | Higher likelihood of prolonged oozing or bruising around the incision. | Pat, never rub, when drying; watch for drainage that doesn’t taper off within the expected window. |
| Older Adults | Thinner skin, slower cell turnover, and more likely to have a comorbidity affecting circulation. | Favor gentle, fragrance-free products, prioritize fall-prevention gear in the shower, and expect a longer overall healing timeline before assuming something is wrong. |
Factors That Change How Fast Your Personal Timeline Moves
Every timeline in this guide is a population average, not a personal guarantee. If your own healing seems faster or slower than the numbers above, one or more of these factors is usually why:
- Age: Cell turnover and collagen production naturally slow with age, which is part of why older adults are called out separately throughout this guide.
- Nutrition status going into surgery: Someone who was already low in protein or key micronutrients before their procedure often heals more slowly than someone who was well-nourished beforehand, reinforcing the importance of the nutrition guidance covered earlier.
- Wound tension and location: Areas that move constantly (over a joint, across the abdomen with breathing) are under more mechanical stress than a still area like the forearm, which can slow visible progress even with perfect care.
- Underlying conditions: Diabetes, peripheral vascular disease, autoimmune conditions, and some medications (including long-term steroid use) are well-documented to slow wound healing.
- Genetics: Some people are simply more prone to slower healing or more noticeable scarring (including keloid or hypertrophic scarring tendencies), independent of how well they follow aftercare instructions.
- Adherence to aftercare: This is the one factor you have the most control over — consistent gentle cleansing, thorough drying, and avoiding early submersion measurably reduce complication rates compared with inconsistent care.
If your provider gave you a timeline that differs from the general ranges in this guide, follow theirs — they’ve factored in these personal variables in a way a general article never can.
Vasectomy and Minor Urological Procedure Stitches
Vasectomies and similar minor urological procedures typically use small dissolvable sutures on the scrotum, an area that’s both delicate and hard to keep fully still.
- Timing: Most urologists recommend waiting at least 24-48 hours before showering, then keeping showers brief with the area allowed to air-dry rather than being rubbed with a towel.
- Support: Snug (not tight) supportive underwear is usually recommended around the clock for the first several days to limit movement of the area, including during showering.
- Activity: Avoid baths, swimming, and heavy activity for the period your provider specifies, often around a week, since scrotal tissue is particularly prone to swelling with excess movement.
- Ice and Elevation: Between showers, brief icing (wrapped, never direct) and elevation while resting help control swelling that can otherwise make hygiene more uncomfortable.
Skin Biopsy and Mole Removal Stitches
A shave or punch biopsy, or an excisional mole removal, is one of the most common minor procedures leaving behind a small number of stitches — and one of the most common places people wonder if the usual rules still apply to something “so small.”
- Same principles, smaller scale: Even a single-stitch closure benefits from the same 24-48 hour water-avoidance window and gentle-drying habits as a larger incision.
- Location matters: A biopsy on the back or scalp is harder to keep dry and monitor than one on the forearm; consider asking someone to help inspect harder-to-see sites after each shower.
- Waiting on results: If the biopsy was taken to test for a specific condition, normal showering care doesn’t need to change while you wait for pathology results — hygiene and healing come first regardless of the outcome.
- Scar expectations: Even small biopsy sites benefit from the scar care principles covered earlier once the wound is closed, particularly sun protection, since a fresh scar exposed to UV light can darken permanently.
Choosing a Shower Cleanser: An Ingredient-Level Guide
Not every “gentle” or “sensitive skin” label means the same thing near a fresh incision. Use this quick reference when picking a cleanser for the weeks around your surgery.
| Look For | Generally Avoid Near Fresh Stitches |
|---|---|
| Fragrance-free (not just “unscented,” which can still contain masking fragrance) | Added perfumes and essential oils |
| pH-balanced or labeled for sensitive skin | Strong exfoliating acids (glycolic, salicylic) applied directly to the area |
| Chlorhexidine or benzalkonium-based antiseptic washes when specifically recommended by your provider | Alcohol-based hand sanitizer or rubbing alcohol applied to the wound |
| Simple, short ingredient lists | Antibacterial bar soaps with heavy dyes, which can leave residue in a fresh incision line |
| Lukewarm-tolerant formulas that rinse cleanly | Bubble bath or bath oils, which are tied to full-immersion bathing anyway |
Climate and Seasonal Considerations for Wound Care
Where and when you’re recovering changes some of the practical details of showering with stitches, even though the medical fundamentals stay the same.
- Hot, Humid Climates: Sweat can accumulate under dressings faster, so more frequent (but still brief) dressing checks and changes may be needed. Loose, breathable clothing reduces friction and trapped moisture between showers.
- Cold, Dry Climates: Indoor heating can dry out the skin surrounding a scar, which may increase itching. A fragrance-free moisturizer applied around, not on, a closed wound can help once your provider says it’s appropriate.
- High Altitude or Air Travel Recovery: Lower humidity in airplane cabins and high-altitude locations can also dry surrounding skin; keep hydration up and continue routine dressing checks even while traveling.
- Summer Sun Exposure: A scar less than a year old is significantly more prone to permanent discoloration from UV exposure than mature skin, making consistent sunscreen or covering especially important during summer recovery periods.
Signs Your Wound Is Healing Well (A Reassurance Checklist)
This guide spends a lot of time on warning signs, which can leave out the equally important reassurance of what normal, healthy progress actually looks like after a shower:
- The area feels slightly warm but not hot to the touch, and any warmth is gradually decreasing day to day.
- Redness is confined close to the incision line itself and is fading rather than spreading.
- Any drainage is minimal, clear to pale pink, and tapering off rather than increasing.
- Pain is gradually improving and is manageable with your prescribed or recommended pain control.
- The wound edges look approximated (touching, not gapping) each time you check after a shower.
- You’re able to complete a shower and drying routine with less discomfort than the time before.
If most or all of these describe your experience, you’re on a typical healing track. Use this list alongside — not instead of — the infection-versus-normal-healing table earlier in this guide.
A Sample Post-Op Showering Checklist You Can Follow
Bringing everything together, here’s a practical, repeatable sequence for the first two weeks:
- Confirm your specific clearance date and any restrictions with your discharge paperwork before your first shower.
- Gather supplies beforehand: mild cleanser, a clean towel reserved for the wound area, any waterproof cover, and a fresh dressing, so you’re not dripping while searching for them mid-shower.
- Keep the water lukewarm, not hot — heat increases swelling and can make you lightheaded, especially on pain medication.
- Wash the rest of your body first, then address the incision area last, briefly and gently.
- Turn off the water before beginning to dry off, and pat the incision dry first while your towel is at its driest.
- Allow a few minutes of air exposure if your provider recommends it, before reapplying any dressing.
- Inspect the area in good light using the reassurance checklist and the infection-warning-signs table above.
- Log anything notable (drainage amount, pain level, appearance) somewhere simple, like a phone note, so you can describe changes accurately if you do need to call your provider.
Psychological and Emotional Aspects of Recovery
Surgery is a physical and psychological stressor. Anxiety about your wound is normal. Here’s how to cope:
- Manage “Stitch Anxiety”: The fear of your stitches breaking is common. Trust that they are strong. A properly placed suture can hold significant tension. Visualize them as tiny, strong anchors.
- Body Image Concerns: A new scar can affect self-image. Reframe your thinking: this scar is a testament to your resilience and a step towards better health. Give yourself time to adjust.
- Dealing with Dependency: Needing help to shower or dress can be frustrating. Communicate your needs clearly to caregivers and remember it’s temporary. A shower chair or handheld showerhead can restore a sense of independence.
- Post-Operative Depression: A period of low mood or “the blues” is common 3-5 days after surgery due to anesthesia, pain meds, and physical stress. If feelings of sadness or hopelessness persist beyond 2 weeks, speak to your doctor.
The simple ritual of a shower can be therapeutic. The warmth relaxes muscles, the steam can clear sinuses, and the act of self-care boosts mood. If you’re struggling with sleep during recovery, the practice of a shower before bed can help regulate your circadian rhythm and improve sleep quality.
Travel and Lifestyle Considerations With Stitches
Traveling
If you must travel with fresh stitches:
- Air Travel: Pressure changes are not an issue for skin stitches. The main risk is immobility and DVT (deep vein thrombosis). Get up and walk hourly if possible. Keep your wound care supplies in your carry-on.
- Car Travel: Use a small pillow or folded towel as a buffer between your seatbelt and your incision site. Take breaks every 1-2 hours to walk and stretch.
- Destination: Avoid swimming pools, hot tubs, lakes, and oceans until cleared by your doctor. Be extra vigilant about sun protection on the scar.
Returning to Work and Exercise
These timelines are general; your surgeon will provide specifics based on your job and procedure.
- Desk Job: May return in 3-7 days if pain-controlled, but ensure you get up and move regularly to prevent stiffness and blood clots.
- Light Physical Job: 2-4 weeks.
- Heavy Labor/Athletics: 6 weeks to 3 months. You’ll likely need phased return, starting with light duty.
- Exercise: Walking is encouraged immediately. Light cardio (stationary bike) may be okay at 2 weeks. Weight training and high-impact activities often require 6-8 weeks. Listen to your body and your surgeon.
Pediatric and Geriatric Special Considerations
Children
- Fear: Use a clear, waterproof bandage they can see through. Let them help by holding the washcloth or choosing a fun bandage for after the shower.
- Activity: Keeping stitches dry and intact on an active child is challenging. Waterproof covers are essential. Use games and distractions to encourage calm activities.
- Dissolvable Stitches: Often used to avoid the trauma of removal. Explain that the stitches will “melt away” like magic.
Older Adults
- Skin Fragility: Aging skin is thinner and more prone to tearing. Use paper tape or silicone tape for dressings, never strong adhesive. Pat dry gently—no rubbing.
- Mobility and Balance: The risk of falls is high. A shower chair, grab bars, and non-slip mats are non-negotiable safety items.
- Healing Rate: Healing may be slower due to reduced cell turnover and potential comorbidities like diabetes or vascular disease. Patience and meticulous care are key.
Emergency Scenarios: When to Seek Immediate Help
Go to the Emergency Room or Call 911 if you experience:
- Bright red, pulsating bleeding that soaks through a bandage in minutes.
- Your wound suddenly opens and you can see tissue beneath the skin.
- Signs of severe infection with high fever (>101.5°F/38.6°C), confusion, rapid heart rate, or difficulty breathing.
- Sudden, severe pain that is not relieved by medication.
- A stitch or staple that is deeply embedded or broken, with part left in the skin causing irritation.
Day-by-Day Recovery Timeline: What Changes Each Day You Shower
One of the most common searches after surgery isn’t just “can I shower with stitches” — it’s a specific day count: can I shower 3 days after stitches, is it safe at 5 days, what about 10 days? The truth is that risk doesn’t drop in a straight line; it falls in stages as each phase of healing completes. The table below maps out what’s generally happening at each milestone so you can understand why the guidance changes, not just memorize a number.
| Day Post-Op | What’s Happening Biologically | General Showering Guidance |
|---|---|---|
| Day 0-1 | Fibrin seal is forming; the wound has almost no independent strength yet. | Sponge bath only. No direct water contact with the incision. |
| Day 2-3 | A basic epithelial bridge has usually closed the surface; deeper layers remain fragile. | Most surgeons clear a brief, gentle shower now. No soaking, no scrubbing, immediate drying afterward. |
| Day 4-7 | Epithelialization is typically complete on a clean, uncomplicated wound; collagen deposition is ramping up. | Normal short showers are usually fine; continue avoiding baths, pools, and hot tubs. |
| Day 7-14 | Sutures/staples are often removed in this window (varies by site); tensile strength is still only a fraction of unwounded skin. | Showering is typically unrestricted, but the scar line itself still needs gentle handling and full drying. |
| Day 14-21 | Wound has usually reached roughly 20% of final tensile strength; collagen remodeling accelerates. | Scar massage and topical scar treatments are often approved around this point if the surgeon agrees the wound is fully closed. |
| Week 4-6 | The wound is generally strong enough to tolerate submersion without the surface reopening. | This is the typical window when doctors clear patients for baths, swimming pools, and hot tubs — always confirm with your own surgeon first. |
Why there’s no single universal number: A clean, low-tension incision on the forearm and a high-tension abdominal incision heal at very different rates, even though both might technically be “closed” by day 10. Location, tension, suture material, your age, and conditions like diabetes or smoking status all shift these numbers. Treat the table as a general framework, not a substitute for your discharge paperwork.
Shower vs. Bath vs. Sponge Bath vs. No-Rinse Cleansing: Which Is Right for Each Stage?
Not all “getting clean” methods carry the same risk. Understanding the differences helps you choose the safest option at each stage of recovery rather than defaulting to whichever is most convenient.
| Method | Wound Exposure | Best Used When | Key Risk |
|---|---|---|---|
| Sponge Bath | None — incision is avoided entirely with a damp cloth used elsewhere on the body. | First 24-48 hours post-op, or any time you’re told to keep the wound completely dry. | Minimal, but can feel incomplete for hygiene if prolonged for many days. |
| Standard Shower | Brief, gentle running water; no soaking. | Once your surgeon clears direct water contact, typically 24-72 hours post-op. | Water pressure directed straight at the incision, or lingering too long. |
| No-Rinse Cleansing Foam/Wipes | None on the wound itself; used on surrounding skin and hair. | Bedbound patients, those with mobility restrictions, or anyone advised to avoid standing showers. | Not a full substitute for hygiene long-term; some formulas can irritate sensitive incision-adjacent skin. |
| Full Bath / Submersion | Complete — the wound sits in standing water. | Only once the wound is fully epithelialized and specifically cleared, usually 4-6 weeks out. | Highest infection risk of any method; bathwater is not sterile and bacteria can wick into any residual opening. |
| Swimming (Pool/Ocean/Lake) | Complete, plus prolonged immersion and friction from movement. | Only after full closure and specific surgeon clearance, often the same 4-6 week mark or later for high-tension incisions. | Chlorine can irritate a young scar; natural water carries bacteria; friction from swimming strokes can stress the healing line. |
Common Myths About Showering With Stitches, Debunked
“Hydrogen Peroxide Keeps It Clean”
Myth. Hydrogen peroxide and rubbing alcohol are commonly reached for out of habit, but both are cytotoxic to the healthy new cells forming at the wound edge. Most wound care guidance today favors plain water or saline for cleansing and reserves antiseptics for the skin around the wound, not inside it.
“Air Drying Is Always Better Than Covering”
Partly myth. Some exposure to air helps a dry-healing wound, but many modern wound care protocols favor a “moist healing” approach under an appropriate dressing, which has been shown to support faster re-epithelialization than leaving a wound fully exposed and dried out.
“A Few Drops of Water Will Cause Infection”
Myth, generally. A brief, incidental splash that’s promptly and gently dried rarely causes a problem. The real risk factors are prolonged submersion, standing water, and failing to dry the area — not a passing mist from a shower.
“Waterproof Dressings Never Need Changing”
Myth. Even a fully waterproof film dressing can lift at the edges after repeated showers or a lot of movement. Check the seal after every shower and replace it if you see any peeling, pooling of moisture underneath, or visible soiling.
“Petroleum Jelly Protects Stitches In the Shower”
Mostly myth, and sometimes counterproductive. A thick occlusive layer can trap moisture against sutures rather than repel it, which can macerate the surrounding skin. Ask your provider whether a specific ointment is appropriate for your wound type rather than assuming any barrier product is protective.
“Once Stitches Are Out, All Restrictions Are Over”
Myth. Removal only means the sutures themselves are gone — the tissue underneath is still at a fraction of its final strength. Gentle handling, sun protection, and avoiding tension on the area typically continue for weeks after removal.
Postpartum Stitches: Showering After Episiotomy, Perineal Tears, and C-Section
Childbirth-related stitches come with their own showering questions, separate from surgical incisions elsewhere on the body, because the area involved is difficult to keep dry, sits close to urine and other fluids, and is often sore and swollen at the same time.
Perineal and Episiotomy Stitches
- Showering: A normal shower is typically fine within the first day or two, as long as you let warm water run gently over the area rather than aiming a hard direct spray at the stitches.
- Peri Bottles: Many postpartum units recommend rinsing the area with a peri bottle of warm water after every bathroom trip, in addition to normal showers, to keep urine and discharge from sitting on the stitches.
- Drying: Pat the area dry with a clean towel, front to back, or let it air dry for a few minutes before dressing. Avoid rubbing.
- Baths and Sitz Baths: A plain warm sitz bath (no soap, bath bombs, or oils) is often recommended a few times a day for comfort and is different from a full soak in a standing bathtub — check with your provider about which is being recommended, since the terms are easy to mix up.
- Padsicles and Ice Packs: Cooling pads used in the first 24-48 hours help with swelling; pat the area dry before applying a fresh one after showering.
C-Section Incisions
A C-section incision sits low on the abdomen, often under a fold of skin, which makes drying especially important. In addition to the general abdominal surgery guidance above, most postpartum discharge instructions recommend gently washing the incision with mild soap and water during a normal shower once cleared (often 24-48 hours post-delivery), followed by thorough patting dry, including underneath any overhanging skin fold, before dressing or going braless in loose clothing to reduce friction.
Oral, Dental, and Mouth Stitches: Rinsing, Brushing, and Eating Around Them
Stitches inside the mouth — after wisdom tooth extraction, gum surgery, a cleft lip repair revision, or a laceration to the lip or tongue — aren’t affected by showering the way skin stitches are, but the same “keep it clean without disturbing it” principle applies through eating and rinsing instead of water exposure.
- Showering itself: A normal shower poses no risk to mouth stitches; the concern is what goes into the mouth, not water on the skin.
- Rinsing: Most providers ask patients to avoid vigorous rinsing or spitting for the first 24 hours, since the suction and pressure can dislodge the healing clot underneath. After that, a gentle saltwater rinse (typically ½ teaspoon of salt in a cup of warm water) is commonly recommended, letting the liquid fall out of the mouth rather than spitting forcefully.
- Brushing: Brush other teeth normally but avoid the stitched area directly for the first few days; some providers recommend a soft-bristled or post-surgical brush.
- Mouthwash: Alcohol-based mouthwash is usually discouraged early on, as it can irritate healing tissue and delay closure; a prescribed or alcohol-free rinse is often substituted.
- Eating: Soft, lukewarm foods are typically advised for the first few days, avoiding anything crunchy, seedy, spicy, or very hot, all of which can catch on or irritate the stitches.
- Dissolvable vs. Removable: Most oral stitches are absorbable and dissolve within one to two weeks; if non-dissolving sutures were used, your dentist or oral surgeon will schedule a removal visit.
Circumcision Stitches: Showering and Hygiene Care
Circumcision stitches, whether for an adult procedure or a revision, raise similar questions to any other genital-area surgical site: the tissue is delicate, moisture management matters, and friction from clothing is an added factor that most other incisions don’t have to deal with.
- Timing: Providers commonly clear a gentle shower within the first day or two, once any initial dressing is removed as instructed, while continuing to avoid baths and pools until the area is fully healed, typically several weeks later.
- Technique: Let water run over the area rather than directing a strong spray at it, and use plain water or a mild, fragrance-free cleanser rather than scented soaps.
- Drying: Pat dry gently and allow a short period of air exposure before dressing, since trapped moisture in this area is a common source of irritation.
- Clothing: Loose-fitting underwear reduces friction against the healing incision; many providers suggest briefs-style support in the first days for stability, then switching to looser fits as swelling subsides.
- Watch for: The same infection signs covered earlier in this guide apply here — increasing redness, swelling, discharge, or fever should prompt a call to your provider.
Swimming, Pools, and Open Water With Stitches: A Closer Look
“When can I swim with stitches?” is one of the most frequent follow-up questions once the initial showering question is answered, and it deserves more detail than a single line.
| Water Type | Primary Concern | General Timing |
|---|---|---|
| Chlorinated Pool | Chlorine can irritate immature scar tissue and dry out surrounding skin; the pool itself still isn’t sterile. | Typically not before full closure and surgeon clearance, often 4-6 weeks. |
| Ocean/Sea | Naturally occurring bacteria (including some, like Vibrio species, that are specifically associated with wound infections in warm coastal water) and salt can sting an open area. | Same general window as pools; err toward waiting longer if the wound looks at all fresh. |
| Lakes/Rivers | Freshwater carries its own bacterial load and often more sediment and debris than treated pool water. | Same general window; avoid if water quality advisories are in effect. |
| Hot Tubs/Spas | Warm, recirculating water is an especially favorable environment for bacteria like Pseudomonas. | Among the longest waits — often the very last water activity cleared, after pools and open water. |
If you’re an athlete or a regular swimmer eager to get back in the water, ask your surgeon directly for a swimming-specific clearance date rather than assuming that a general “you can shower now” means you can also submerge and swim laps. The two are evaluated differently because submersion time, water pressure against the incision, and the friction of stroke technique all add stress that a two-minute shower does not.
Fitting a Waterproof Cover Correctly: Step-by-Step
A waterproof cast or wound cover only works if it’s actually sealed. A poorly fitted cover can be worse than no cover at all, since it traps water against the dressing without you realizing it. Follow this sequence for the best seal:
- Check the dressing first. Make sure any gauze or film dressing underneath is clean, dry, and securely adhered before covering it — never trap a damp dressing under a waterproof sleeve.
- Choose the right size. A cover that’s too loose won’t form a seal at the opening; one that’s too tight can restrict circulation, especially on a swollen limb. Measure the circumference above the area you’re protecting before ordering.
- Roll, don’t drag, the cover into place. Bunch the sleeve like a sock and unroll it upward over the limb, rather than pulling it on like a bag, which can twist the seal.
- Test the seal with a small water splash before your full shower. Run a little water over the sealed edge and check for seepage before committing to a full rinse.
- Keep the shower brief regardless. A waterproof cover reduces risk but doesn’t guarantee zero exposure, especially after repeated use as the seal material wears. Treat it as an added safety margin, not a green light for a long soak.
- Remove carefully. Roll the cover back down rather than yanking it off, and immediately check the dressing underneath for any moisture before deciding whether it needs to be changed.
Showering With Other Medical Devices Present
Stitches often aren’t the only thing to plan around. If you’re also managing one of the following, factor it into your shower routine alongside your incision care:
Surgical Drains
Jackson-Pratt or Hemovac drains should be emptied before showering and kept out of the direct water stream. Many patients pin the bulb to a lanyard or waistband to keep it from dangling and pulling at the insertion site while washing.
Wound Vacs (NPWT)
Negative pressure wound therapy units are generally not submerged, and many models are disconnected only briefly, if at all, for a carefully directed sponge-style wash — always follow your wound care team’s specific device instructions rather than general shower advice.
PICC Lines and IV Sites
A PICC line dressing must stay completely dry; a purpose-made waterproof sleeve is typically required for showering, and the arm is often kept outside the direct spray as an added precaution.
External Fixators and Pins
Pin sites usually can get wet during a normal shower once cleared, but the pin-site cleaning routine prescribed by your orthopaedic team should still be followed afterward, since these sites remain open access points for longer than a typical incision.
Dressing Types and How Each One Handles Water
The dressing over your stitches often matters more for showering purposes than the stitches themselves. Here’s how the common types compare:
| Dressing Type | Water Resistance | Shower Handling |
|---|---|---|
| Dry Gauze & Tape | None — soaks through quickly. | Remove or protect fully before showering; replace with a fresh, dry dressing immediately after. |
| Transparent Film Dressing | Generally waterproof while the seal holds. | Can typically stay on through a shower; check edges afterward for lifting or trapped moisture underneath. |
| Hydrocolloid Dressing | Water-resistant; designed to interact with wound fluid rather than outside water. | Usually shower-safe short-term, but avoid prolonged soaking, which can break down the gel matrix early. |
| Foam Dressing | Absorbent rather than waterproof. | Some are labeled shower-safe; check the packaging, and change promptly if it becomes saturated. |
| No Dressing (Open to Air) | N/A — direct exposure. | Only used once your provider has specifically said the wound can be left uncovered; follow their exact showering timing rather than general guidance. |
A Caregiver’s Guide: Helping Someone Else Shower With Stitches
If you’re the one assisting a partner, parent, or child through post-op showering rather than the patient yourself, a few practical adjustments make the process safer and less stressful for both of you.
- Prep everything before they undress. Set out towels, dressings, and any waterproof covers within arm’s reach so the person isn’t standing around cold and exposed while you search for supplies.
- Use a shower chair or transfer bench for anyone with limited mobility or balance concerns, even if they insist they don’t need it — post-anesthesia dizziness and pain medication can affect balance more than people expect.
- Let the person do as much as they safely can themselves. Maintaining independence where possible supports the psychological side of recovery discussed earlier in this guide; step in for the parts they genuinely can’t manage, like reaching a back incision.
- Learn to recognize the same infection signs covered in this guide so you can support inspection after each shower, especially for wound locations the patient can’t easily see themselves (upper back, scalp, back of a limb in a cast).
- Respect privacy and communicate clearly. Ask before touching or looking at the incision, and narrate what you’re doing, particularly when helping a child or an anxious patient.
- Know when to step back and call for help. If you notice any of the emergency warning signs discussed earlier, don’t attempt to manage it alone — contact the surgical team or emergency services as appropriate.
Sport-Specific Return-to-Water Timelines
“Returning to exercise” and “returning to water-based activity” are not the same clearance, and athletes in particular tend to ask about their specific sport rather than exercise in general.
| Activity | Key Consideration | Typical Earliest Window |
|---|---|---|
| Recreational Lap Swimming | Full submersion plus repetitive stroke friction across the incision. | After full closure and specific clearance, commonly 4-6+ weeks. |
| Surfing/Paddleboarding | Combines open-water exposure with impact and friction from falls. | Similar to swimming, sometimes later depending on incision location and fall risk. |
| Contact Sports | Direct impact risk to the incision independent of water exposure. | Often the longest wait of any activity category — frequently 6-8+ weeks with sport-specific medical clearance. |
| Yoga/Light Stretching | Low impact, but certain poses can stretch or compress an incision. | Often earlier than swimming, once basic mobility and pain allow, with modifications around the incision. |
| Running/Cardio | Sweat management and impact-related tension on the incision, not water exposure itself. | Frequently a few weeks after a shower is cleared, once the surgeon confirms adequate tensile strength. |
Quick-Reference Glossary of Wound Care Terms
| Term | Plain-Language Meaning |
|---|---|
| Dehiscence | The wound edges separating or reopening after closure. |
| Epithelialization | New skin cells covering the surface of the wound. |
| Granulation Tissue | The pink, bumpy new tissue that fills a healing wound bed. |
| Maceration | Softening and breakdown of skin from excess moisture exposure. |
| Serosanguinous Drainage | Thin, pale pink or blood-tinged fluid — a normal early finding, distinct from pus. |
| Suture Spitting | A dissolvable stitch working its way to the skin surface before it’s fully absorbed. |
| Tensile Strength | How much force the healing tissue can withstand before it would reopen. |
Essential Gear for Post-Op Showering
Depending on where your stitches are, you might need extra protection to keep them dry. Here are top-rated solutions from Amazon.

Waterproof Cast/Wound Covers
Best for Extremities. If you have stitches on your arm or leg, don’t mess with trash bags and tape. These reusable silicone sleeves create a vacuum seal that is 100% watertight.
Check Price on Amazon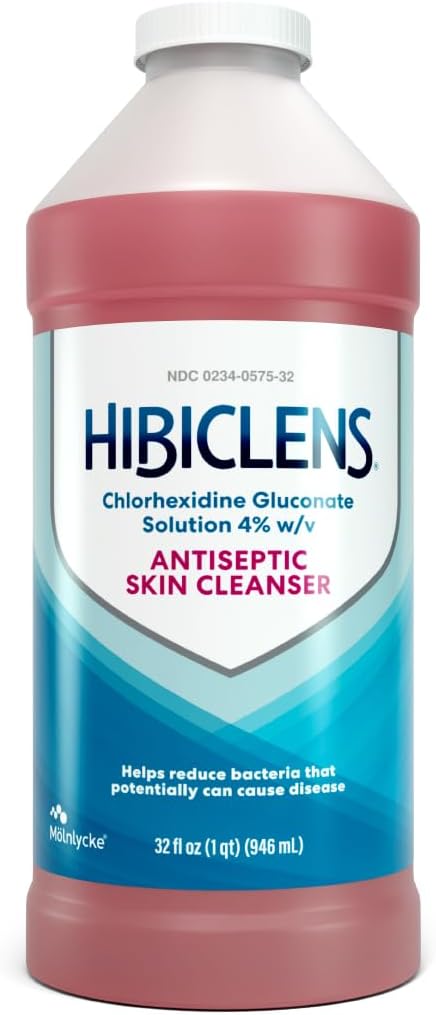
Hibiclens Antiseptic Skin Cleanser
Doctor Recommended. This is the pink soap surgeons use. It kills bacteria on contact and continues working for 24 hours. Essential for preventing post-op infections.
Check Price on Amazon
SparkPod Handheld Shower Wand
Control is Key. If you have stitches on your torso, a fixed head is risky. A handheld wand lets you wash your lower body while keeping your chest completely dry.
Check Price on AmazonFrequently Asked Questions (Expanded)
What if my stitches get wet accidentally?
Don’t panic. Gently pat them dry immediately with a clean towel. If they were covered by a dressing that got soaked, remove the wet dressing, clean the area around the wound with a mild antiseptic wipe (avoiding the incision), and apply a fresh, dry sterile dressing. Monitor closely for any signs of infection over the next 48 hours.
Can I wash my hair with stitches in my head?
Usually after 48 hours, yes. Use baby shampoo and be very gentle. Do not use your fingernails to scrub the scalp. Rinse thoroughly to prevent soap buildup. Consider leaning back in a salon-style sink for the first wash to avoid direct stream on the wound. After rinsing, blot the area dry with a clean paper towel, then use a cool hair dryer to ensure the scalp is completely dry.
Is it safe to shower if I feel dizzy?
No. Post-surgery medications (especially opioids and anesthesia residuals), low blood pressure, and dehydration can cause vertigo. If you’re asking why do I get dizzy in the shower, it’s likely a combination of vasodilation from heat and your post-op condition. Use a shower chair, keep water lukewarm (not hot), have someone supervise you, or opt for a sponge bath until the dizziness resolves.
Can I shave over stitches?
Absolutely not. Wait until the stitches are removed, the wound is fully closed (no scabs), and the skin is no longer tender, which could be several weeks. Shaving can introduce bacteria, cause irritation, and even catch and pull on dissolvable stitches. See our guide: Shave Before or After Shower? for techniques once you’re fully healed.
How do I deal with itching around my stitches?
Itching is a normal sign of healing (histamine release). Do not scratch. Apply a cool compress over the dressing. Ask your doctor if you can use an over-the-counter oral antihistamine like cetirizine (Zyrtec). Once the wound is closed, applying a fragrance-free moisturizer around (not on) the scar can help. If itching is severe or accompanied by a rash, it could be an allergic reaction to the suture material or topical antibiotic—contact your doctor.
Can I use a hot tub or sauna?
No, not until your surgeon clears you, which is typically after stitches are out and the wound is fully epithelialized (skin closed), often at 4-6 weeks. The hot, swirling water of a hot tub is a breeding ground for bacteria like Pseudomonas, which can cause serious wound infections. Saunas and steam rooms create excessive moisture and heat that can weaken the wound.
What’s the difference between “getting wet” and “soaking”?
Getting wet means brief, gentle contact with clean, running water (like in a shower). Soaking means submerging the wound in standing water (bath, pool, tub) for an extended period, which allows water and bacteria to penetrate the wound layers. Soaking is prohibited until full healing. A quick shower is generally permitted; a 20-minute bath is not.
Can I shower with stitches after a tattoo touch-up or piercing revision that used sutures?
The same core principles apply: avoid direct spray on the closed area for the first day or two, keep showers brief, and pat rather than rub the area dry. Because these sites are often smaller and more superficial than a surgical incision, many providers clear light showering sooner, but always follow the specific aftercare sheet given at the time of the procedure.
Can I use a rain shower head or high-pressure shower system with stitches?
It’s best to avoid it initially. A wide rain-style head or a high-pressure jet delivers more direct force than a standard showerhead, which can be uncomfortable and increases the chance of water pooling directly on the incision. A handheld wand you can angle away from the wound gives you far more control during the first one to two weeks.
Do I need to wash my stitches with soap, or is water alone enough?
For most closed surgical incisions, letting clean water run gently over the area is sufficient; a mild, fragrance-free soap can be used on the surrounding intact skin but is often advised against going directly onto the suture line itself unless your provider specifically recommends it, since some soaps can irritate the healing tissue.
Is it normal for stitches to smell after showering?
A faint, non-foul odor immediately after removing a dressing is common and usually related to normal serous drainage or adhesive residue. A strong, foul, or sweetish odor — especially paired with increased drainage, redness, or pain — is not normal and should be reported to your provider promptly, as it can indicate infection.
Can I shower with stitches if I only have Steri-Strips and no visible sutures?
Yes, but treat Steri-Strips as more water-sensitive than sutures or staples. Keep the direct stream off them, blot the area dry afterward instead of rubbing, and resist the urge to peel a lifting strip off early — trim any loose edge with clean scissors instead, or let your provider handle it at a follow-up visit.
Can I shower with stitches if I don’t have anyone to help me?
Most people showering alone with stitches can manage safely by slowing down, using a shower chair or grab bars if balance is a concern, keeping pain medication timed appropriately beforehand, and limiting the shower to what’s truly necessary rather than a long, relaxing soak. If your procedure specifically limits use of one arm or affects your balance significantly, ask your care team about home health or outpatient support before you’re discharged, rather than improvising alone on day one.
How long should a post-op shower actually last?
Shorter than your usual routine — most guidance points to a brief, efficient shower in the first one to two weeks, often well under ten minutes, rather than a long soak under hot water. The goal is basic hygiene and gentle cleansing, not relaxation; save longer showers for once your incision is more fully healed.
Can weather or humidity delay how quickly I can shower normally again?
Weather doesn’t change the biology of your specific wound, but it can change your comfort and dressing needs along the way, as covered in the climate section above. A humid environment may mean more frequent dressing checks, while a dry environment may mean more attention to moisturizing intact skin around the scar — neither should change your surgeon’s core clearance timeline.
Do stitches need to “breathe,” and does that conflict with showering?
Not in the way the phrase is often used. Wounds don’t require open air exposure to heal — many heal faster under an appropriate moisture-retentive dressing than left fully uncovered. What matters for showering purposes isn’t airflow but avoiding prolonged wetness: a brief shower followed by thorough drying and, if used, a fresh dressing supports healing just as well as leaving the area uncovered between showers, and often with better protection from friction and contamination in the meantime.
Hair Transplant and Scalp Suture Showering Care
Scalp procedures — hair transplants, laceration repairs, or Mohs surgery excisions on the scalp — come with a specific challenge: hair itself makes rinsing, checking, and drying the area harder than almost anywhere else on the body.
- Timing: Hair transplant clinics commonly restrict any water contact with the donor or recipient sites for the first 2-4 days, then introduce a very gentle, low-pressure rinse using a cup or specialized technique rather than a normal showerhead for the following week or two.
- Water Pressure: Direct, forceful spray is generally avoided on newly placed grafts for one to two weeks, since dislodging a graft in the first days can affect the result. Let water run down from above the head rather than aiming a handheld nozzle directly at the scalp.
- Shampooing: A specific gentle, often sulfate-free, shampoo may be recommended, applied with fingertips rather than nails, and rinsed with the same low-pressure technique.
- Crusting: Small scabs or crusts around graft sites or a suture line are normal and are usually softened gradually over repeated gentle rinses rather than picked or scrubbed off.
- Drying: Pat dry with a soft towel or allow to air dry; avoid vigorous towel-drying motion, which can catch on healing grafts or a suture line.
Showering Timelines by Common Procedure: Quick-Reference Table
For a fast answer to “when can I shower after my specific surgery,” this consolidated table pulls together the general timelines discussed throughout this guide. As with every timeline in this article, treat these as typical ranges to discuss with your own surgeon, not a fixed rule for your individual case.
| Procedure | Typical First Shower | Typical Bath/Swim Clearance |
|---|---|---|
| Minor laceration repair / skin biopsy | 24-48 hours | 1-2 weeks after full closure |
| Appendectomy / laparoscopic gallbladder removal | 24-48 hours | 2-4 weeks |
| Open abdominal surgery / hernia repair | 48-72 hours | 4-6 weeks |
| C-section | 24-48 hours | 4-6 weeks |
| Knee, hip, or shoulder replacement | 48-72 hours (often with a waterproof cover) | 4-6 weeks or until incision fully sealed |
| Mastectomy / breast surgery | 24-72 hours (drains permitting) | Several weeks; often tied to drain removal |
| Facial/cosmetic surgery | 24-48 hours, face washed separately at first | 2-6 weeks depending on procedure extent |
| Circumcision (adult) | 24-48 hours | Several weeks |
| Vasectomy | 24-48 hours | About 1 week |
| Dental/oral surgery | No restriction on showering itself; rinsing restrictions apply instead | N/A |
| Hair transplant | 2-4 days, gentle low-pressure rinse | 2-4 weeks for normal-pressure showering; longer for swimming |
| Tattoo touch-up with sutures | 24-48 hours | 1-2 weeks |
Conclusion: Your Path to Confident Recovery
The question “Can you shower with stitches?” opens the door to a much broader conversation about intelligent, proactive post-operative care. By understanding the science of wound healing, respecting the specifics of your suture materials, mastering the technique of gentle cleansing and thorough drying, and vigilantly monitoring for complications, you transform from a passive patient into an active partner in your own recovery.
Remember that this period of vulnerability is temporary. Each careful shower, each nutritious meal, each moment of rest is an investment in your long-term outcome—not just the closure of a wound, but the quality of the scar and the return to full function. Arm yourself with the right tools, like a stable shower chair or a gentle showerhead, and don’t hesitate to ask for help when you need it.
And finally, grant yourself grace. If you’re not up for a full shower, there is no shame in a sponge bath. The benefits of not showering for a day while you prioritize rest are real. Your body’s energy is focused on the monumental task of repair. Listen to it, care for it, and trust the process. You’ve got this.
- Wait 24-48 hours before your first post-op shower unless instructed otherwise.
- Never soak your stitches in baths, pools, or hot tubs.
- Use mild, fragrance-free soap and let water flow gently over the wound—no scrubbing.
- Pat dry thoroughly with a clean towel and consider a cool hair dryer for hard-to-reach areas.
- Your surgeon’s instructions override any general guideline.
- Watch for signs of infection: increasing redness, swelling, pus, fever, or worsening pain.
- Begin scar care only after the wound is fully closed and approved by your doctor.
- Nutrition, hydration, and rest are as important as external wound care.
Disclaimer: As an Amazon Associate, ShowerBlog earns from qualifying purchases. The information in this guide is synthesized from current medical literature, including principles from The Journal of the American College of Surgeons, Wound Repair and Regeneration, and guidelines from the American Academy of Dermatology and the Centers for Disease Control and Prevention. It is intended for consumer education and should be used in conjunction with, not as a replacement for, professional medical care.