How to Clean a Shower Head with Vinegar: A Practical DIY Guide
If your shower head has gone from a strong, even spray to a weak, sputtering dribble, the culprit is almost always mineral buildup — and the fix is almost always sitting in your kitchen cabinet. This guide walks through the entire process of cleaning a shower head with plain white vinegar, from gathering supplies to reattaching a fixture that sprays like new.
Why Vinegar Works on Shower Heads
White vinegar is diluted acetic acid, typically around 5% concentration. That acidity is exactly what’s needed to dissolve calcium and magnesium deposits — the hard water minerals that build up inside a shower head’s nozzles over weeks and months. As water evaporates from the tiny holes after every shower, it leaves behind a thin mineral residue. Over time, that residue hardens into a crusty layer that narrows or completely blocks the jets, which is why a shower head that once sprayed evenly starts shooting water sideways or barely dribbling at all.
Unlike harsh commercial descalers, vinegar is inexpensive, food-safe, and gentle enough for most finishes when used correctly. It won’t damage rubber nozzles the way some abrasive scrubbing pads can, and it doesn’t leave behind the strong chemical fumes associated with bleach-based or acid-based bathroom cleaners.
That said, vinegar isn’t a universal solution — some finishes and materials react poorly to prolonged acid exposure, which we’ll cover in the finish-specific section further down. If your shower head is leaking around the base rather than just spraying poorly, vinegar alone won’t fix that; you may want to read our guide on how to fix a leaking shower head first.
Signs Your Shower Head Needs a Vinegar Clean
- Uneven spray pattern, with some jets shooting water sideways
- Visible white or greenish crust around the nozzle holes
- A noticeable drop in water pressure compared to when it was new
- Water dripping slowly from the head even after the valve is shut off
- A musty or mineral smell coming from the fixture
If low pressure is your main complaint and the shower head looks visually clean, the issue might be elsewhere in the plumbing. Our article on how to fix low shower water pressure covers causes beyond mineral buildup, and why shower head pressure runs low digs into diagnosing the exact source.
What You’ll Need
| Item | Purpose | Optional? |
|---|---|---|
| White distilled vinegar | Dissolves mineral deposits | Required |
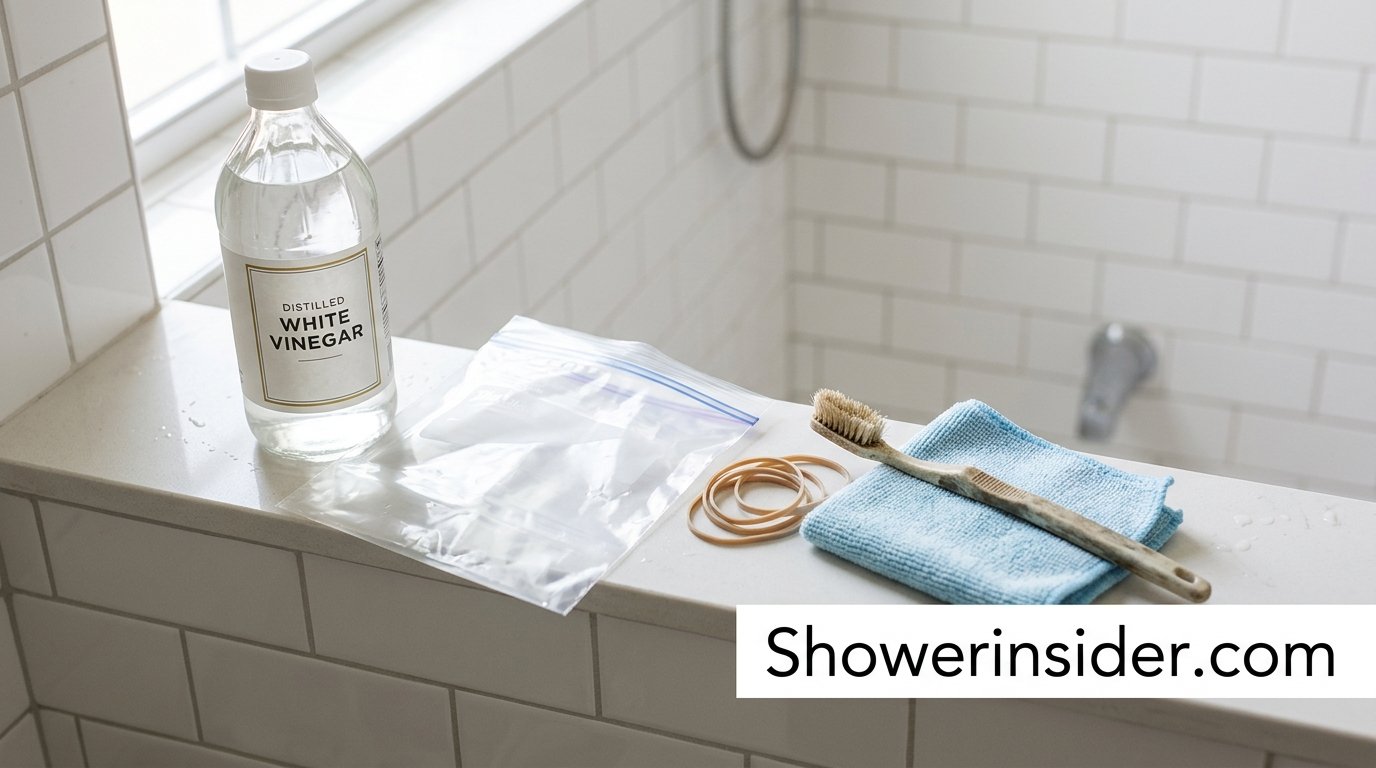
| Gallon-size resealable plastic bag | Holds vinegar around a fixed shower head | Optional (for soak-in-place method) |
| Rubber band or twist tie | Secures the bag in place | Optional |
| Bowl or bucket | Holds a removed shower head fully submerged | Optional (for removable method) |
| Old soft-bristle toothbrush | Scrubs loosened deposits from nozzles | Recommended |
| Toothpick or small pin | Clears individual clogged jets | Recommended |
| Adjustable wrench or pliers | Removes a threaded shower head | Optional |
| Old cloth or rag | Protects finish and wipes down after | Recommended |
| Plumber’s tape | Reseals threads on reattachment | Recommended |

Want a purpose-built kit instead of assembling supplies? A dedicated descaling brush set makes it easier to reach into narrow nozzles without scratching the finish.
Check Price on AmazonStep 1: Inspect and Remove the Shower Head
Start by looking closely at the nozzle face. If you see white, chalky buildup, that confirms mineral deposits are the problem. Next, decide whether you can unscrew the shower head from the arm. Most standard threaded shower heads twist off counter-clockwise by hand, though older or corroded fittings may need an adjustable wrench wrapped in a cloth to avoid scratching the finish.
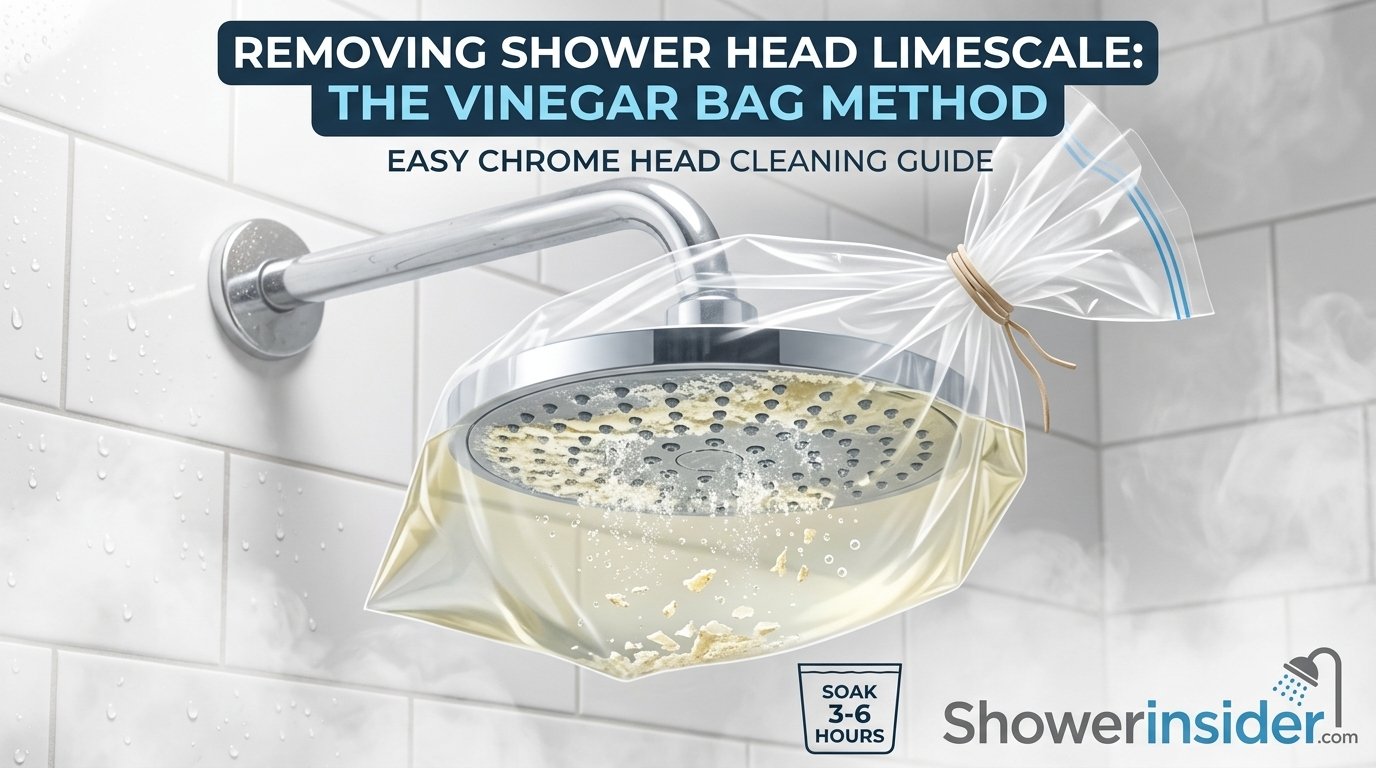
If the shower head is fixed, rain-style, or otherwise difficult to remove, don’t force it — you can clean it in place using the bag method described in Step 2.
Step 2: Choose the Right Method for Your Fixture
There are two main approaches, and the right one depends on whether the shower head can be removed.
Removable Shower Head
Submerge the entire nozzle face in a bowl of vinegar. This gives the most even, thorough soak and is the faster method.
Fixed or Rain Shower Head
Fill a plastic bag with vinegar and secure it around the shower head with a rubber band so the nozzle face stays submerged in place.
Step 3: Prepare the Vinegar Soak
For the submerge method, pour plain white vinegar into a bowl deep enough to fully cover the nozzle face — no need to dilute it for typical buildup. For the bag method, fill a resealable plastic bag about halfway with vinegar, roughly 1 to 2 cups depending on the size of the fixture.
Step 4: Soak the Shower Head
If removed, drop the shower head into the bowl of vinegar nozzle-side down and let it soak for 30 minutes to a full hour, or up to overnight for severe buildup. If cleaning in place, slide the bag up over the shower head so the nozzle face is fully submerged, then secure it tightly around the neck with a rubber band or twist tie so it doesn’t leak or fall.
Step 5: Scrub the Jets
After soaking, remove the shower head (or bag) and use an old toothbrush to scrub the nozzle face, working in small circles to loosen softened mineral deposits. For nozzles that are still clogged, gently insert a toothpick straight into each hole to clear the blockage — avoid metal pins on rubber nozzles, since they can tear the silicone.
Step 6: Rinse Thoroughly
Run the shower head under warm tap water (or hold it under the tub faucet) for a minute or two to flush out loosened debris and the acidic smell. Rinsing well matters — leftover vinegar residue can dry into a faint film on chrome or nickel finishes if it isn’t washed away.
Step 7: Reattach and Test
If you removed threads, wrap fresh plumber’s tape clockwise around them before screwing the shower head back onto the arm by hand, then snugging it with a wrench-wrapped cloth if needed. Turn the water on and check the spray pattern — jets should run in even, straight streams rather than spraying sideways or dribbling.

Out of vinegar or need a bulk supply for regular descaling? A large jug of distilled white vinegar keeps you stocked for shower heads, faucets, and kettles alike.
Check Price on AmazonThe Science: Limescale, Biofilm, and Bacteria
To understand why a shower head clogs the way it does, it helps to know exactly what’s happening at the microscopic level every time you shower. Tap water — even water that looks perfectly clear — carries dissolved minerals, primarily calcium and magnesium carbonate, along with trace amounts of iron, silica, and in some regions, manganese. As water passes through the tiny nozzle holes and then evaporates off the metal or rubber surface, those dissolved minerals don’t evaporate with it. They stay behind, molecule by molecule, and slowly crystallize into the chalky white deposit most people call limescale or hard water scale.
What makes this process frustrating is that it’s self-reinforcing. A slightly narrowed nozzle hole increases the water pressure locally as it exits, which changes the spray pattern and evaporation rate, which in turn tends to accelerate further mineral deposition right at that spot. This is why a shower head rarely clogs evenly — you’ll often see two or three jets completely blocked while the rest spray normally, simply because those particular holes crossed a threshold first and the buildup snowballed from there.
Limescale isn’t the only thing accumulating inside a shower head, though. The warm, damp, dark environment inside the nozzle chamber and hose is close to ideal for microbial growth. Research into premise plumbing has repeatedly found that shower heads can harbor biofilm — a thin, slimy layer of bacteria embedded in a self-produced matrix that clings to interior surfaces and resists simple rinsing. Some of the organisms identified in these biofilms include common environmental bacteria, and in rarer cases, species from the Mycobacterium and Legionella families, which is part of why plumbing and health researchers recommend regular shower head cleaning and periodic replacement rather than treating it as a purely cosmetic issue.
This is also where vinegar earns some of its reputation beyond just descaling. Acetic acid has documented antimicrobial properties against a range of common bacteria, which means a vinegar soak isn’t purely a mechanical descaling step — it also meaningfully reduces the microbial load on the nozzle surface, even though it isn’t a hospital-grade disinfectant and shouldn’t be treated as one for anyone who is immunocompromised or has specific medical guidance about premise plumbing. For most households, though, a routine vinegar soak addresses both the mineral buildup and a meaningful share of the biofilm in one pass, which is a big part of why it remains the go-to home remedy over drier alternatives like scraping or brushing alone.
Cleaning the Internal Filter Screen
Most shower heads — especially mid-range and higher-end fixed and handheld models — have a small mesh or rubber filter screen sitting just inside the connection point, where the shower head threads onto the arm or hose. Its job is to catch sediment, rust flakes, and larger mineral particles before they reach the nozzles. Over time, this screen can become just as clogged as the nozzles themselves, and it’s a step people frequently skip entirely, which is why a shower head sometimes stays weak even after a thorough vinegar soak of the nozzle face.
Once the shower head is fully unscrewed from the arm, look inside the connection collar. You should see either a small disc of fine mesh, a rubber washer with a built-in screen, or occasionally a simple plastic flow restrictor. Gently pry it out with a flathead screwdriver or the tip of a butter knife, taking care not to bend or tear the mesh.
Drop the screen into the same vinegar bowl or bag for a shorter soak, roughly 10 to 15 minutes, since the mesh is thin and clears quickly. Rinse it under running water afterward, checking that light passes evenly through every section of the mesh, then set it back into the connector before reattaching the shower head. Skipping this piece is one of the most common reasons people report “vinegar didn’t fully work” — the nozzles were clear, but the screen behind them was still restricting flow.
Routine Clean vs. Deep Clean: Which Do You Need?
Not every cleaning session needs to be a full soak. It’s worth distinguishing between a quick routine wipe-down that prevents buildup and the deep clean this guide focuses on for reversing buildup that’s already there.
| Approach | What It Involves | Best For | Time Needed |
|---|---|---|---|
| Routine wipe (weekly) | Spray a 50/50 vinegar-and-water solution on the nozzle face, wipe with a cloth | Preventing buildup before it starts | 2–3 minutes |
| Standard soak (monthly) | Bag or bowl soak for 30–60 minutes as described in the main steps above | Typical hard-water households | 30–60 minutes |
| Deep soak (as needed) | Overnight soak plus filter screen cleaning and jet-by-jet clearing | Visible clogging or a big drop in pressure | Overnight |
| Baking soda boost (occasional) | Paste scrub combined with a vinegar soak for stubborn, aged buildup | Fixtures that haven’t been cleaned in 6+ months | 45–90 minutes |
Keeping a quick weekly wipe-down in your routine — the same habit covered in our broader shower maintenance guide — is genuinely the difference between needing an occasional 30-minute soak and needing an overnight rescue mission every few months.
Baking Soda + Vinegar: A Deep-Clean Variant for Stubborn Buildup
For a shower head that hasn’t been cleaned in six months or longer, plain vinegar sometimes needs a mechanical boost. Baking soda’s mild abrasiveness helps physically lift crusted, aged mineral deposits that a chemical soak alone struggles to loosen, especially deposits that have hardened into a thick, chalky shell rather than a thin film.
Make a thick paste using roughly three parts baking soda to one part water, and work it directly into the nozzle face with an old toothbrush, focusing on any visibly crusted spots. Let the paste sit for 10 to 15 minutes so it can start breaking the surface layer down, then proceed directly into a standard vinegar soak as described in Step 3 and Step 4 above. Because baking soda is alkaline and vinegar is acidic, don’t combine them in the same container at the same time — the two neutralize each other in a fizzing reaction that wastes both. Use the paste first as a standalone mechanical pass, rinse it off, and only then move into the vinegar soak.
This two-stage approach — abrasive paste, rinse, then acid soak — consistently outperforms either method used alone on fixtures with heavy, aged buildup, without requiring you to buy a separate commercial descaler.
Handheld vs. Fixed vs. Rain Shower Heads: What Changes
The core vinegar-cleaning method is the same across shower head styles, but a few details shift depending on what you’re working with.
| Type | Removal | Best Soak Method | Special Notes |
|---|---|---|---|
| Standard fixed head | Usually unscrews by hand or with a wrench | Submerge in a bowl | Easiest type to clean thoroughly |
| Handheld with hose | Detaches from the hose cradle or the hose itself unscrews | Submerge the head; the hose interior can be flushed with a vinegar-water mix separately | Check where the hose meets the head for a second small filter screen |
| Rain shower head (ceiling or wall-mounted, wide face) | Rarely removable without disconnecting plumbing | Bag method, sometimes with two bags taped together for a wide face | Has far more nozzles, so scrubbing takes noticeably longer |
| Combo/dual shower systems | Each head usually detaches individually | Clean each head separately, plus the diverter valve if accessible | See our dual shower head combo guide for fixture-specific notes |
If you’re shopping for a wide rain-style head specifically because it’s easier to keep clean, it’s worth comparing options first — our best rainfall shower system roundup highlights models with wider nozzle spacing that resist clogging longer than tightly packed designs.
Testing Your Water Hardness (and Why It Predicts How Often You’ll Be Doing This)
How fast a shower head reclogs after cleaning almost entirely comes down to water hardness, measured in grains per gallon (GPG) or parts per million (ppm) of dissolved calcium carbonate. If you’ve never checked, an inexpensive test strip from a hardware store gives you an answer in about 30 seconds, or you can typically look up your municipal water report online if you’re on a public water supply.
| Hardness Level | Grains Per Gallon (GPG) | Expected Vinegar-Clean Frequency |
|---|---|---|
| Soft | Less than 1 GPG | Every 4–6 months |
| Slightly hard | 1–3.5 GPG | Every 2–3 months |
| Moderately hard | 3.5–7 GPG | Monthly |
| Hard | 7–10.5 GPG | Every 2–3 weeks |
| Very hard | Over 10.5 GPG | Weekly wipe-downs plus a monthly deep soak |
If test results put you in the “hard” or “very hard” range, cleaning alone will always feel like a treadmill — a whole-house or point-of-use water softener addresses the root cause rather than the symptom, and is worth researching if you’re re-cleaning fixtures more than once a month across your whole bathroom.
What You Should Never Mix With Vinegar
Vinegar is safe on its own, but combining cleaning products is where most household chemical accidents happen, so it’s worth being explicit about what to keep separate.
- Bleach: Never combine vinegar with any bleach-based product. The reaction releases chlorine gas, which is toxic even in small, enclosed bathroom spaces.
- Hydrogen peroxide (in the same container): Mixing the two creates peracetic acid, which is corrosive and can irritate skin, eyes, and lungs.
- Commercial descalers like CLR: These are already acidic; combining them with vinegar doesn’t meaningfully boost cleaning power and increases fume intensity for no real benefit.
- Baking soda, in a sealed container: Not dangerous, but the fizzing reaction happens fast and can pop open a poorly sealed bag, so if you do combine them, do it in an open bowl rather than a sealed plastic bag.
If you’re cleaning multiple bathroom surfaces in the same session — say, tackling mold on grout right after descaling the shower head — always rinse and ventilate between products rather than layering cleaners on top of each other.
Don’t Lose the Rubber Washer
Inside the connection point of most removable shower heads sits a small rubber O-ring or washer that creates a watertight seal against the shower arm threads. It’s easy to overlook, especially if it stays inside the arm rather than the shower head when you unscrew the fixture. Before you set the old shower head down and get absorbed in cleaning it, take a second to check both the arm and the shower head connector for this washer.
If it’s missing, cracked, or flattened when you go to reattach the fixture, you’ll likely get a slow drip or spray at the connection point no matter how well you’ve sealed the threads with plumber’s tape — a washer issue is often mistaken for a bad tape job. Replacement washers are inexpensive and sold in multi-packs at any hardware store, so it’s worth keeping a spare on hand if yours looks worn. This is a common enough issue on its own that we cover it in more depth in why is my shower head leaking, including how to tell a washer problem apart from a threading or fitting problem.
Does Vinegar Actually Damage Shower Heads?
This question comes up constantly in home-improvement forums and comment sections, usually from someone who left a shower head soaking overnight and is now worried they’ve ruined it. The short answer is that for the vast majority of shower heads — chrome, stainless steel, and plastic in particular — an overnight soak causes no meaningful damage at all. Plenty of people report forgetting a shower head in a bag of vinegar for a full day or two with no visible harm once it’s rinsed and dried. The acetic acid in household vinegar is comparatively weak, and these finishes are specifically engineered to handle regular exposure to water, soap, and mild acids over years of use.
Where the “vinegar can damage your shower head” warning actually holds up is with plated or coated finishes: brass, gold-tone, nickel, oil-rubbed bronze, and matte black fixtures often rely on a thin lacquer or physical vapor deposition (PVD) coating layered over a base metal. Acetic acid can slowly etch or dull that coating with prolonged exposure, which is why those finishes get a shorter recommended soak time throughout this guide. The damage isn’t structural — your shower head will still function — but the coating can lose its shine or develop a slightly uneven, patchy look that’s difficult to reverse.
The more common source of real problems isn’t the vinegar itself, but what happens afterward. Forgetting to rinse the fixture thoroughly is a bigger risk than soak duration for most finishes, because any acid left sitting inside the nozzle holes or on the surface after the soak keeps working slowly even after you’ve moved on to something else. A full rinse under running water, ideally warm, does more to protect a fixture long-term than being overly cautious about exactly how many hours it spent in the bag.
It’s also worth noting that vinegar is considerably gentler than the alternative most people reach for when vinegar “doesn’t feel strong enough”: stronger acid-based commercial descalers. Those products work faster, but several plumbing professionals and hardware forum regulars specifically caution against reaching for them unless a fixture is genuinely beyond what vinegar can handle, precisely because they’re far less forgiving of finish sensitivity and accidental over-application.
Vinegar vs. Hydrogen Peroxide for Shower Heads
Hydrogen peroxide occasionally comes up as an alternative to vinegar, especially from people focused more on disinfecting than descaling. It’s worth understanding the difference, because the two solve different problems and aren’t interchangeable.
Hydrogen peroxide is a strong oxidizer and a genuinely effective disinfectant — it’s good at breaking down organic material, killing mold spores, and neutralizing certain bacteria and viruses on contact. What it is not particularly good at is dissolving mineral scale. Calcium and magnesium deposits are largely unaffected by peroxide’s oxidizing action, since limescale removal is a chemistry problem that calls for an acid to react with and break down carbonate minerals, not an oxidizer. If your shower head’s main issue is chalky white buildup narrowing the nozzles, a hydrogen peroxide soak will likely leave you just as clogged as before, even after a lengthy soak.
Vinegar, by contrast, is a mild acid that’s specifically effective against mineral scale, and it carries meaningful (though not sterilizing-grade) antimicrobial properties as a secondary benefit. For the standard “my shower head sprays weakly and has visible white crust” scenario that sends most people looking for a fix, vinegar is the correct tool, not peroxide.
| Factor | White Vinegar | Hydrogen Peroxide |
|---|---|---|
| Dissolves mineral scale | Yes — this is its primary strength | Minimal effect |
| Kills mold and bacteria | Moderate antimicrobial effect | Strong oxidizing disinfectant |
| Best used for | Clogged nozzles, low pressure, visible scale | Sanitizing surfaces already free of scale |
| Safe to combine | Never mix directly with peroxide in one container | Never mix directly with vinegar in one container |
| Typical cost | Very low | Low to moderate |
If you want both effects, the safer approach is sequential rather than combined: do a full vinegar soak and rinse first to clear the mineral scale, then, on a separate occasion if disinfection is a specific concern, wipe the nozzle face with a peroxide-dampened cloth and rinse again. Never combine the two directly in the same bag or bowl, since mixing acetic acid and hydrogen peroxide produces peracetic acid, a corrosive compound that can irritate skin, eyes, and airways.
Cleaning Faucets, Aerators, and Other Bathroom Fixtures With the Same Method
Once you’ve got the vinegar bag technique down for a shower head, it’s worth knowing the exact same approach works on nearly every other water fixture in the house that suffers from the identical mineral-buildup problem. This is one of the more useful things about learning this method — it isn’t a shower-specific trick, it’s a general hard-water descaling technique that happens to be most commonly discussed in the context of shower heads.
| Fixture | How to Apply the Method | Typical Soak Time |
|---|---|---|
| Bathroom sink faucet | Bag method, tied around the spout with a rubber band | 30–60 minutes |
| Kitchen faucet aerator | Unscrew the aerator cap and submerge it directly in a small cup of vinegar | 30–60 minutes |
| Bathtub spout | Bag method if the spout can’t be removed | 30–60 minutes |
| Handheld bidet or sprayer heads | Submerge method, same as a removable shower head | 30 minutes |
| Electric kettle (interior) | Boil a vinegar-and-water solution inside, then rinse thoroughly | 15–20 minutes, no scrubbing needed |
| Coffee maker reservoir | Run a brew cycle with a vinegar-water solution, then two rinse cycles with plain water | One brew cycle |
Faucet aerators in particular are worth checking at the same time you clean a shower head, since they’re fed by the same hard-water supply and clog through an identical mechanism. A kitchen or bathroom faucet that’s started spraying unevenly or has visibly slowed down is very likely suffering from the same calcium buildup, just concentrated in the small mesh aerator screen at the tip of the spout rather than in shower nozzles. Unscrewing an aerator usually just takes fingers or a pair of pliers wrapped in a cloth to avoid scratching the finish, and the tiny parts inside — the screen, the flow restrictor disc, and sometimes a small rubber gasket — should all go into the vinegar separately so you don’t lose track of how they’re stacked when reassembling.
One difference worth flagging: kettles and coffee makers involve heat, which speeds up the descaling reaction considerably, so soak times for those appliances are shorter than for a cold-water shower head soak. Always run at least one full rinse cycle with plain water afterward on anything that touches food or drinking water, since a lingering vinegar taste is unpleasant even though it isn’t harmful.
What Vinegar Actually Kills — and What It Doesn’t
Because shower heads are a genuinely favorable environment for microbial growth — warm, damp, low light, and rarely disturbed at the microscopic level — it’s a fair question to ask exactly what a vinegar soak accomplishes on the biological side, not just the mineral side.
Laboratory research on acetic acid’s antimicrobial properties has found it to be effective against a range of common bacteria, including certain strains of E. coli and Staphylococcus aureus, at concentrations similar to household white vinegar. That’s a meaningful result for a cleaning product that costs a few dollars a gallon, and it’s part of why vinegar shows up so often in natural-cleaning circles as a general-purpose household disinfectant alternative to bleach.
Where expectations need to be kept realistic is with the more resistant organisms sometimes found in shower plumbing biofilm, including certain environmental Mycobacterium species and, in rarer and more serious cases, Legionella. These organisms can be considerably more resistant to mild acids than everyday bacteria, and a five-minute or even hour-long vinegar soak is not equivalent to the high-temperature flushing or chlorine-based disinfection protocols public health guidance recommends for addressing a confirmed Legionella concern in plumbing. For the overwhelming majority of households, this distinction doesn’t matter day to day — routine vinegar cleaning combined with regular use (water sitting stagnant in unused fixtures is the bigger risk factor) keeps things well within normal, safe territory. It matters more specifically for anyone who is immunocompromised, managing a household member with a serious respiratory condition, or dealing with a fixture that’s gone unused for many weeks, such as in a vacation home — in those specific situations, it’s worth discussing premise plumbing hygiene with a doctor or a licensed plumber rather than relying on a vinegar soak alone.
Practically speaking, for the standard “my shower head is a little slimy and smells musty” situation, vinegar is doing real, measurable work against the bacterial load, not just placebo psychological comfort. It just isn’t a substitute for medical-grade disinfection in the narrow set of situations where that level of certainty actually matters.
Low-Flow and Water-Saving Shower Heads: Special Considerations
Low-flow shower heads, which restrict output to around 2.0 gallons per minute or less to meet efficiency standards, deserve a specific mention because they’re disproportionately sensitive to the exact clogging problem this guide addresses. A standard shower head pushes more water through each nozzle, which naturally flushes out some loose mineral particles on its own between cleanings. A low-flow head is engineered around narrower internal channels and smaller nozzle openings to begin with, which means even a modest amount of scale buildup represents a much larger percentage reduction in the already-limited opening size.
In practice, this means low-flow and water-efficient shower heads tend to show noticeable pressure drops from mineral buildup faster than standard-flow fixtures, sometimes within just a few weeks in a hard-water home, and the difference between a clean and a lightly clogged low-flow head can feel dramatic since there’s so little flow margin to begin with. The good news is that the vinegar-cleaning process itself doesn’t need to change — the same bag or bowl soak works identically — but the cleaning frequency probably should. If you’ve invested in a low-flow head for water conservation and you’re in a moderately hard or hard water area, plan on the more frequent end of the maintenance schedule covered further down, and consider the quick weekly wipe-down as closer to mandatory than optional.
It’s also worth checking whether your low-flow shower head has a separate, dedicated flow restrictor disc in addition to the standard filter screen — many efficiency-rated models do. That disc has its own small opening that can clog independently of the nozzle face, and it’s easy to miss during a routine soak if you’re only paying attention to the visible spray holes.
DIY Vinegar Cleaning vs. Calling a Plumber
Cleaning a shower head with vinegar is squarely a do-it-yourself task, and calling a plumber for it would be overkill in nearly every situation — there’s no specialized tool, licensing requirement, or safety hazard involved that justifies a service call for descaling alone. That said, it’s useful to know where the line actually sits, because a small number of situations that look like a simple clogged shower head are actually something bigger.
Stick with DIY vinegar cleaning when…
The shower head itself shows visible white or greenish crust, the spray pattern is uneven rather than absent, water pressure elsewhere in the house is normal, and there’s no active leaking at the connection point beyond what a fresh washer and plumber’s tape would fix.
Consider calling a plumber when…
Low pressure affects every fixture in the house (a supply-side or main-line issue, not a shower head problem), there’s a persistent leak inside the wall or at the valve itself, the shower arm is corroded or won’t budge without risking damage to the wall plumbing, or hot water has stopped working entirely rather than just running weak.
A useful diagnostic before reaching for the vinegar at all: temporarily remove the shower head entirely and run the water directly from the exposed arm. If pressure is strong and even with the head off, the problem is almost certainly inside the shower head or its filter screen, and a vinegar soak is exactly the right fix. If pressure is still weak with the head removed, the bottleneck is upstream in the plumbing, and no amount of vinegar soaking will resolve it — that’s the point where it makes sense to consult our low water pressure troubleshooting guide or bring in a professional.
Why Vinegar Is the More Eco-Friendly Descaling Choice
Beyond cost and gentleness, vinegar has a genuine environmental case in its favor compared with most commercial descaling products. Acetic acid breaks down readily in wastewater treatment and in septic systems, unlike some of the harsher synthetic acids and surfactants used in commercial limescale removers, which can be more persistent and require more careful handling and disposal. Because vinegar is derived from fermentation rather than industrial synthesis, its production footprint is also generally lower than that of manufactured descaling chemicals.
For households on a septic system specifically, this matters more than it might for those on municipal sewer. Harsh chemical cleaners in large or repeated quantities can disrupt the bacterial balance that septic tanks depend on to break down waste. Vinegar used in the moderate quantities involved in a shower head soak — typically a cup or two, poured down the drain after use — is broadly considered septic-safe, which isn’t something you can say with confidence about every bottle of blue-labeled commercial descaler under the sink.
There’s also a simple packaging and consumption argument: a single large jug of white vinegar lasts through dozens of cleaning sessions across multiple fixtures, compared with single-purpose spray bottles of commercial descaler that get thrown away once empty. For anyone specifically trying to reduce the number of separate chemical cleaning products in their bathroom cabinet, standardizing on vinegar for shower heads, faucets, kettles, and general limescale removal cuts down on both cost and clutter at the same time.
Vinegar Concentration Explained: Does Strength Matter?
Not all vinegar sold at the store is the same strength, and it’s worth understanding the differences before assuming a stronger bottle will simply work faster with no downside.
| Type | Typical Acetic Acid % | Good for Shower Heads? |
|---|---|---|
| Standard white distilled vinegar | ~5% | Yes — the standard, tested choice for this guide |
| “Cleaning vinegar” (grocery store) | ~6% | Yes, works slightly faster; treat sensitive finishes with extra caution |
| Apple cider vinegar | ~5% | Works similarly but can tint or leave odor on porous surfaces |
| Horticultural or industrial vinegar | 20% or higher | Not recommended — too aggressive for home fixtures and finishes |
For nearly every shower head cleaning scenario, standard 5% white distilled vinegar is the correct choice — it’s been the basis for every soak time and finish recommendation throughout this guide. Going up to 6% “cleaning vinegar” shaves a little time off a soak but doesn’t fundamentally change the process, and it’s not worth seeking out specifically. Going far beyond that, into horticultural-strength vinegar sold for weed control, is a mistake: those concentrations are strong enough to cause real skin and eye irritation and can etch metal finishes far more aggressively than intended, with no proportional benefit for a household descaling task.
If a soak seems to be working too slowly even after the recommended time, the fix isn’t a stronger vinegar — it’s usually either a longer soak, a fresh batch of vinegar (since it becomes diluted and less effective as it absorbs dissolved minerals from the deposits it’s dissolving), or the baking soda paste pre-treatment covered earlier in this guide for especially aged buildup.
Cleaning Disk-Style and Modern Rain Shower Heads: A Closer Look
Large, flat, disk-style rain shower heads — the wide, ceiling-mounted or wall-mounted panels that have become popular in remodeled bathrooms — deserve their own closer look because their internal design is meaningfully more complex than a traditional handheld or standard fixed shower head, and that complexity changes how thoroughly a vinegar soak can reach every clogged point.
A traditional shower head usually has a single water inlet feeding a relatively shallow chamber behind the nozzle face, so a soak or bag treatment reaches essentially the entire interior evenly. A wide disk-style head, by contrast, often distributes water across a much larger internal chamber with multiple internal baffles or channels designed to spread flow evenly across dozens or even over a hundred individual nozzles. That larger, more complex internal geometry means mineral deposits can accumulate unevenly across the disk, and a soak that fully submerges the visible nozzle face may still leave some interior channels only partially exposed to the vinegar, especially with the bag method rather than full removal.
For a fixed disk-style head that can’t be removed from the ceiling or wall, use two overlapping plastic bags rather than one to ensure the entire wide face stays submerged, since a single standard bag often isn’t large enough to cover the whole disk evenly. Secure with two rubber bands, one on each side, rather than a single band around the center, and check partway through the soak that vinegar hasn’t drained away from one edge.
Because these fixtures have so many more nozzles than a standard head — sometimes well over a hundred individual holes — the scrubbing and toothpick-clearing step described in Step 5 takes noticeably longer. It’s worth budgeting extra time rather than rushing through it, since a few missed clogged nozzles on a disk-style head are much less noticeable visually than on a smaller, standard head, but they still add up to reduced overall pressure.
Preventing Water Spots After Rinsing
A shower head that’s freshly cleaned and rinsed can still end up looking spotty within a day or two if the final drying step gets skipped, especially on chrome, glass-adjacent fixtures, or polished finishes in hard-water homes. The spots that form aren’t new buildup from a dirty fixture — they’re simply the same calcium and magnesium minerals in your water drying on the surface again, just this time forming on the outside of the shower head rather than inside the nozzles.
The fix is straightforward: after the final rinse in Step 6, take an extra thirty seconds to wipe the entire exterior of the shower head dry with a microfiber cloth rather than letting it air dry. Water that air-dries on a surface leaves mineral residue behind exactly the same way it does inside the nozzles; water that’s wiped away while still wet doesn’t get the chance to evaporate and deposit minerals on the finish. This is a small step, but it’s the difference between a shower head that looks freshly cleaned for weeks and one that develops a hazy, spotted look within days, particularly in hard water areas.
For households that want to extend this habit beyond just the shower head, wiping down glass shower doors and any exposed chrome trim with the same cloth right after a shower — while the water is still fresh rather than dried — meaningfully cuts down on the need for the more intensive descaling jobs covered in our guide to removing hard water stains from shower glass.
Common Vinegar Cleaning Myths vs. Facts
| Myth | Fact |
|---|---|
| Overnight soaking will always ruin a shower head | True mainly for plated or coated finishes; chrome, stainless, and plastic tolerate overnight soaks well |
| Stronger vinegar always cleans faster and better | Standard 5% white vinegar is sufficient; higher concentrations mainly add irritation risk, not proportional benefit |
| Mixing vinegar and baking soda together makes a more powerful cleaner | The fizzing reaction neutralizes both; use them as separate, sequential steps instead |
| Vinegar disinfects a shower head as well as bleach | Vinegar has real but moderate antimicrobial effects; it isn’t a hospital-grade disinfectant |
| If vinegar doesn’t work, the shower head needs replacing | Often it’s the internal filter screen or a flow restrictor still clogged, not the nozzles themselves |
| Apple cider vinegar works better because it’s “more natural” | Similar acidity to white vinegar, but more prone to staining and odor — no cleaning advantage |
Vinegar vs. Other Descaling Methods
Vinegar is popular because it’s cheap and gentle, but it isn’t always the fastest or strongest option. Here’s how it stacks up against common alternatives.
| Method | Effectiveness on Heavy Buildup | Cost | Finish Safety | Fumes |
|---|---|---|---|---|
| White vinegar soak | Good, may need repeat soaks | Very low | Safe for most, risky for some plated finishes if left too long | Mild, non-toxic |
| CLR or commercial descaler | Excellent | Moderate | Can be harsh on soft or coated finishes | Stronger, ventilate room |
| Baking soda paste | Fair, mostly surface residue | Very low | Very safe | None |
| CLR + vinegar combo | Excellent | Moderate | Use with caution | Moderate |
| Ultrasonic cleaner | Excellent | Higher (equipment) | Safe | None |
For persistent buildup that vinegar alone won’t shift, our guide to removing hard water stains in a shower covers stronger approaches, and if the problem extends to glass panels rather than just the fixture, see how to remove hard water stains from shower glass.
Pros and Cons of Cleaning with Vinegar
Pros
- Inexpensive and always available
- Non-toxic and food-safe
- Effective on typical calcium and magnesium buildup
- No harsh fumes compared to bleach-based cleaners
- Works with both removable and fixed shower heads
Cons
- Slower than commercial descalers on heavy buildup
- Extended soaking can dull certain plated or antique finishes
- Strong smell during the soak
- Not effective on rust stains, only mineral scale
- May need repeating for very old fixtures
If rust rather than limescale is the issue, vinegar won’t fully resolve it — check how to remove rust stains from a shower floor for a rust-specific approach.
Cleaning by Shower Head Finish Type
Not every finish tolerates the same soak time. Here’s a general guide, though always check manufacturer instructions if you have them.
| Finish | Max Recommended Soak | Notes |
|---|---|---|
| Chrome | Up to overnight | Very durable, tolerates vinegar well |
| Brushed nickel | 30–60 minutes | Rinse promptly to avoid dulling |
| Oil-rubbed bronze | 15–20 minutes | Prolonged acid exposure can strip the coating |
| Matte black | 15–20 minutes | Avoid abrasive scrubbing on the coating |
| Polished brass | 20–30 minutes | Can tarnish with extended soaking |
| Plastic (handheld/economy heads) | Up to overnight | Generally very tolerant |
Choosing the right replacement finish matters too if a fixture is beyond saving — our best handheld shower heads review and best shower heads roundup both break down durable options by finish and spray type.
How Often to Repeat This
In hard water areas, a monthly vinegar soak keeps buildup from ever becoming severe. In soft water areas, every few months is usually enough. Pairing this with a regular shower maintenance routine — squeegeeing walls, wiping the head dry after use — slows redeposit significantly. If you’re also dealing with grout or glass buildup at the same time, tackle it together using how to clean shower grout without scrubbing.
Common Mistakes to Avoid
- Using metal tools on rubber nozzles — a metal pin can tear silicone jets; use a wooden toothpick instead.
- Skipping the rinse step — leftover vinegar can leave a faint film or odor.
- Over-soaking delicate finishes — matte black and oil-rubbed bronze are especially sensitive to long acid exposure.
- Forcing a stuck fixture — twisting too hard can crack plastic threads; use penetrating oil and gentle pressure instead.
- Not checking the bag seal — a loose rubber band lets the bag slip and vinegar drip everywhere.
Still Not Working After Cleaning?
If the spray pattern is still poor after a thorough vinegar clean, the issue may not be inside the shower head at all. A clogged inline filter, a partially closed shutoff valve, or sediment further up the line can all mimic the symptoms of a scaled-up nozzle. Start with how to increase shower water pressure for a broader troubleshooting checklist, and if water isn’t getting hot at all rather than just weak, that’s a separate issue covered in why your shower isn’t getting hot and fixing a shower with no hot water.
A lingering musty smell even after cleaning can point to mold in the hose or drain rather than the shower head itself — see musty shower smell after cleaning for next steps, or how to unclog a shower drain naturally if slow drainage is part of the problem.
Frequently Asked Questions
Can I use apple cider vinegar instead of white vinegar?
Yes, apple cider vinegar has similar acidity, but it can leave a faint tint or odor and is generally more expensive, so plain white distilled vinegar is the more practical choice for cleaning.
How long should I soak a shower head in vinegar?
30 minutes to an hour clears typical buildup. For heavy scale, an overnight soak works well on durable finishes like chrome, but check the finish guide above before soaking delicate coatings that long.
Do I need to dilute the vinegar with water?
For standard buildup, undiluted vinegar works fine. Some people dilute it half-and-half with water for sensitive finishes, which slows the reaction slightly but is gentler.
Is vinegar safe for all shower head finishes?
Chrome and plastic tolerate it very well. Oil-rubbed bronze, matte black, and polished brass are more sensitive and should have shorter soak times, as noted in the finish table above.
My shower head isn’t removable — can I still clean it this way?
Yes, use the plastic bag method: fill a bag with vinegar, slide it over the fixture so the nozzle face is submerged, and secure it with a rubber band.
Why does my shower head get clogged so quickly?
This usually points to hard water in your area. Softening the water or wiping the fixture dry after each use slows how fast deposits reform.
Can vinegar remove rust stains too?
Vinegar dissolves mineral scale but is far less effective on rust. For rust specifically, see our dedicated guide on removing rust stains linked above.
What if scrubbing and soaking don’t clear the jets?
Try a second, longer soak, then gently clear individual holes with a wooden toothpick. If jets remain blocked after that, the shower head’s internal mesh filter may be clogged and worth inspecting separately.
Is it safe to mix vinegar with baking soda for extra power?
The fizzing reaction looks dramatic but neutralizes both ingredients quickly, actually reducing cleaning effectiveness. It’s better to use vinegar alone for descaling and baking soda paste separately for scrubbing surface grime.
How do I know if buildup is mineral scale versus mold?
Mineral scale is typically white, chalky, and hard, concentrated right at the nozzle holes. Mold is usually darker, softer, and can appear along seams or inside the hose rather than just the nozzle face.
Will cleaning my shower head with vinegar also help with my kitchen faucet or kettle?
Yes — the same soak-and-scrub approach works on faucet aerators, kettles, and coffee makers, since they all clog through the same mineral-scale mechanism, though heated appliances typically need shorter soak times.
Does vinegar disinfect a shower head as well as bleach or hydrogen peroxide?
Vinegar has real but moderate antimicrobial effects against common bacteria; it isn’t a hospital-grade disinfectant and shouldn’t be relied on for serious disinfection needs, but it’s sufficient for routine household maintenance.
Conclusion
Cleaning a shower head with vinegar is one of the simplest, cheapest bathroom fixes there is — no special tools required, and in most cases, a single soak restores a strong, even spray. The key steps are straightforward: identify whether your fixture is removable, soak the nozzle face in vinegar for 30 minutes to overnight depending on the finish, scrub and clear the jets, rinse thoroughly, and reattach with fresh plumber’s tape. Repeating this every month or two in hard water areas keeps buildup from ever becoming a bigger job.
If your shower head is beyond saving after cleaning, or you’re simply ready for an upgrade, browse our best shower heads roundup for durable, easy-to-maintain options.

Ready for a fixture that’s easier to keep clean long-term? Look for shower heads with self-cleaning silicone nozzles that resist mineral buildup.
Check Price on Amazon