
How to Fix Low Shower Water Pressure: The Complete DIY Guide
This post contains affiliate links. If you purchase through these links, we may earn a commission at no additional cost to you. Learn more about shower maintenance.
Why Does Shower Water Pressure Drop in the First Place?
A weak, dribbling shower stream can turn an energizing morning ritual into a frustrating ordeal. Before you reach for your tools, it helps to understand what is actually happening inside your plumbing. Low shower water pressure can originate from several different sources, and identifying the root cause is the fastest path to a lasting fix.
The most common culprits include mineral buildup inside the shower head nozzles, which gradually chokes off water flow over months and years. This is especially common in areas with hard water, where dissolved calcium and magnesium leave behind stubborn deposits. If you have noticed white, crusty spots on your fixtures, mineral scale is almost certainly part of the problem.
Another frequent cause is a partially closed shut-off valve. During past plumbing work or emergency repairs, a valve may have been turned down and never fully reopened. It sounds simple, but it is one of the most overlooked explanations for low shower pressure.
Your home’s pressure regulator — a bell-shaped valve typically installed near the water meter — controls how much pressure enters your entire plumbing system. If it is set too low, fails internally, or becomes clogged with debris, every faucet and shower in your home will feel the effects.
Clogged or corroded supply lines can also reduce the volume of water reaching your shower. Older galvanized steel pipes are especially prone to internal rust and mineral buildup that narrows the pipe diameter over time. In some cases, the problem is external — a municipal water supply issue or a leak in the main line serving your neighborhood.
Finally, modern flow restrictors — small plastic discs inside many shower heads — are designed to conserve water but sometimes reduce flow too aggressively. If your shower head is relatively new and pressure was fine at first but has declined, a partially blocked restrictor could be the reason.
Understanding these causes sets the stage for the hands-on troubleshooting steps that follow. Each method targets a specific failure point, so working through them in order — from easiest to most involved — will save you time and money.
Tools and Supplies You Will Need
Gathering everything before you start prevents mid-project trips to the hardware store. Here is a practical list of the tools and materials that cover virtually every repair method in this guide.
| Item | Purpose | Estimated Cost |
|---|---|---|
| White vinegar (1 gallon) | Dissolving mineral deposits | $3–5 |
| Plastic zip-lock bag | Soaking the shower head in place | $1 |
| Rubber bands or twist ties | Securing the vinegar bag around the shower head | $1 |
| Old toothbrush | Scrubbing individual nozzles | Free |
| Adjustable wrench | Removing and tightening shower head connections | $10–15 |
| Plumber’s tape (Teflon tape) | Sealing threads on new connections | $2–4 |
| Needle-nose pliers | Removing flow restrictors and small components | $8–12 |
| Channel-lock pliers | Adjusting shut-off valves and larger fittings | $12–18 |
| Baking soda | Alternative cleaning agent for severe buildup | $2 |
| Pipe wrench (optional) | Working on supply line connections | $15–25 |
You probably already own most of these items. The vinegar soak method alone — using just vinegar, a bag, and a rubber band — can resolve the majority of low-pressure issues caused by mineral buildup. If you end up needing to replace the shower head entirely, having plumber’s tape on hand ensures a drip-free connection.
For homeowners tackling pressure regulator or supply line issues, a basic adjustable wrench and channel-lock pliers will cover the job. Only reach for a pipe wrench if you are working with older, larger-diameter pipes that require extra grip force.

Plumbing Wrench Set
A quality adjustable wrench set covers most DIY shower repairs. Includes channel-lock pliers for valve adjustments.
Check Price on AmazonStep 1: Inspect the Shower Head for Visible Buildup
The shower head is the last stop before water hits your skin, making it the most common source of low pressure. Start with a visual inspection — no tools required. Look closely at the nozzles (the small holes where water exits). If you see white, chalky residue around the openings or notice that some nozzles are completely blocked, mineral deposits are choking your water flow.
Stand under the shower and observe the spray pattern. A healthy shower head produces a full, even spray across all nozzles. If the water is shooting out in uneven streams, with some nozzles producing a strong jet while others dribble or produce nothing at all, you are looking at a classic mineral buildup pattern. The deposits concentrate around the nozzle edges, narrowing the opening and forcing water through fewer exits.
On rain-style or multi-setting shower heads, check both the outer ring of nozzles and the central ones. These heads have more nozzles and a wider surface area, which means more spots for minerals to accumulate. A quick visual check takes sixty seconds and tells you whether a simple cleaning will solve the problem or whether you need to investigate further upstream.
If your shower head looks relatively clean but pressure is still low, do not rule it out yet. Some mineral deposits form inside the internal channels of the head where you cannot see them. In that case, proceed to the vinegar soak method in the next step — it addresses both visible and hidden buildup.
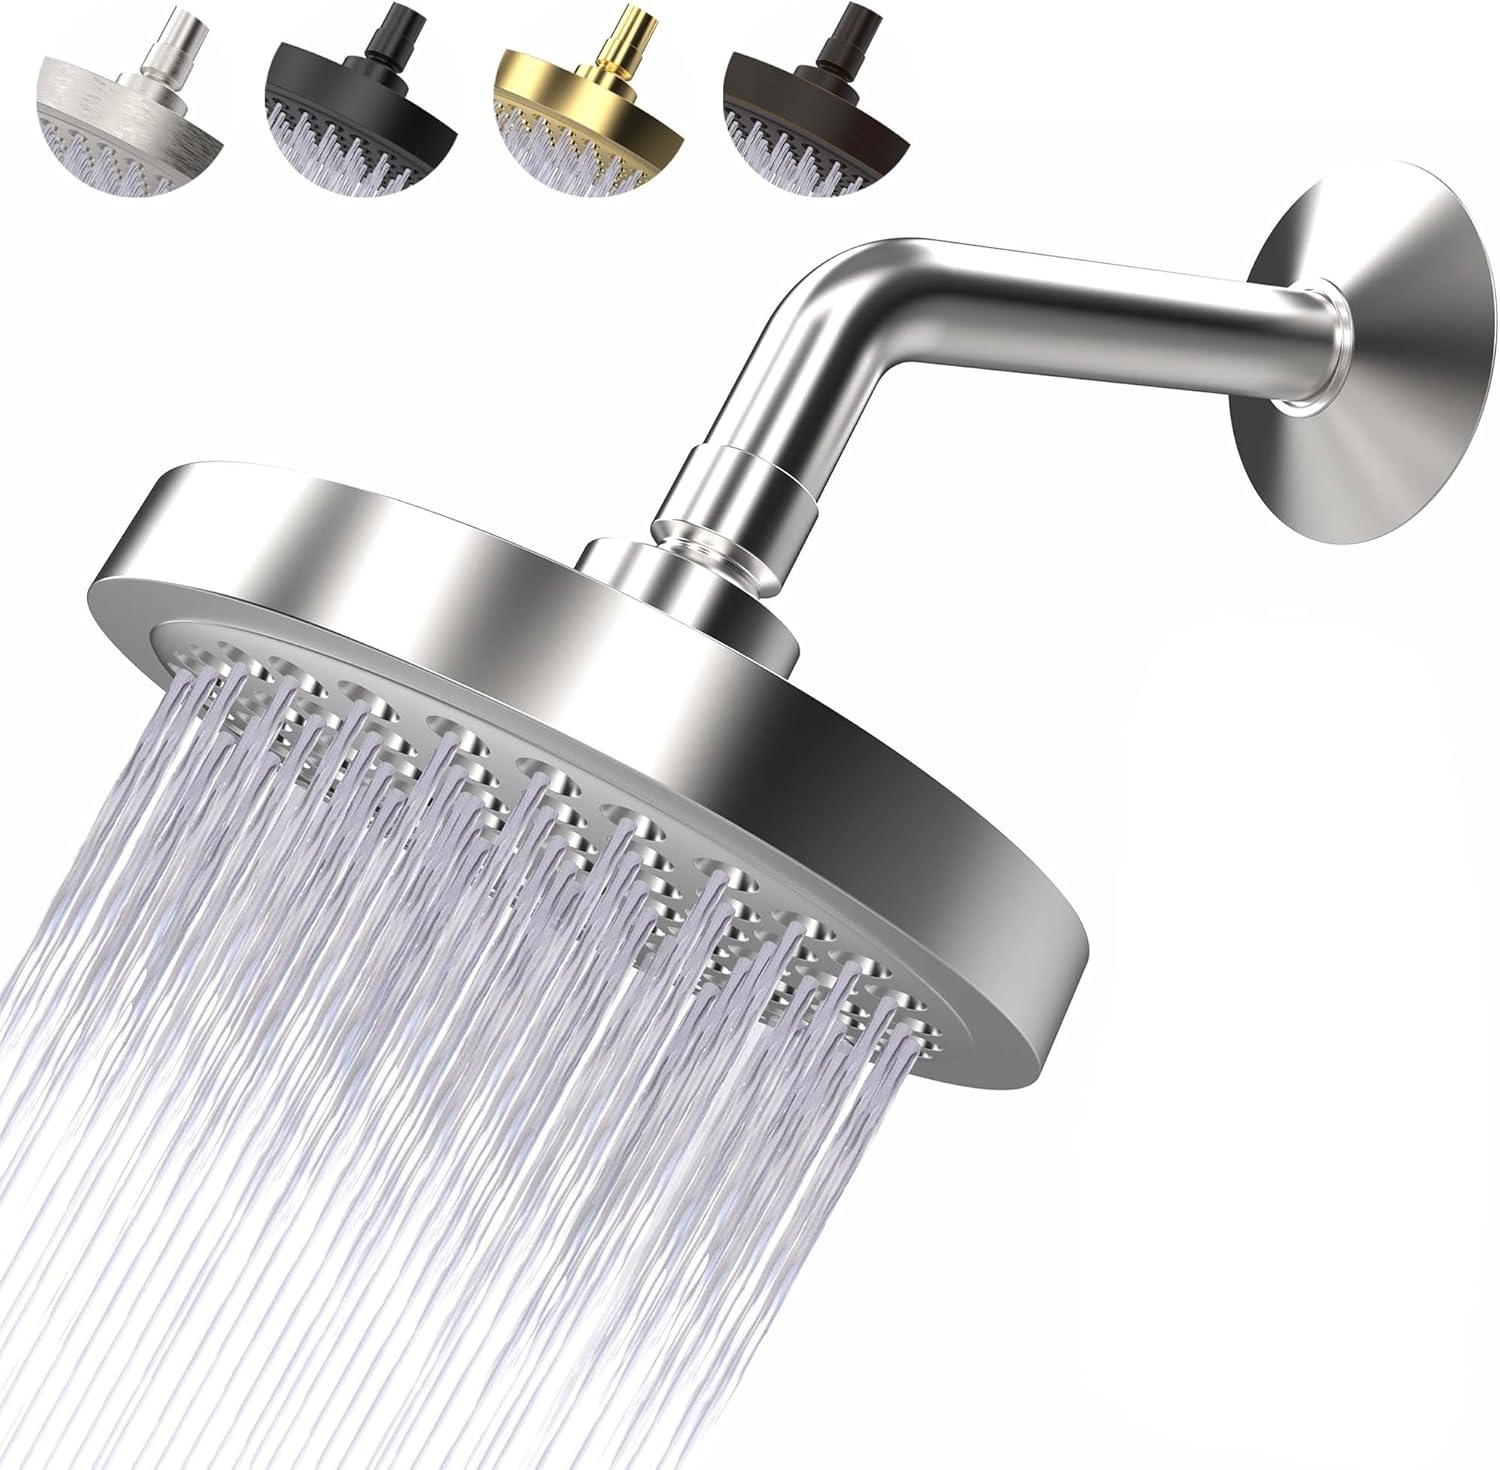
High-Pressure Shower Head with Anti-Clog Nozzles
Silicone nozzles resist mineral buildup and can be cleaned with a simple finger swipe. Great upgrade if your current head is beyond saving.
Check Price on AmazonStep 2: Clean the Shower Head Nozzles
Once you have confirmed that mineral deposits are the culprit, a thorough cleaning can restore your shower to full strength. The quickest method works on any shower head — whether it is fixed, handheld, or a multi-setting model — and requires no disassembly.
Method A — The Vinegar Bag Soak: Pour enough white vinegar into a gallon-sized zip-lock bag to fully submerge the shower head. Position the bag over the shower head so the nozzles are immersed in vinegar, then secure the bag in place with a rubber band or twist tie wrapped around the shower arm. Let it soak for at least four hours, though overnight yields the best results for heavy buildup.
After soaking, remove the bag and use an old toothbrush to scrub each nozzle individually. The softened deposits will come away easily. Run the shower for a minute to flush out any remaining debris, and you should notice an immediate improvement in spray pattern and pressure.
Method B — Baking Soda Paste: For stubborn deposits that vinegar alone does not fully dissolve, mix baking soda with a small amount of water to form a thick paste. Apply the paste directly onto the nozzle openings and let it sit for thirty minutes. The mild abrasive action of baking soda helps break down mineral scale that vinegar softens but does not completely remove. Scrub with the toothbrush, rinse, and test.
Method C — Needle Clearing: If individual nozzles remain blocked after soaking, straighten a paperclip or use a toothpick to gently poke through each clogged opening. Work carefully — you are clearing the blockage, not widening the nozzle hole. This step is especially useful for shower heads with very small nozzle openings, like rain-style heads.
For shower heads that are removable, taking the head off entirely gives you deeper access. Unscrew the head from the shower arm with an adjustable wrench (wrap a cloth around the arm to prevent scratching), then submerge the head in a bowl of undiluted white vinegar. This method works best when buildup is severe or when the shower head has complex internal waterways that a surface soak cannot reach.
Cleaning the nozzles resolves low pressure in roughly 70 to 80 percent of cases, making it the single most effective DIY fix. If your pressure does not improve after a thorough cleaning, the issue likely lies upstream in the valves, supply lines, or pressure regulator — so continue to the next steps.

Shower Head Cleaning Brush Kit
Designed to reach into individual nozzles and scrub away mineral deposits. Works on all shower head types.
Check Price on AmazonStep 3: Deep Descaling for Heavy Mineral Buildup
When a vinegar bag soak does not fully restore pressure, it is time for a more aggressive descaling approach. This step is particularly effective for homes with very hard water, where mineral deposits have accumulated over years and formed hardened scale that surface cleaning cannot dissolve.
Full vinegar immersion: Remove the shower head completely by unscrewing it from the shower arm. Fill a bowl or bucket with enough undiluted white vinegar to fully submerge the head. Place the shower head face-down in the vinegar so that the nozzles are in direct contact with the liquid. Let it soak for a minimum of eight hours — twelve hours or overnight is ideal for heavy scale. The prolonged immersion allows vinegar to penetrate the internal waterways and dissolve deposits that a surface soak misses.
After soaking, lift the shower head out and use a stiff nylon brush — an old dish brush works well — to scrub every surface, paying special attention to the nozzle plate and any visible channels. Rinse under hot water and use a toothpick or paperclip to clear any remaining individual nozzle blockages.
Vinegar and baking soda combo: For the toughest mineral scale, pour baking soda into the shower head’s openings after the vinegar soak. The chemical reaction between the acidic vinegar residue and the alkaline baking soda creates a fizzing action that helps break apart deposits deep inside the nozzles. Let the fizzing subside, then rinse thoroughly with hot water.
Commercial descaler: If vinegar and baking soda do not fully dissolve the scale, commercial calcium and lime removers are available at most hardware stores. These products are formulated specifically for hard water deposits and work faster than household vinegar. Follow the manufacturer’s instructions carefully, wear gloves, and ensure good ventilation when using chemical descalers.

CLR Calcium, Lime & Rust Remover
Industrial-strength descaler that dissolves heavy mineral deposits in minutes. Safe for most plumbing fixtures.
Check Price on AmazonStep 4: Check the Shut-Off Valves
If cleaning the shower head did not resolve the problem, the next place to look is your shut-off valves. These small valves control the water supply to individual fixtures, and a partially closed valve is one of the most common — and most easily overlooked — causes of low shower pressure.
For a single-handle shower valve, the shut-off valve is typically located behind an access panel on the wall opposite the shower, or in the ceiling if the shower is on an upper floor. If your home has a basement or crawl space, you may find it below the shower fixture. Turn the valve handle fully counterclockwise to ensure it is completely open. Even a valve that is three-quarters open can significantly reduce water volume and pressure.
For dual-handle showers (separate hot and cold handles), look for two shut-off valves — one for each supply line. Both must be fully open for adequate pressure and proper temperature mixing. A partially closed hot-water valve, for example, will reduce overall flow and may cause the water to feel cooler than expected.
Some homes have main shut-off valves that control the entire water supply. If you recently had plumbing work done, the main valve may have been partially closed and not fully restored. Locate your main shut-off valve — usually near the water meter or where the supply line enters your home — and verify it is in the fully open position.
Gate valves vs. ball valves: Older homes often have gate valves (round handle you turn multiple rotations) while newer plumbing uses ball valves (quarter-turn lever). With a gate valve, turn the handle counterclockwise until it stops — do not force it past the stop point, as this can damage the valve stem. With a ball valve, the lever should be parallel to the pipe when fully open. If the lever is perpendicular to the pipe, the valve is closed.
While you are inspecting valves, check for visible leaks around the valve body. A dripping shut-off valve may indicate a worn washer or gasket that needs replacement. Even a small leak at the valve can reduce pressure downstream and signal that the valve is nearing the end of its service life.
After verifying all valves are fully open, turn the shower on and test the pressure. A simple valve adjustment takes less than five minutes and can produce a dramatic improvement if the valve was indeed partially closed.
Step 5: Inspect the Water Pressure Regulator
The water pressure regulator (also called a pressure-reducing valve or PRV) is a bell-shaped device installed on the main water line where it enters your home. Its job is to reduce the incoming municipal water pressure — which can exceed 80 psi — to a safe level for your plumbing, typically between 40 and 60 psi. When the PRV malfunctions or is set too low, it restricts water flow to every fixture in the house, including your shower.
Finding the PRV: Look for the valve near your water meter, where the main supply line enters the house, or in the basement near the front wall. It will look like a bell or dome-shaped housing with a bolt on top and a locknut around the adjustment screw.
Checking the pressure setting: If you have a pressure gauge (inexpensive at any hardware store), attach it to a hose bib or washing machine faucet and note the reading. Normal residential pressure should fall between 40 and 60 psi. Anything below 40 psi at the fixture level suggests the PRV may be restricting flow.
Adjusting the PRV: Loosen the locknut on top of the regulator, then turn the adjustment bolt clockwise to increase pressure or counterclockwise to decrease it. Make small adjustments — a quarter turn at a time — and test the shower after each adjustment. When you find the right setting, tighten the locknut to secure the bolt in place.
When the PRV needs replacement: If adjusting the bolt does not change your water pressure, or if the PRV is more than ten to fifteen years old, it may have failed internally. Signs of a failing PRV include inconsistent pressure (pressure fluctuates without any fixtures being turned on), water hammer (banging pipes), and visible corrosion or leaking around the valve body. A PRV replacement typically costs $200 to $400 including parts and labor when done by a plumber, or $50 to $100 for the part alone if you are comfortable with DIY plumbing.
Step 6: Check the Supply Lines
Supply lines are the pipes that carry water from the shut-off valve to the shower head. Over time, these lines can develop internal blockages from mineral deposits, corrosion, or debris. In older homes with galvanized steel pipes, the interior of the pipe can become so restricted by rust and scale that water flow drops dramatically even when the shower head and valves are in perfect condition.
Signs of supply line problems: If your shower pressure is low but every other fixture in the bathroom has normal pressure, the issue is likely in the supply line feeding the shower specifically. If low pressure affects multiple fixtures on the same floor or in the same bathroom, the problem may be in a shared branch line.
Checking flexible supply lines: Many modern shower installations use flexible braided stainless steel supply lines that connect the shut-off valve to the shower valve. These lines can develop kinks, mineral blockages, or internal liner collapse. Disconnecting the line at both ends and running water through it into a bucket will tell you whether the line is restricted. If water flow is weak through the disconnected line, replacing it is a straightforward fix.
Checking rigid supply pipes: For homes with copper or PEX rigid supply lines, diagnosis is more complex. A significant drop in pressure at one fixture but not others usually indicates a partial blockage in the line. Flushing the line — temporarily disconnecting the shower head and opening the valve to blast water through the line — can dislodge loose debris. If flushing does not help, the pipe may have internal corrosion or scale that requires professional assessment.
If you suspect corroded pipes are the issue — especially in homes built before the 1970s that may have galvanized steel plumbing — a professional plumber can perform a pressure test to determine whether pipe replacement is needed. Replacing galvanized pipes with modern PEX or copper is a significant investment but eliminates recurring pressure problems caused by internal pipe corrosion.
Step 7: Replace the Shower Head
If cleaning, valve adjustments, and supply line checks have not restored your shower pressure, replacing the shower head itself is a cost-effective and often highly effective solution. Modern high-pressure shower heads are engineered to maximize water velocity even at normal household pressure, producing a noticeably stronger spray than older or basic models.
Choosing the right replacement: Look for shower heads marketed as “high-pressure” or “pressure-boosting.” These designs use smaller nozzle openings, internal air-injection technology, or optimized spray patterns to create the feeling of stronger water flow without actually increasing water consumption. Many high-pressure heads are WaterSense certified, meaning they meet EPA efficiency standards while still delivering satisfying pressure.
Removal: Use an adjustable wrench to loosen the connection between the shower head and the shower arm. Wrap a cloth around the shower arm to prevent the wrench from scratching the finish. Turn counterclockwise to unscrew the old head. Clean the threads on the shower arm with a rag to remove old plumber’s tape and any mineral residue.
Installation: Wrap the shower arm threads with two to three layers of plumber’s tape in a clockwise direction. This prevents leaks at the connection. Screw the new shower head onto the shower arm by hand until snug, then give it a quarter turn with the wrench. Do not overtightighten — hand-tight plus a quarter turn is sufficient for most shower heads.
After installation, turn the shower on slowly and check for leaks at the connection point. If you see dripping, turn off the water, remove the head, add another layer of plumber’s tape, and reinstall. A properly taped and tightened connection should be completely drip-free.

AquaDance High-Pressure Shower Head
6-setting shower head with rub-clean silicone nozzles. Consistently rated as one of the best upgrades for low-pressure showers.
Check Price on AmazonStep 8: Remove or Adjust the Flow Restrictor
Many modern shower heads come with a built-in flow restrictor — a small plastic or metal disc designed to limit water flow and conserve energy. While these restrictors serve an important environmental purpose, they can reduce pressure to the point where the shower feels weak and unsatisfying, especially if your home already has lower-than-average water pressure.
Locating the restrictor: Remove the shower head from the shower arm (as described in Step 7). Look inside the threaded connection end of the shower head. You will typically see a small colored disc — often blue, green, or white — sitting inside the opening. This is the flow restrictor. Some shower heads have the restrictor accessible from the nozzle side, while others require removing a retaining ring or washer first.
Removing the restrictor: Use needle-nose pliers or a small flathead screwdriver to carefully pry the restrictor disc out of its seat. Some restrictors simply lift out; others snap into place and require gentle leverage. Be careful not to damage the surrounding rubber washer or O-ring, as these are essential for a watertight seal when you reinstall the head.
Testing without the restrictor: Reinstall the shower head without the restrictor and test the pressure. Most homeowners notice a significant improvement immediately. The shower spray will feel fuller and more forceful, particularly on heads with small nozzle openings that are most affected by flow restriction.
Important considerations: Removing the flow restrictor increases water consumption, which may affect your water bill and is not legal in all jurisdictions. Some states and municipalities mandate maximum flow rates for shower heads, and removing a restrictor may put you out of compliance. Check your local regulations before making this change. If you prefer a compromise, you can drill a slightly larger hole in the restrictor rather than removing it entirely, providing a moderate flow increase without exceeding legal limits.
For detailed comparisons of shower heads that balance pressure and efficiency, check our guides on the best shower heads and best rainfall shower systems.
Step 9: When to Call a Professional Plumber
Most low shower pressure problems are fixable with the DIY methods covered in this guide. However, some situations require the expertise, tools, and diagnostic equipment that only a licensed plumber can provide. Knowing when to stop troubleshooting and call a pro saves you time, prevents further damage, and ensures the underlying problem gets a proper fix.
Situations that warrant professional help:
- Low pressure throughout the entire house: If every faucet, shower, and outdoor spigot has weak pressure, the problem is in your main supply line or at the municipal level. A plumber can test your incoming pressure and determine whether the issue is on your side of the meter or the city’s responsibility.
- Visible leaks in walls or ceilings: Water stains, damp spots, or actively dripping water near plumbing suggest a broken or corroded pipe behind the wall. This requires immediate professional attention to prevent structural damage and mold growth.
- Discolored water: Brown, yellow, or rusty water accompanying low pressure indicates pipe corrosion or sediment in the supply line. A plumber can identify the source and recommend whether pipe replacement or flushing is needed.
- Water hammer or banging pipes: Loud banging or thudding sounds when you turn the shower on or off can indicate trapped air, loose pipe straps, or a malfunctioning pressure regulator. While sometimes harmless, persistent water hammer can damage pipes and fittings over time.
- DIY fixes have not worked: If you have cleaned the shower head, verified all valves are open, checked the PRV, and inspected supply lines without improvement, a plumber has access to diagnostic tools like pressure gauges, pipe cameras, and flow meters that can pinpoint hidden problems.
When choosing a plumber, look for a licensed professional with positive reviews and experience in residential plumbing. Ask for a written estimate before any work begins, and verify that they are insured. Most reputable plumbers offer free or low-cost consultations for diagnostic visits, giving you a clear picture of the problem and repair cost before committing to the work.
For homes with persistent low pressure despite good plumbing, upgrading to an electric shower designed for low water pressure can provide a reliable solution. These units heat and boost water pressure independently of your home’s plumbing system.

Digital Water Pressure Gauge
Test your water pressure before calling a plumber. Identifies whether the problem is in your plumbing or at the supply level.
Check Price on AmazonBest High-Pressure Shower Heads for Low Water Pressure
If your home’s water pressure is inherently low — whether due to a basement apartment, an upper-floor unit, or a municipal supply that simply does not deliver strong pressure — investing in a shower head specifically designed to maximize flow at low pressures can make a transformative difference. Here are the top options that consistently deliver satisfying spray even when inlet pressure is below average.
| Shower Head | Type | Best For | Flow Rate | Key Feature |
|---|---|---|---|---|
| AquaDance 6-Setting | Fixed mount | Best overall value | 2.5 GPM | Spray face with rub-clean nozzles |
| SparkPod Rain Shower | Rainfall fixed | Luxury feel on a budget | 2.5 GPM | Large 6-inch spray face |
| High Sierra All Metal | Single-function | Maximum pressure | 1.5 GPM | Patented nozzle for strong stream |
| HotelSpa Handheld | Handheld | Flexible use | 2.5 GPM | 7 spray settings + pause trigger |
| Delta HydroRain | Dual head | Rain + handheld combo | 2.5 GPM | Magnetic dock for handheld |
Benefits of Upgrading
- Instant pressure improvement without plumbing changes
- Modern spray technology maximizes every gallon
- Many models are WaterSense certified
- Easy five-minute installation
- Anti-clog silicone nozzles reduce maintenance
Considerations
- Cannot fix pressure problems caused by valves or pipes
- Some high-pressure heads are louder than standard models
- Very low inlet pressure (under 30 psi) may still feel weak
- Dual-head systems require more installation effort
- Check local flow rate regulations before removing restrictors
For households with extremely low pressure, combining a high-pressure shower head with a handheld shower head offers both performance and convenience. Handheld models let you position the spray closer to your body, which feels stronger even at lower flow rates.

Best Dual Shower Head Combo
Combines a fixed rainfall head with a handheld unit for maximum coverage and pressure. Perfect for low-pressure situations.
Check Price on AmazonCheck our full reviews of the best handheld shower heads and best dual shower head combos for more options and detailed comparisons.
Preventing Low Shower Pressure Long-Term
Fixing low shower pressure once is satisfying, but preventing it from returning requires a few simple maintenance habits. These proactive steps keep your shower performing at its best year after year and protect your plumbing investment.
Regular cleaning schedule
Set a reminder to clean your shower head every three to four months. A quick vinegar soak — even just thirty minutes with the bag method — prevents mineral deposits from accumulating to the point where they restrict flow. For homes with very hard water, monthly cleaning keeps nozzles clear and maintains consistent pressure. See our full guide on removing hard water stains for more cleaning tips.
Install a shower head filter
A shower water filter does more than improve water quality — it also traps mineral particles before they reach the nozzles, significantly extending the time between cleanings. Filters are inexpensive, easy to install between the shower arm and head, and replaceable cartridges typically last three to six months. Read our review of the Aquabliss shower filter for a top-rated option.
Monitor your water pressure
Periodically testing your water pressure with an inexpensive gauge helps you catch declining pressure early. A sudden drop in pressure often signals a developing problem — a partially failing PRV, an emerging blockage, or a leak — that is cheaper and easier to address before it becomes a major issue.
Address plumbing issues promptly
Do not ignore small plumbing problems. A dripping valve, a pinhole leak in a supply line, or a slowly draining shower can all be early symptoms of larger issues that eventually affect water pressure. Prompt repairs prevent minor problems from escalating into expensive overhauls.
For homeowners dealing with ongoing hard water issues, a whole-house water softener is the most comprehensive solution. While it requires an upfront investment, it protects every pipe, valve, and fixture in your home from mineral scale — not just the shower. Our guide on cleaning shower grout and shower mold cleaners covers related maintenance that keeps your entire bathroom in top condition.
Frequently Asked Questions
Why is my shower water pressure suddenly low?
Sudden low shower water pressure is most commonly caused by a clogged shower head from mineral buildup, a partially closed shut-off valve, or issues with your water supply line. In some cases, it can also be caused by a failing pressure regulator or a problem at the municipal water supply level. Start by checking the shower head and valves before investigating deeper plumbing issues.
Can I fix low shower water pressure myself?
Yes, most causes of low shower water pressure can be fixed with basic DIY methods. Cleaning a clogged shower head, adjusting the shut-off valve, or replacing a faulty pressure regulator are all tasks that most homeowners can handle with minimal tools. The vinegar soak method alone resolves the majority of cases.
How do I clean mineral buildup from my shower head?
Fill a plastic bag with white vinegar, submerge the shower head in it, and secure the bag with a rubber band. Let it soak overnight, then scrub the nozzles with an old toothbrush and rinse thoroughly. For extreme buildup, remove the shower head and soak it directly in undiluted vinegar for eight to twelve hours.
What is a water pressure regulator and does it affect my shower?
A water pressure regulator is a valve installed near your water meter that controls the pressure of water entering your home. If it is set too low or is malfunctioning, it will reduce water flow to every fixture including your shower. You can adjust it with a wrench or replace it if it has failed internally.
How do I check if my shut-off valve is fully open?
Locate the shut-off valve for your shower — usually behind an access panel or under the sink for a dual-handle setup. Turn the valve handle fully counterclockwise to ensure it is completely open. For ball valves (lever-style), the lever should be parallel to the pipe when fully open.
Should I replace my shower head to improve water pressure?
Replacing your shower head is a good option if cleaning does not restore pressure, or if your current head has a built-in flow restrictor you want to remove. High-pressure shower heads are specifically designed to maximize water flow and can make a noticeable difference, especially in homes with below-average inlet pressure.
Is low shower pressure a plumbing emergency?
Low shower pressure alone is rarely a plumbing emergency. However, if it is accompanied by discolored water, visible leaks, or low pressure throughout the entire house, it could indicate a more serious issue like a broken supply line or a water main problem that requires prompt professional attention.
Can hard water cause low shower pressure?
Yes, hard water is a leading cause of low shower pressure. The calcium and magnesium minerals in hard water gradually build up inside shower head nozzles and pipes, restricting water flow over time. Regular cleaning and installing a water filter or softener can help prevent mineral buildup from forming.
How do I know if my pipes are clogged?
Signs of clogged pipes include low water pressure at multiple fixtures, discolored water, gurgling sounds in the walls, and slow drainage. If only your shower is affected, the problem is likely the shower head, valve, or local supply line rather than your home’s main pipes.
When should I call a plumber for low shower pressure?
You should call a plumber if DIY fixes do not resolve the issue, if low pressure affects the entire house, if you suspect a leak in your plumbing, or if you are uncomfortable working with shut-off valves or pressure regulators. A plumber can diagnose hidden problems like corroded pipes or municipal supply issues.
Conclusion: Enjoy Strong, Refreshing Showers Again
Low shower water pressure is one of the most common — and most fixable — plumbing frustrations homeowners face. As this guide has shown, the solution ranges from a five-minute valve adjustment to a complete shower head replacement, with most problems falling somewhere in between. The key is systematic troubleshooting: start with the simplest, most likely causes and work your way toward more involved solutions.
For the majority of homeowners, the winning formula is straightforward: clean the shower head regularly, verify all valves are fully open, and invest in a high-pressure shower head designed for your water conditions. These three steps alone resolve low pressure in the vast majority of cases without calling a plumber or spending significant money.
When DIY methods reach their limit, a licensed plumber has the tools and expertise to diagnose deeper issues like failing pressure regulators, corroded pipes, or municipal supply problems. And for homes with chronically low pressure, upgrading to a specially designed low-pressure shower head or an electric shower unit provides a reliable, permanent solution.
Whatever the cause of your low shower pressure, the steps in this guide give you a clear, proven path to restoring the strong, satisfying water flow you deserve. Start with Step 1 today, and enjoy the difference a properly functioning shower makes in your daily routine.
Ready to Fix Your Low Shower Pressure?
Start with the vinegar soak method — it resolves 70-80% of low-pressure issues in under 24 hours. For the best results, pair it with a high-pressure shower head upgrade.
Explore Our Top Shower Head PicksFor more shower tips, product reviews, and maintenance guides, explore our complete collection at ShowerInsider.com. Whether you need help with fixing a leaking shower head, unclogging a shower drain, or choosing the best steam shower, we have you covered.