
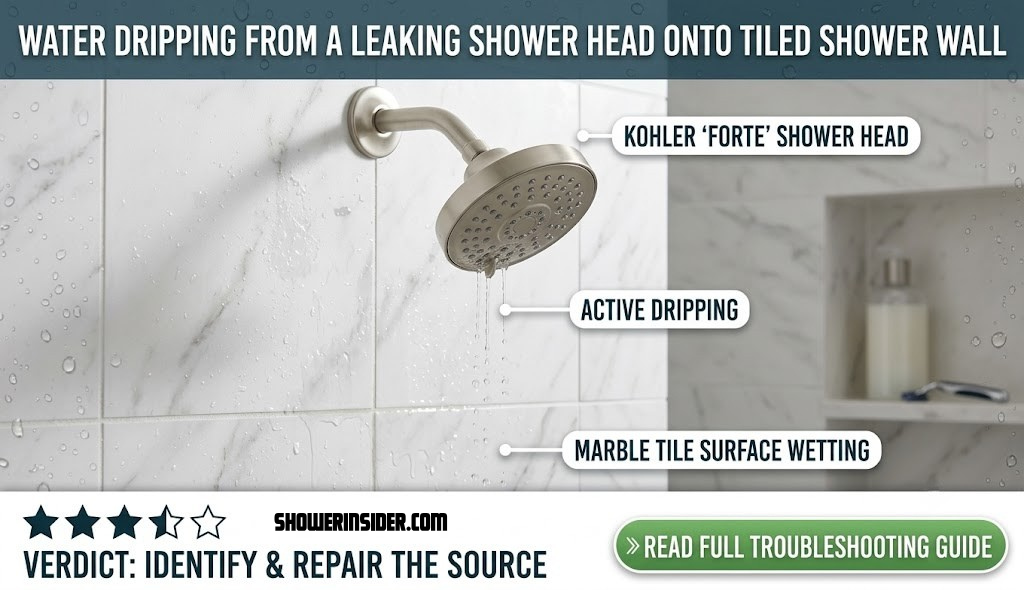
How to Fix a Leaking Shower Head: A Complete Step-by-Step Guide
That slow drip isn’t just annoying — it’s wasting water and money every single day. Here’s exactly how to stop it, tool by tool, step by step.
Why Shower Heads Leak in the First Place
A leaking shower head almost always comes down to one of three culprits: a worn rubber washer, mineral buildup blocking a proper seal, or a loose connection where the shower head meets the pipe. Hard water is the biggest long-term enemy here — over months of use, calcium and lime deposits harden inside the nozzle holes and around the threading, which pushes water pressure into the wrong places and forces it out through the connection point instead of the spray face.
If you’ve already ruled out the shower head itself, it’s worth reading why your shower head might be leaking for a deeper breakdown of root causes, since sometimes the real issue is upstream in the valve or pipe rather than the head itself.
It helps to understand the anatomy of the connection before you start unscrewing anything. Every fixed shower head threads onto a shower arm using a standard pipe thread — usually a half-inch NPT (National Pipe Thread) fitting in North America, or BSP threading in the UK and much of Europe. That threaded joint relies on two things working together: the physical compression of the threads themselves, and a secondary sealing layer, which is either the plumber’s tape wrapped around the threads or a rubber washer sitting inside the head’s swivel ball joint. When either of those fails, water finds the path of least resistance and escapes at the seam rather than exiting through the spray nozzles where it belongs.
There’s also a pressure component worth understanding. Household water pressure typically runs between 40 and 80 psi. A shower head is engineered to release that pressure evenly across dozens of small nozzle openings. When even a handful of those openings get clogged with mineral scale, the same volume of water has to squeeze through fewer exits, which raises the effective pressure at every remaining opening — including the internal seals. This is why a shower head that leaks lightly at first often gets progressively worse over a few weeks: the clog causing the backpressure keeps growing, and the seal keeps degrading a little more with every shower.
Shower Head Types and Their Unique Leak Points
Not every shower head fails the same way, and knowing which type you have narrows down the likely cause before you even pick up a wrench.
Fixed Wall-Mounted Shower Heads
This is the most common type and the one covered in the step-by-step section of this guide. Leaks typically show up right at the connecting nut where the head threads onto the shower arm, and the fix is almost always the O-ring, the tape, or mineral buildup described above.
Handheld Shower Heads
Handheld units add a second failure point: the flexible hose. Leaks can occur at either end of the hose — where it connects to the wall bracket or holder, and where it connects to the handheld wand itself. Both ends use small rubber gaskets rather than plumber’s tape, so a worn hose gasket is usually the culprit rather than a threading issue.
Rainfall and Ceiling-Mounted Shower Heads
Rain shower heads mount on a much larger diameter arm, and because the head itself is heavier, it puts more mechanical stress on the connection over time. Gravity working against a slightly loose fitting will produce a leak faster than it would on a smaller, lighter fixed head, so these benefit from re-checking the tightness of the connection every few months.
Dual and Combo Shower Head Systems
If you’re running a dual shower head combo, the diverter valve that splits water between the fixed head and the handheld wand becomes a third possible leak source, in addition to the two head connections themselves. A worn diverter can cause water to trickle from the head that’s supposedly turned off, which is often mistaken for a leaking head when the actual part at fault is the diverter cartridge.
Low-Flow and Filtered Shower Heads
Filtered shower heads add an internal cartridge housing with its own set of O-rings on both sides of the filter chamber. These extra seals mean there are simply more points where a leak can start, so if you have a filtered head, check both the filter housing seams and the standard arm connection before assuming it’s the same fix as a standard head.
Before You Start: Tools & Safety Prep
You don’t need to be a plumber to handle this. Gather these basics first so you’re not dripping water halfway through a step:
- Adjustable wrench or channel-lock pliers
- PTFE plumber’s tape (thread seal tape)
- An old toothbrush
- White vinegar (distilled, undiluted)
- A soft cloth or old towel
- A small sandwich bag and rubber band (for the vinegar soak)
Wrap the wrench jaws in a cloth or tape before gripping any chrome or finished fittings — bare metal jaws will scratch the finish permanently.

Grab the basics in one kit — an adjustable wrench, PTFE tape, and a cleaning brush cover almost every shower head repair.
Check Price on AmazonStep 1: Shut Off the Water Supply
Before touching anything, turn off the water. Most homes don’t have a dedicated shut-off valve just for the shower, so you’ll typically shut off the main water supply to the bathroom, or the whole house if that’s the only option. Turn the shower handle on briefly afterward to bleed off any remaining pressure in the line.
If you’re unsure where your main shut-off is, it’s typically located where the water line enters the house — near the water meter, in a basement, utility closet, or crawl space in colder climates, or in an outdoor valve box in warmer regions. Newer homes sometimes have a secondary shut-off specifically for the bathroom or even for individual fixtures, which saves you from cutting water to the entire house for a simple repair. Take a moment to locate this before you start, since fumbling for a shut-off valve with water already running is a much more stressful version of the same five-minute task.
Step 2: Remove the Shower Head
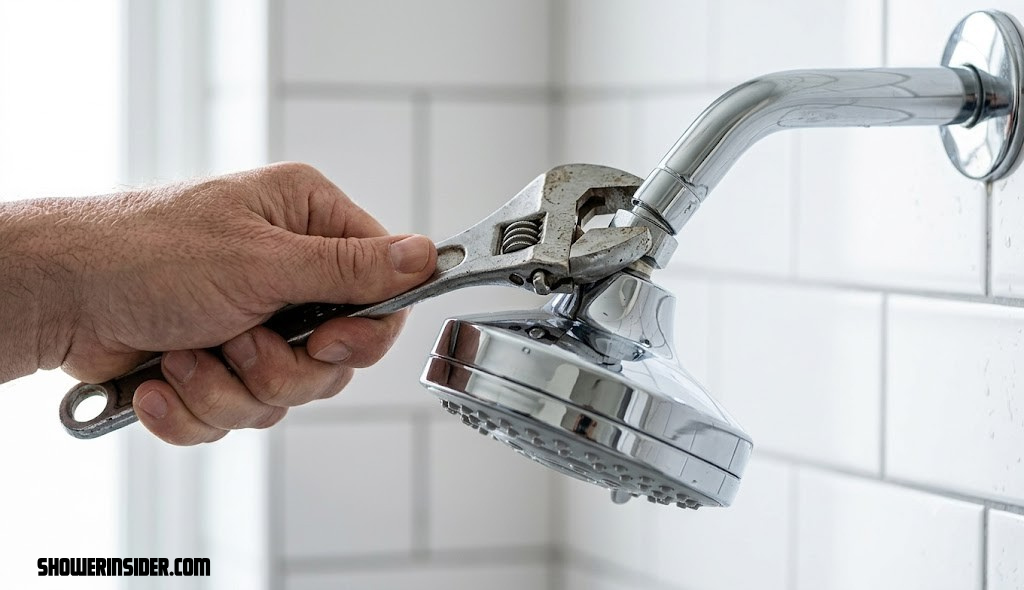
Wrap the connecting nut (the hex-shaped fitting where the shower head meets the shower arm) with a cloth, then grip it with your wrench and turn counter-clockwise. Some shower heads unscrew entirely by hand once loosened — twist gently so you don’t damage the threads.
If the nut doesn’t budge at first, resist the urge to force it immediately. A few drops of white vinegar or a penetrating lubricant left on the threads for five to ten minutes can loosen mild corrosion enough to make the next attempt much easier. Once it starts turning, keep steady, even pressure rather than short aggressive jerks, which reduces the risk of the wrench slipping off the nut and scraping the surrounding finish.
Step 3: Inspect the O-Ring and Rubber Washer
Inside the connecting nut, you’ll find a small rubber O-ring or washer. This is the part that actually creates the watertight seal. If it looks cracked, flattened, or brittle, that’s very likely your leak’s source — and it’s a cheap, five-minute fix to replace.
Replacement O-rings are inexpensive and sold in universal multi-packs. Match the diameter as closely as possible.
To remove the old O-ring, gently pry it out with a fingernail or the flat edge of a small tool, being careful not to scratch the seat it sits in. Before installing the replacement, wipe the seat clean of any old rubber fragments or grime, since debris trapped underneath a new O-ring can prevent it from seating fully and create a leak identical to the one you just fixed. A light film of plumber’s grease on the new O-ring can help it seat smoothly, though it’s optional for most standard repairs.

Universal O-ring assortment kit — covers nearly every shower head and faucet size so you always have the right fit on hand.
Check Price on AmazonStep 4: Clean Mineral Buildup from the Nozzles
Fill a sandwich bag with plain white vinegar, submerge the shower head’s spray face, and secure it around the neck with a rubber band. Let it soak for 30–60 minutes — longer for heavy limescale. The acid in the vinegar dissolves calcium deposits clogging the nozzle holes, which restores even water flow and reduces the backpressure that often causes leaks at the connection.
Afterward, scrub the nozzle face with an old toothbrush to loosen any remaining residue, then rinse thoroughly under running water before reattaching.
For heavily clogged heads, a straightened paperclip or a toothpick can help clear individual nozzle openings that the vinegar and brush didn’t fully unclog — insert it gently rather than forcing it, since the openings are often narrower than they look. If buildup is severe and this is a recurring issue every few weeks rather than every few months, it’s a sign your home has notably hard water, and a whole-home or point-of-use water softener may be worth considering as a longer-term fix rather than repeating this cleaning cycle indefinitely.
Step 5: Reapply Plumber’s Tape to the Threads
Wrap PTFE plumber’s tape clockwise around the threaded end of the shower arm — clockwise matters, because it should tighten in the same direction you’ll be screwing the head on, not unravel. Three to four wraps is usually enough to create a firm, leak-proof seal.
Before wrapping fresh tape, remove any old tape residue completely — leftover strands from a previous repair can bunch up unevenly under the new wrap and actually create gaps rather than filling them. Pull the tape taut as you wrap so it beds tightly into the thread grooves rather than sitting loosely on top of them, and tear it off cleanly at the end rather than leaving a long trailing edge that can catch and unravel as you thread the shower head back on.
Step 6: Reattach the Shower Head and Test for Leaks
Screw the shower head back on by hand until snug, then give it a final quarter-turn with your cloth-wrapped wrench — don’t overtighten, as that can crack the fitting or compress the O-ring unevenly. Turn the water back on and run the shower for a minute, checking closely around the connection nut for any dripping.
If it’s still leaking after this process, the issue is likely deeper in the shower valve or wall pipe, not the head itself — that’s a good moment to review how to replace a shower faucet or bring in a licensed plumber.
Cartridge and Valve Leaks Explained
If the six steps above haven’t stopped the leak, the problem has usually moved from the shower head itself into the valve buried in your wall — the part you control with the shower handle. Modern showers use one of three valve mechanisms: compression valves (older two-handle setups with rubber washers), cartridge valves (a single replaceable cylinder that controls both flow and temperature), or ceramic disc valves (two ceramic discs that slide against each other to control water).
Cartridge valves are by far the most common in homes built or renovated in the last two decades, and they’re also the most common source of a leak that seems to come from “nowhere” — water dripping from the shower head hours after the shower was last used, for instance. Over time, the rubber seals on the cartridge itself wear down, letting a small amount of water bypass the closed position and slowly work its way through the pipe and out the head. This is different from the seal issues covered in Steps 3 and 5, because no amount of retightening the shower head will fix a worn cartridge — the valve itself has to be pulled and replaced.
Replacing a cartridge usually involves removing the shower handle, unscrewing a retaining nut or clip, and pulling the old cartridge straight out before pushing in a matching replacement — matching the exact brand and model matters here, since cartridges are not universal. If you’re comfortable with basic plumbing work, this is a moderate DIY job; if you’re not, this is one of the more common reasons homeowners bring in a professional, since incorrect reassembly can cause water hammer or inconsistent temperature control. For a full walkthrough of related valve and faucet work, see our guide on how to replace a shower faucet.
Handheld Shower Hose Leaks
If your setup includes a handheld wand, don’t overlook the hose itself as a leak source — it’s easy to fixate on the head when the actual failure is at either connection point along the hose. Start by inspecting the small rubber washer inside the coupling nut where the hose meets the wall bracket or arm. These washers are usually flatter and thinner than the ones used at a fixed head connection, and they tend to wear out faster because the hose flexes and rotates with regular use, putting more mechanical stress on the seal than a stationary connection experiences.
Next, check the connection at the handheld wand end of the hose using the same approach — hand-tighten first, then a quarter turn with a wrench if needed, checking for a worn washer before assuming the threading itself is the problem. If the leak is coming from a pinhole or crack partway along the length of the hose rather than at either end, the hose itself needs replacing rather than repairing; braided stainless steel hoses tend to outlast the plastic-core versions that ship with many entry-level handheld kits.
Other Common Leak Sources to Rule Out
If you’ve replaced the O-ring, cleaned the nozzles, and re-taped the threads but water is still escaping, check these less obvious spots:
- The shower arm itself — a hairline crack in the arm can leak even with a perfect head connection.
- The diverter valve — if you have a dual shower head setup, a worn diverter can send water to both heads at once, creating what looks like a leak.
- Low water pressure fittings — inconsistent pressure can sometimes force water backward through weak seals; see our guide on increasing shower water pressure if flow feels uneven.
- Wall-mounted valve leaks — water appearing to drip from the head but actually running down from behind the tile usually points to the in-wall valve, not the head.
- Damaged shower door or curtain seals — while not technically a shower head leak, water escaping the enclosure can pool near the base and get mistaken for a head or pipe leak; if your enclosure itself seems to be the issue, our guide to shower doors covers common sealing problems.
- Corroded shower arm threading — in older homes with galvanized steel plumbing, corrosion inside the arm threading can prevent tape or washers from creating a clean seal no matter how many times you redo the wrap.
Seasonal and Winter Pipe Considerations
Leaks have a habit of showing up — or getting worse — right after a cold snap, and that’s not a coincidence. Water expands as it freezes, and even a brief freeze in an exposed section of pipe (common in unheated basements, exterior walls, or vacation homes) can stress joints and connections that were previously sealed just fine. If your leak appeared suddenly after a cold night rather than gradually over weeks, inspect the shower arm and any exposed supply piping for hairline cracks in addition to checking the O-ring and tape, since a temperature-related crack won’t be fixed by re-tightening alone.
Homes in colder climates also see more mineral scale buildup in winter months, ironically, because water heaters are often run at higher temperatures, and hot water carries dissolved minerals more readily to the surfaces they eventually deposit on. If you’re chasing recurring leaks every winter, a slightly more frequent vinegar-soak schedule during the colder months can help offset this.
Water Waste and Real Cost Impact
It’s easy to underestimate how much a “small” drip actually costs, both in water and in money. A shower head dripping at roughly one drop per second wastes somewhere in the neighborhood of 3,000 to 5,000 gallons of water per year, depending on drop size and household water pressure. At typical municipal water and sewer rates, that translates into noticeable extra cost on a water bill — often in the range of an additional $20 to $50 annually for a single leaking fixture, and considerably more if the leak is a steady trickle rather than an occasional drip.
Beyond the direct utility cost, a persistent leak in a shower stall can contribute to excess moisture in the bathroom, which creates favorable conditions for mold and mildew growth on tile, grout, and caulking. If you’re already dealing with recurring mold issues, it’s worth checking whether a slow shower head leak is part of what’s feeding the problem — our guides on shower mold cleaners and fixing a musty shower smell after cleaning both cover moisture-related causes that often trace back to a fixture that isn’t sealing properly.
Brand-Specific Notes: Does the Fix Change by Manufacturer?
The core repair process — O-ring, tape, mineral cleaning — is essentially universal across manufacturers, since almost every fixed shower head threads onto a standard half-inch NPT arm regardless of brand. That said, a few brand-specific quirks are worth knowing before you start.
Delta and Moen
Both brands are common in North American homes and use fairly standard cartridge designs, which makes replacement parts easy to source. If you’re comparing the two for a future purchase or replacement, our Delta vs. Moen shower head performance comparison breaks down flow consistency and long-term durability between them. If you’re troubleshooting a Delta unit specifically, our Delta shower head review and Delta shower system reviews cover known quirks with specific model lines.
Kohler
Kohler systems sometimes ship with slightly finer nozzle openings, which can make them more sensitive to mineral scale backpressure than other brands — meaning the vinegar-soak step in this guide is worth doing more proactively. If you’ve noticed inconsistent pressure alongside a leak, our Kohler low-pressure test walks through diagnosing whether it’s a clog or a design characteristic.
Grohe and Hansgrohe
These premium European brands often use BSP threading rather than NPT, which means replacement O-rings and washers aren’t always interchangeable with generic North American multi-packs — check the diameter carefully before buying. For a deeper look at how these two compare on leak resistance and build quality, see our Hansgrohe vs. Grohe vs. Kohler performance comparison, or our standalone Grohe shower system reviews and Hansgrohe shower system reviews.
Budget and Value Brands
Value-tier brands such as Glacier Bay, SR Sun Rise, Esnbia, Embather, and Himk generally use simpler internal designs, which actually makes the O-ring and tape fix in this guide even more reliable, since there are fewer proprietary parts involved. If you’re troubleshooting one of these specifically, our reviews of the Glacier Bay faucet line, the SR Sun Rise shower system, the Esnbia shower system, the Embather shower system, and the Himk shower system all include notes on common leak points reported by owners.
Electric and Combi-Boiler Showers
Electric showers work differently from standard mixer showers, since they heat water on demand rather than mixing pre-heated hot and cold supply lines. Leaks in these units are more often related to the heating unit’s internal seals than the head itself, and should generally be handled with more caution given the electrical component. If you’re dealing with one, our Triton T80Z electric shower review and our roundup of the best digital showers for combi boilers cover unit-specific maintenance guidance.
Renters and Rental Properties: What You Can (and Can’t) Fix
If you’re renting rather than a homeowner, the steps in this guide are still almost entirely safe to perform yourself, since they involve the shower head itself rather than permanent plumbing modifications — removing a shower head, cleaning it, and reattaching it doesn’t alter the property in any way a landlord would object to. It’s still worth keeping the original shower head aside if you swap in a replacement, so you can reinstall it before moving out.
Where the line gets more complicated is anything involving the in-wall valve or cartridge covered earlier in this guide. Opening up a wall valve, replacing a cartridge, or doing any work that could affect the plumbing system as a whole is generally something to flag to a landlord or property manager first, both because it may be their responsibility to handle and because unauthorized modifications to fixed plumbing can occasionally create disputes over a security deposit. A quick message documenting the leak and your troubleshooting steps protects you either way, even if you end up doing the head-level repair yourself in the meantime.
When to Upgrade Instead of Repair
Sometimes the more sensible move isn’t repairing the existing shower head at all, but replacing it — particularly if the unit is old, has visible corrosion on the housing, or if you’ve already gone through the O-ring, tape, and cleaning steps more than once for the same head. A new shower head is a relatively small expense compared to the time spent on repeated repairs, and it’s also a natural opportunity to reconsider your setup entirely.
If your bathroom’s water pressure has always felt underwhelming, this can be a good moment to look into a rainfall shower system or review our broader guide on installing a rainfall shower head, both of which are designed around more even flow distribution. If low pressure specifically has been a recurring frustration rather than just an occasional annoyance, our list of the best electric showers for low water pressure and our broader recommended electric showers roundup are worth a look. And if you’ve been considering a bigger upgrade altogether, our guides on best steam showers and steam shower generators cover what’s involved in that kind of renovation.
Quick Reference Checklist
If you just want the short version to run through while you’re standing in the shower with a wrench in hand, here’s the whole repair condensed into a single checklist:
- Shut off the water supply and bleed remaining pressure from the line
- Wrap the connecting nut with a cloth and unscrew the shower head counter-clockwise
- Inspect the O-ring or washer for cracking, flattening, or brittleness
- Soak the nozzle face in a vinegar-filled bag for 30–60 minutes to clear mineral buildup
- Scrub the nozzle holes gently with an old toothbrush and rinse thoroughly
- Wrap fresh PTFE plumber’s tape clockwise around the shower arm threads, 3–4 wraps
- Reattach the shower head by hand, then snug it with a cloth-wrapped wrench — don’t overtighten
- Turn the water back on and run the shower for a full minute, checking closely for drips at the connection
- If the leak persists, move on to checking the cartridge, valve, or hose connection rather than repeating the head-level steps
Fix It Yourself vs. Call a Plumber
DIY Repair
- Costs under $15 in parts
- Takes 15–30 minutes
- No appointment needed
- Great for O-ring, tape, and mineral buildup issues
Calling a Plumber
- Better for in-wall valve or pipe damage
- Costs $75–$200+ for a service call
- Necessary if leak persists after DIY steps
- Required for major re-piping work
To put real numbers behind that comparison: a full DIY repair kit covering a wrench, plumber’s tape, and an O-ring assortment typically runs under $15 total, and most of those supplies last through several future repairs rather than being single-use. A plumber’s service call, by contrast, usually starts with a flat trip or diagnostic fee in the $75–$150 range before any parts or labor for the actual fix are added, and a cartridge or valve replacement performed by a professional can push the total past $200 once labor is included, particularly if any tile or wall access is required to reach the valve body.
The deciding factor really comes down to where the leak is located. Anything at the shower head connection — the O-ring, the threading, the mineral buildup — sits squarely in DIY territory for almost anyone comfortable using a wrench. Anything that requires opening the wall, replacing a cartridge you can’t identify, or dealing with corroded galvanized piping is where the math starts to favor a professional, both for the specialized tools involved and for the risk of turning a small leak into a larger water-damage problem if a repair goes wrong.
Recommended Tools Comparison
| Tool | Best For | Approx. Price |
|---|---|---|
| Adjustable Wrench | Loosening/tightening connection nut | $10–$18 |
| PTFE Plumber’s Tape | Sealing threaded connections | $3–$6 |
| O-Ring Multi-Pack | Replacing worn rubber seals | $6–$12 |
| White Vinegar | Dissolving mineral/limescale buildup | $3–$5 |
| Channel-Lock Pliers | Extra grip on stubborn fittings | $12–$20 |
Tool-by-Tool Deep Dive
Adjustable Wrench vs. Channel-Lock Pliers
Either tool works for this repair, but they behave a little differently. An adjustable wrench gives you a flat, parallel jaw that distributes force evenly across the flats of a hex nut, which is gentler on finished chrome or brushed-nickel surfaces. Channel-lock pliers grip at an angle and can dig into softer finishes if you’re not careful with the cloth wrap, but they offer more leverage on a stuck or corroded nut. If your connection hasn’t been touched in years and feels seized, start with the wrench and only switch to pliers if the wrench genuinely can’t get it moving.
Choosing the Right PTFE Tape
Plumber’s tape isn’t one-size-fits-all — it comes in different thicknesses and colors, with thicker “high-density” tape typically used for gas line connections rather than water fittings. For a shower head repair, standard white PTFE tape rated for water lines is the right choice; avoid the yellow gas-rated tape, which is formulated differently and isn’t necessary here.
Vinegar Concentration and Alternatives
Plain white distilled vinegar (roughly 5% acidity) is strong enough to dissolve calcium and lime deposits without damaging chrome, brushed nickel, or most other common shower head finishes. Diluting it isn’t necessary for this repair, but if your shower head has a matte black or specialty finish, it’s worth checking manufacturer guidance first, since some coatings are more sensitive to prolonged acid exposure than standard chrome.
O-Ring Sizing
O-rings are sized by inner diameter, outer diameter, and thickness. A universal multi-pack is the easiest way to make sure you have a close match on hand without needing to measure precisely beforehand, since you can simply test a few sizes against the original ring until you find one that seats the same way.
Regional Plumbing Standard Differences
If you’re following this guide outside North America, it’s worth knowing that thread standards differ by region, which can affect which replacement parts fit. North American homes typically use NPT (National Pipe Thread) fittings, which have a tapered profile that seals partly through the taper itself and partly through the tape or washer. The UK, Australia, and much of Europe more commonly use BSP (British Standard Pipe) threading, which has a different thread pitch and, in some variants, a parallel rather than tapered profile relying more heavily on a washer for the seal.
Practically, this means an O-ring or shower head purchased in one region may not thread correctly onto a shower arm manufactured to the other region’s standard, even though they look similar at a glance. If you’ve recently moved, imported a shower head, or are working with an older or unusually branded fitting, double-check the thread standard before assuming a universal repair kit will fit without modification.
Recommended Maintenance Schedule
A shower head rarely fails without warning — small maintenance habits, done on a predictable schedule, catch most problems before they turn into an actual leak. Here’s a realistic cadence for most households, adjusted slightly for water hardness.
| Task | Soft Water Homes | Hard Water Homes |
|---|---|---|
| Wipe down shower head after use | Occasionally | After every use |
| Vinegar soak for nozzle buildup | Every 4–6 months | Every 4–8 weeks |
| Inspect O-ring condition | Once a year | Every 6 months |
| Re-check plumber’s tape seal | Every 1–2 years | Yearly |
| Full connection disassembly & clean | Every 2 years | Yearly |
If you’re not sure which category your home falls into, a simple visual test helps: if you’re regularly dealing with cloudy white spots on glass or fixtures, see our guide on removing hard water stains from shower glass, you’re almost certainly in hard-water territory and should lean toward the more frequent schedule above.
Preventing Future Leaks
Once it’s fixed, a little maintenance keeps it that way. Wipe down your shower head after use to slow mineral buildup, and do a vinegar soak every couple of months if you’re in a hard-water area. If limescale keeps coming back aggressively, it’s also worth checking how to remove hard water stains in your shower, since the same deposits clogging your nozzles are usually staining your tile and glass too.
Pairing a squeegee habit with your routine also helps — our shower squeegee review covers a few options that make post-shower upkeep quick.
It’s also worth thinking about prevention holistically rather than just at the shower head. A slow drain, for example, can keep standing water sitting in the shower pan longer than it should, and that lingering moisture puts extra stress on caulking and grout seals nearby — if drainage has been sluggish, our guide on unclogging a shower drain naturally is worth a look alongside your head maintenance routine. Similarly, if you notice grout lines darkening or grime building up faster than usual, that’s often a sign of excess ambient moisture, and cleaning shower grout without scrubbing can help you get ahead of it before it becomes a bigger job.
Finally, consider your water pressure setup as a whole. Extremely high incoming pressure accelerates wear on every seal in the system, not just the shower head connection, while pressure that’s too low can make a partially clogged head feel like a bigger problem than it is. If you haven’t looked at your home’s overall pressure situation recently, our guide on increasing shower water pressure covers how to find a healthy middle ground.
Troubleshooting Decision Guide
If you’re not sure where to start, walk through this quick decision path based on where the water is actually coming from.
Water drips from the nozzle face itself, even when off
This points to a valve or cartridge problem rather than the head — water is bypassing a worn internal seal in the wall valve. Revisit the cartridge and valve section above.
Water leaks from the connection nut where the head meets the arm
This is the classic case covered in Steps 1 through 6 — start with the O-ring and plumber’s tape before looking anywhere else.
Water leaks from a handheld hose connection
Check both ends of the hose for a worn gasket, as covered in the handheld hose section, rather than assuming it’s the same fix as a fixed head.
Water leaks or drips only from a second head in a dual system
This is very likely a worn diverter valve rather than either shower head individually — see the notes on dual shower head systems for more detail.
Water appears to be coming from behind the tile or wall
Stop here and call a plumber. This is outside the scope of a shower head repair and can indicate a failed in-wall pipe joint that needs wall access to fix properly.
Glossary of Shower Plumbing Terms
- O-ring: A small circular rubber gasket that compresses between two fittings to create a watertight seal.
- PTFE tape: Also called plumber’s tape or thread seal tape; a thin, non-adhesive tape wrapped around threaded pipe fittings to fill microscopic gaps and prevent leaks.
- Shower arm: The pipe extending from the wall that the shower head threads onto.
- Cartridge valve: A single replaceable cylinder inside the wall that controls both water flow and temperature mixing.
- Diverter valve: A mechanism that redirects water between two outlets, such as a fixed head and a handheld wand.
- NPT (National Pipe Thread): The standard tapered thread type used on most residential shower and faucet fittings in North America.
- Escutcheon: The decorative plate covering the wall opening around a shower valve or handle.
- Backpressure: Increased internal water pressure caused by restricted flow, often from mineral buildup blocking nozzle openings.
Common Mistakes to Avoid
Most botched shower head repairs come down to a handful of repeatable mistakes rather than genuinely difficult problems. Watching out for these ahead of time will save you a second trip through the steps.
Overtightening the connection nut
It’s tempting to assume that tighter automatically means more sealed, but cranking down hard on the connecting nut can crack plastic housings or compress an O-ring unevenly, which sometimes creates a leak rather than solving one. Hand-tight plus a modest quarter turn with a wrench is almost always enough.
Wrapping plumber’s tape in the wrong direction
Tape wrapped counter-clockwise will unravel as you screw the head on clockwise, undoing the seal before it even has a chance to work. Always wrap in the same direction you’ll be turning the head to tighten it.
Skipping the vinegar soak because “the leak isn’t about clogging”
Even when the immediate cause looks like a worn O-ring, mineral buildup is frequently a contributing factor by increasing internal backpressure. Doing the full sequence of steps, rather than jumping straight to the part that seems most obviously broken, produces a more durable fix.
Reusing a clearly damaged O-ring
A cracked or flattened O-ring won’t suddenly reseal itself after cleaning. If it looks compromised in Step 3, replace it rather than putting it back in and hoping for the best.
Ignoring a leak that starts right after cold weather
As covered in the seasonal section above, a leak that appears suddenly following a freeze is more likely a cracked fitting than a worn seal, and re-taping alone won’t resolve a physical crack.
Safety Considerations Before You Begin
This is a low-risk repair overall, but a few basic precautions are worth keeping in mind. Always shut off the water supply before removing the shower head — working on a pressurized line, even briefly, can spray water unexpectedly. If your home’s main shut-off valve is old or difficult to turn, apply steady, gentle pressure rather than forcing it, since older valves can seize or crack under excessive force.
When using a wrench near tiled walls or glass shower doors, keep your grip controlled and avoid sudden force that could cause the tool to slip and contact surrounding surfaces. If you’re working in a tub or shower stall, a folded towel on the surface beneath you reduces the chance of a dropped tool causing chips or cracks to the basin. Finally, if at any point you notice signs of a larger issue — significant water damage on an adjacent wall, visible mold beneath fixtures, or corroded piping that crumbles rather than unscrews — stop and consult a licensed plumber rather than continuing, since these can indicate a problem larger than a simple head-level repair.
Real-World Examples: How This Plays Out
Scenario 1: The Slow Drip in an Older Apartment
A tenant notices a faint drip from the shower head roughly an hour after their last shower. After running through Steps 1 through 6, the O-ring turns out to be flattened and cracked — a five-minute swap with a replacement from a universal multi-pack solves it completely, with no need to involve the property manager at all.
Scenario 2: Persistent Leak Despite a Fresh O-Ring
A homeowner replaces the O-ring and re-tapes the threads, but the leak continues at roughly the same rate. After checking further, they notice the drip continues even hours after the shower is off — a telltale sign the problem is actually the cartridge valve behind the wall, not the head connection at all, matching the pattern described in the cartridge and valve section above.
Scenario 3: Leak Appears Right After a Winter Cold Snap
A leak that had never been an issue suddenly appears the morning after an overnight freeze. Close inspection reveals a hairline crack in the shower arm itself rather than a worn seal — a case where no amount of tape or O-ring replacement would have solved it, since the metal fitting needed to be replaced outright.
Frequently Asked Questions
Why does my shower head leak only when the water is off?
This is usually a worn washer inside the shower valve itself, not the head — water pressure held in the line seeps past a degraded seal until pressure equalizes.
Is it normal for a new shower head to leak slightly at first?
A small drip in the first use or two can happen if the plumber’s tape hasn’t fully compressed yet. If it continues past a few uses, retighten the connection and check the tape wrap.
Can I use Teflon tape on any shower head connection?
Yes, PTFE tape works on essentially all standard threaded shower connections and is the standard fix for minor thread-seal leaks.
How often should I replace the O-ring?
There’s no fixed schedule, but if you notice cracking, flattening, or a persistent drip, it’s time — most O-rings last one to three years depending on water quality.
Why is water leaking from the base where the head meets the arm?
This points directly to a failed O-ring or insufficient plumber’s tape — both are covered in Steps 3 and 5 above.
Can hard water actually cause a leak, not just clogging?
Yes — buildup inside the nozzle plate increases internal backpressure, which can force water out through weaker seal points instead of the intended spray holes.
Do I need to turn off the whole house’s water to fix this?
Only if your home lacks a dedicated shut-off valve for that bathroom or shower line — many older homes require a full shut-off for this kind of repair.
What if tightening the connection nut doesn’t stop the leak?
Overtightening won’t fix a bad seal — remove the head again, confirm the O-ring is intact, and re-wrap the threads with fresh tape rather than forcing it tighter.
Can a leaking shower head increase my water bill significantly?
Yes — even a slow drip can waste several gallons a day, which adds up meaningfully over a billing cycle.
Should I replace the whole shower head instead of repairing it?
If the head is old, corroded, or the plastic housing is cracked, replacement is often more reliable than repeated repairs — see our best shower heads roundup for solid replacement options.
Why does my handheld shower head leak at the hose connection?
This is almost always a worn rubber gasket inside the hose coupling nut rather than a threading problem — replace the small washer at whichever end is dripping.
What’s the difference between a cartridge leak and a shower head leak?
A shower head leak shows up at the connection where the head meets the arm and stops once the water is off; a cartridge leak often continues dripping from the nozzle even after the shower is fully shut off.
Can cold weather cause a shower head to start leaking?
Yes — freezing temperatures can stress pipe joints and connections that were previously sealed properly, so a leak appearing right after a cold snap is worth inspecting for cracks, not just worn seals.
How much water does a leaking shower head actually waste?
A steady drip can waste several thousand gallons a year, which typically adds a noticeable amount to an annual water bill even though each individual drop seems trivial.
Is it worth replacing the diverter valve myself in a dual shower head system?
It’s a moderate DIY job for someone comfortable with basic plumbing, but matching the exact diverter model matters, so confirm compatibility before ordering a replacement part.
Does a leaking shower head contribute to mold growth?
Indirectly, yes — the extra ambient moisture from a persistent leak can create more favorable conditions for mold and mildew on grout and caulking nearby.
Conclusion
Most leaking shower heads come down to a worn O-ring, mineral buildup, or a loose thread seal — all fixable in well under an hour with basic tools. Work through the steps above in order, and test after each major stage so you know exactly where the leak was actually coming from. If water is still escaping after a full cleaning, re-taping, and O-ring swap, the problem has likely moved upstream to the valve or wall pipe, which is the point where calling a plumber makes more sense than continued DIY troubleshooting.
The broader lesson worth carrying forward is that a shower head is a low-maintenance fixture right up until it isn’t, and a few minutes of periodic upkeep — a vinegar soak, a quick inspection of the O-ring, a check on the tape seal — prevents the vast majority of leaks before they start in the first place. Treat this repair less as a one-time fix and more as a habit to revisit every few months, especially if you’re in a hard-water area, and you’ll spend far less time troubleshooting drips going forward. And if this repair turns out to be part of a bigger bathroom refresh, our hub page on general shower maintenance rounds up the related upkeep tasks — drains, grout, glass, and fixtures — that tend to go hand in hand with keeping a shower leak-free long term.