
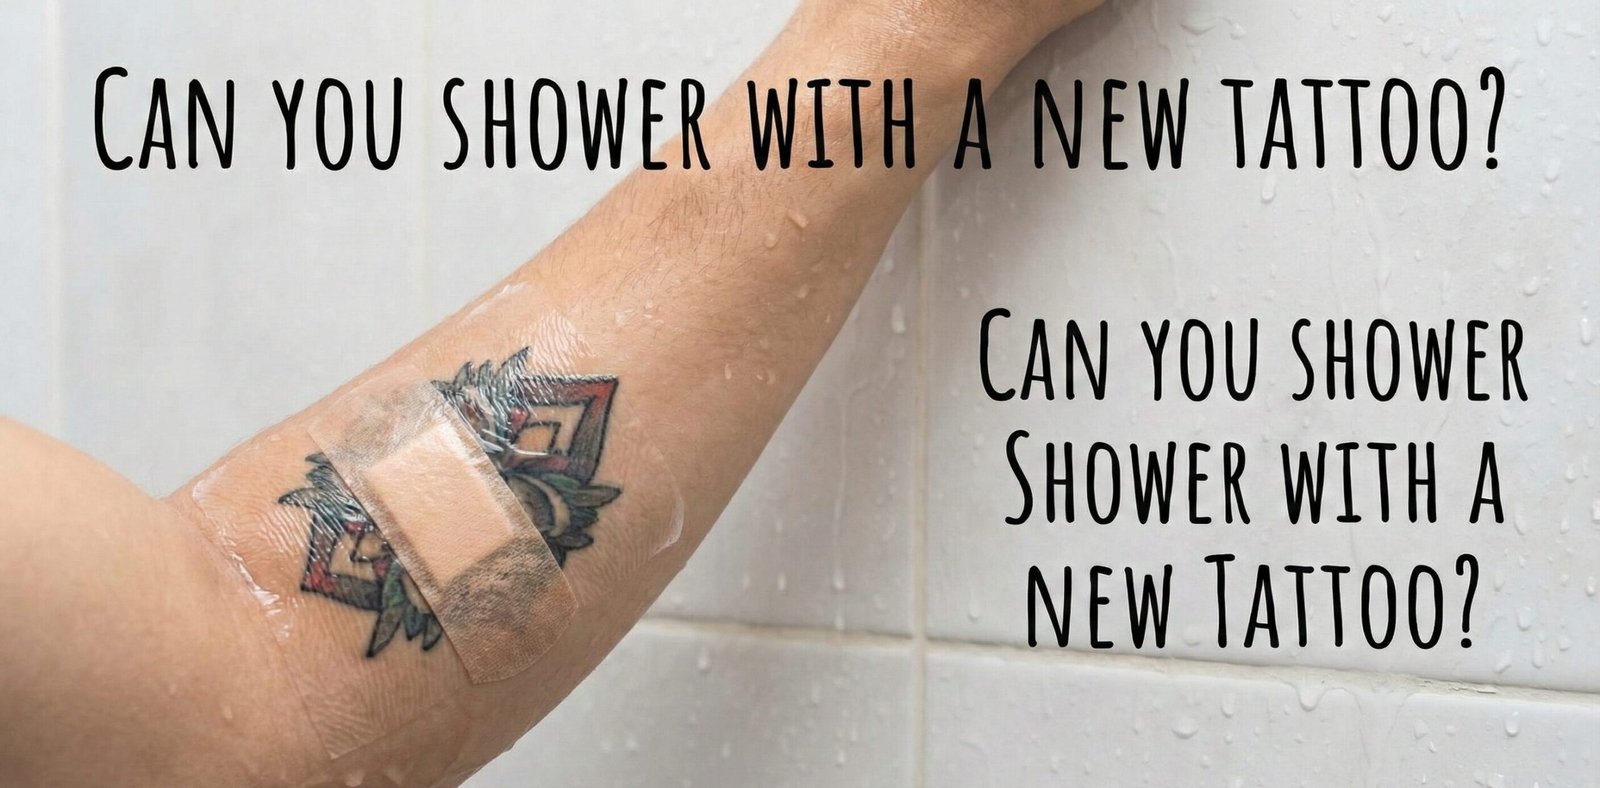
The Ultimate Guide to Showering With a New Tattoo: Complete Healing Science & Aftercare Protocol
Important: A fresh tattoo is a controlled, traumatic injury involving thousands of micro-wounds. This guide synthesizes information from dermatological research and professional tattoo artist consensus, but it is not medical advice. Always follow the specific aftercare instructions provided by your licensed tattoo artist. If you notice signs of infection (excessive redness spreading beyond the tattoo, pus, fever, or worsening pain), seek medical attention immediately. Individuals with compromised immune systems, diabetes, or skin conditions should consult their physician before getting tattooed.
You’ve endured the buzzing needle, watched the artwork emerge on your skin, and now you’re home with a fresh, stunning tattoo. But as the adrenaline wears off, reality sets in: this beautiful art is also an open wound that demands meticulous care. The question isn’t just “Can I shower?” but “How do I shower intelligently to preserve my investment and prevent infection?”
This comprehensive guide goes beyond basic advice, diving deep into the science of tattoo healing, shower physics, product chemistry, water quality, bathroom environment optimization, and body-specific considerations. Whether you’re a first-timer with a small wrist tattoo or a collector adding to a sleeve, understanding the “why” behind each aftercare rule will help you navigate the critical healing period with confidence.
Yes, you can—and should—shower with a new tattoo. Proper cleansing is non-negotiable for preventing infection. However, the protocol is specific: lukewarm water only, gentle antibacterial soap, no direct high-pressure streams, and absolutely no soaking in baths, pools, hot tubs, or natural bodies of water for a minimum of 2-3 weeks. Your artist’s instructions are paramount, as they account for your specific tattoo’s size, placement, and style.
The Science of Tattooing: Understanding Your “Open Wound”
To shower correctly, you must understand what happened to your skin. A tattoo machine drives sterile, pigment-coated needles into the dermis (the second layer of skin) at a rate of 50-3,000 times per minute. This creates controlled trauma, triggering your body’s immune response.
The Immediate Response (0-24 Hours)
Your body recognizes ink particles as foreign invaders. Macrophages (immune cells) swarm the area to engulf pigment and debris. Blood vessels dilate, causing redness and swelling. Plasma (a clear, sticky fluid) leaks from capillaries to form a protective layer and begin scab formation.
Ink Stabilization (Days 1-7)
Some macrophages permanently encapsulate ink particles, locking them in place. Others carry pigment to lymph nodes. The epidermis (top skin layer) begins to regenerate over the wounded dermis. This is the phase of weeping, scabbing, and intense itchiness.
Surface Healing (Weeks 2-4)
The outer scabs flake away, revealing milky, shiny new skin. The tattoo may appear dull or slightly blurry as a final, thin layer of dead skin (stratum corneum) covers it. Underneath, collagen remodels around ink particles.
Deep Settling (Months 1-6)
The skin fully normalizes. The milky layer sheds, revealing the tattoo’s true vibrancy. Ink particles are now permanently secured within fibroblasts and macrophages in the dermis. The tattoo is considered fully “healed” at the surface, but deep stabilization continues.
Complete Healing Timeline & Showering Protocol
Phase 1: The Initial Wrap (Hours 0-24)
Showering Status: DO NOT SHOWER
Your artist will apply an initial bandage—either traditional cling film or a medical-grade adhesive barrier like Saniderm/Tegaderm (Second Skin).
- Traditional Wrap (Cling Film): This is a temporary barrier to protect against airborne bacteria as you travel home. Remove it after 2-4 hours as instructed. Do not get it wet; it’s not waterproof.
- Adhesive Barrier (Second Skin): This is a breathable, waterproof bandage designed to stay on for several days. You can shower with it, but avoid extreme heat and prolonged soaking which can compromise the adhesive.
Key Action: When you remove the initial wrap (if not using Second Skin), this is your first wash. Do it at the sink with lukewarm water and antibacterial soap before your first shower.
Phase 2: The Weeping Phase (Days 1-3)
Showering Status: GENTLE SHOWERS ALLOWED
The tattoo will ooze plasma, excess ink, and possibly a small amount of blood. This forms a shiny, sticky layer that hardens into a scab if not cleaned off.
Shower Protocol:
- Frequency: 2-3 times daily is ideal to prevent thick scab formation.
- Water Temperature: Lukewarm (98-100°F / 36-38°C). Hot water causes vasodilation, increasing blood flow, swelling, and ink loss. See our Ideal Shower Temperature Guide for precise temperature benchmarks.
- Technique: Stand with your back to the shower stream. Let water trickle over the tattoo indirectly. Do not blast it directly.
- Cleansing: Use a quarter-sized amount of fragrance-free antibacterial soap. Lather in clean hands, apply to tattoo with gentle circular motions for 15-20 seconds, then rinse thoroughly.
- Drying: Pat—don’t rub—with a clean paper towel. Air dry for 10-15 minutes before applying aftercare ointment.
Phase 3: Peeling & Itching (Days 4-14)
Showering Status: CONTINUE GENTLE SHOWERS
The tattoo will begin to peel, much like a sunburn. Colors may appear dull under flaking skin. Intense itching is normal—this is histamine release and new nerve growth.
- DO: Let loose flakes wash off naturally in the shower. They will come away when ready.
- DON’T: Pick, scratch, or peel flakes. This can pull out ink, cause scarring, and create “holidays” (faded spots).
- Shower Strategy: The warm, moist environment can temporarily relieve itching. After showering, apply a fragrance-free lotion (like Lubriderm or Aveeno) to keep skin supple and reduce itch.
- Special Consideration: If you have a high-pressure shower, this is the phase where it’s most dangerous. Forceful water can rip off semi-attached flakes.
Phase 4: Settling & Aftercare (Weeks 3-6+)
Showering Status: NORMAL SHOWERS RESUME
Peeling has stopped. The tattoo may look slightly cloudy or shiny as the final layer of skin regenerates. It’s now safe to resume most normal activities, with a few lifelong considerations.
- Sun Protection: UV radiation is the #1 cause of tattoo fading. Once fully healed, apply broad-spectrum SPF 30+ sunscreen to your tattoo whenever it’s exposed.
- Moisturize: Keep tattooed skin hydrated with quality, fragrance-free lotion after showering.
- Avoid Abrasion: Be mindful of loofahs, harsh exfoliants, or shower tools that might scratch the skin over your tattoo.
Water Quality & Your Healing Tattoo: The Overlooked Factor
Most aftercare guides focus exclusively on technique—how to wash, how to dry, what products to use. But an often-overlooked variable with enormous impact on tattoo healing is the quality of the water itself flowing over your fresh wound. Not all tap water is created equal, and understanding what’s in your water can mean the difference between vibrant, fast-healing art and a tattoo prone to irritation, dullness, or prolonged sensitivity.
Hard Water vs. Soft Water: A Critical Distinction
Hard water contains elevated concentrations of dissolved minerals, primarily calcium and magnesium carbonate. In the United States alone, over 85% of homes have hard water to some degree. When this mineral-rich water contacts an open wound like a fresh tattoo, several problematic interactions occur.
🔴 Hard Water Effects on Healing Tattoos
- Mineral deposits can accumulate in open micro-wounds, potentially trapping bacteria
- Calcium ions react with soap to form soap scum, reducing cleansing efficacy
- Can leave a residue on skin that clogs pores and interferes with the natural moisture barrier
- May contribute to increased dryness and itching during the peeling phase
- Mineral film can make tattoo colors appear duller during healing
- Existing hard water stains in your shower harbor bacteria—keep your shower clean
🟢 Soft Water Benefits
- More effectively rinses soap residue from sensitive healing skin
- Allows aftercare moisturizers to absorb more readily
- Gentler on the compromised skin barrier
- Produces richer lather with less soap, reducing product waste
- Less likely to leave mineral deposits that interfere with ink settling
- Better for long-term tattoo vibrancy through consistent, clean hydration
If you live in a hard water area, consider using a shower filter during the healing period. Shower filters that use KDF (Kinetic Degradation Fluxion) media or activated carbon can reduce chlorine, heavy metals, and partially soften water. This is particularly beneficial for people with sensitive skin or those who have noticed their skin feels tight and dry after showering.
Chlorine: The Chemical You’re Already Soaking In
Municipal tap water is treated with chlorine or chloramine to kill pathogens—a necessary public health measure, but one with implications for tattoo healing. Chlorine is an oxidizing agent that, at the concentrations found in tap water (0.5-2 ppm), is generally safe for intact skin. However, when in contact with an open wound, it can:
- Interfere with the natural enzymatic processes that facilitate wound healing
- Cause mild chemical irritation that can worsen itching and inflammation during the peeling phase
- Disrupt the skin’s natural microbiome, which plays a role in protecting against pathogenic bacteria
- Potentially bleach certain ink pigments over time with repeated, prolonged exposure (more relevant to soaking than showering)
The good news: a quick shower won’t expose your tattoo to harmful chlorine levels. The concern is primarily with prolonged soaking—which is already prohibited. But if you want to be extra cautious, a vitamin C shower filter neutralizes chlorine effectively. Understanding your shower water usage can also help you keep showers brief and efficient during healing.
Water Temperature Science: Thermodynamics of Healing
The instruction to use lukewarm water isn’t arbitrary—it’s grounded in the physiology of blood flow and wound healing. Our comprehensive shower temperature guide explores these effects in depth, but here’s the science specific to tattoo healing:
Hot water (above 104°F / 40°C) causes significant vasodilation—the widening of blood vessels. During the first week, when your tattoo’s micro-wounds are still closing, this increased blood flow brings more fluid to the area, worsening swelling and potentially forcing ink particles out of the dermis before they’ve been encapsulated by macrophages. Hot water also accelerates the breakdown of the plasma-scab protective layer, removing it before new epithelium has formed underneath.
Cold water (below 65°F / 18°C) causes vasoconstriction—the narrowing of blood vessels. This can temporarily reduce swelling and inflammation, and many people find cold water temporarily relieves the maddening itch of the peeling phase. There are legitimate reasons to consider cooler showers during healing, as our analysis of cold vs. hot shower benefits explores. However, very cold water can cause your skin to contract around the fresh wound, which may feel uncomfortable. A cool-to-lukewarm temperature strikes the best balance.
If you’re unsure whether your shower water is too hot, use the back of your wrist as a guide—not your hand. The skin on the back of the wrist is thinner and more temperature-sensitive. If it feels more than mildly warm, cool it down. Alternatively, a simple bath thermometer (under $10) takes the guesswork out entirely.
Optimizing Your Shower Environment for Tattoo Healing
Your shower is not just a place—it’s an ecosystem. The fixtures, surfaces, air quality, and storage systems all interact to either support or hinder your tattoo’s healing. A poorly maintained shower can be a bacterial breeding ground, while an optimized one becomes a therapeutic space. This section is your complete guide to creating a tattoo-safe shower environment.
Shower Pressure: The Physical Force on Healing Skin
Water pressure is measured in PSI (pounds per square inch). Standard residential showers typically deliver 40-60 PSI at the main line, but the actual pressure at the showerhead nozzle varies considerably based on the head design and any pressure-regulating devices. Understanding your shower pressure dynamics is particularly relevant when you have healing skin.
During tattoo healing, the goal is to use the minimum pressure necessary to rinse soap and plasma residue from the skin without mechanical disruption of the healing tissue. High-pressure streams—even lukewarm ones—can:
- Physically dislodge developing scabs before new epithelium has formed beneath them
- Disrupt the organized collagen matrix forming around ink particles
- Drive bacteria from surrounding skin into the still-open wound channels
- Cause discomfort and reactive muscle tension that may affect adjacent healing areas
If you suffer from genuinely low shower pressure, the good news is that this is actually advantageous during healing. If your pressure is uncomfortably high, you have several solutions: install a rainfall-style showerhead that disperses water over a wide surface area at much lower individual stream pressure, use a handheld shower head to control where water flows (keeping it away from the tattoo), or simply step back from the spray and let water run from your shoulders down to the tattooed area.
Showerhead Selection for Healing Tattoo Care
The type of showerhead you use has a direct bearing on how safely you can shower with a new tattoo. Here’s how common showerhead types compare:
| Showerhead Type | Pressure Profile | Tattoo Safety Rating | Notes |
|---|---|---|---|
| Rainfall / Rain Shower | Wide dispersal, very low PSI per stream | ⭐⭐⭐⭐⭐ Excellent | Best choice. Mimics gentle rain. See our top rainfall system picks. The large-format rainfall heads are ideal. |
| Handheld | Variable; can be low or high depending on setting | ⭐⭐⭐⭐ Very Good | Excellent control. Choose a mist or gentle setting. Invaluable for tattoos in hard-to-reach places. Explore our handheld head reviews. |
| Standard Fixed Head | Moderate concentrated streams | ⭐⭐⭐ Good (with care) | Safe if you position away from direct stream. Not ideal but manageable. |
| High-Pressure / Massage | High focused PSI, targeted streams | ⭐ Poor | Avoid directing at healing tattoo. If you have a dual-head system, use the gentler head only. |
| Steam Shower | No direct water pressure; moist heat | ⭐ Very Poor (Phase 1-2) | Steam opens pores and can increase swelling. Avoid entirely for first 2 weeks. More on steam shower effects. |
Shower Cleanliness: Your First Line of Defense
Here is an uncomfortable truth: the average shower floor harbors approximately 200,000 bacteria per square inch—more than your toilet seat. When you’re healing an open wound, stepping into a contaminated shower environment dramatically increases infection risk. A proper bathroom hygiene routine isn’t just about aesthetics during tattoo healing; it’s a medical necessity.
Pre-Healing Bathroom Preparation: Before you go get tattooed, do a thorough bathroom cleaning. Use an effective shower mold cleaner to eliminate fungal colonies. Scrub the grout lines which harbor bacteria and mold. Clean your showerhead—a vinegar soak for the showerhead removes mineral deposits and biofilm. Address any musty shower smell, as this odor indicates mold/bacterial growth that you do not want near healing skin.
Wipe down your shower floor with an antibacterial cleaner before each shower during the first week. Remove bath mats (they collect bacteria). Don’t use a loofah or washcloth near the tattoo—ever. Keep a squeegee nearby to remove water from surfaces after showering, which reduces mold and bacterial growth between uses. A clean shower environment is non-negotiable when healing open skin.
Shower Organization: Keeping Aftercare Products Safe
During tattoo healing, you’ll need immediate post-shower access to clean paper towels, aftercare ointment, and possibly bandage materials. Disorganized bathrooms lead to one critical mistake: touching potentially contaminated surfaces (soap dispensers, bottles, walls) after washing the tattoo and before patting it dry. The solution is smart storage.
Consider a dedicated shower caddy or drill-free caddy that keeps your tattoo-specific products separate from regular bath products. Your aftercare soap should be in a clean, pump-style dispenser (no bar soap, which accumulates bacteria on its surface). Pre-set everything you need before stepping into the shower so your routine is streamlined and hygienic. Check out corner shelf solutions for keeping products organized without cluttering your shower floor.
The Science of When to Shower: Timing, Sleep & Your Body’s Healing Clock
The timing of your showers during the healing period is more strategic than most people realize. Your body doesn’t heal uniformly throughout the day—there are hormonal and physiological rhythms that favor healing at specific times. Aligning your shower schedule with these rhythms can meaningfully improve outcomes.
Morning vs. Night Showering with a New Tattoo
The debate between night showering versus morning showering takes on new significance when you’re healing a tattoo. Here’s what the biology tells us:
🌙 Night Showering: The Healing Advantage
During deep sleep (NREM Stage 3), growth hormone secretion peaks—and growth hormone is one of the primary drivers of tissue repair and regeneration. Showering before bed cleanses the day’s accumulated bacteria, sweat, and environmental debris from the tattooed area, presenting your body’s nighttime repair systems with a clean, uncontaminated wound environment. This is why showering before bed is particularly beneficial during tattoo healing. Additionally, the temperature drop that occurs after stepping out of a lukewarm shower triggers melatonin release and signals your circadian clock that it’s time for sleep, enhancing the depth and quality of healing sleep.
☀️ Morning Showering: The Cleanliness Argument
During the first 3 days, your tattoo actively weeps plasma overnight, even with appropriate aftercare. This fluid can crust and harden while you sleep, and morning skin—especially when you’ve been sleeping on sheets—can accumulate bacteria. A gentle morning shower to remove overnight deposits is arguably most important during the weeping phase. If you exercise in the mornings, a post-workout shower is essential, as sweat contains salt and lactic acid that irritate healing skin. The ideal protocol for most people is twice daily: a brief morning cleanse and a thorough pre-bedtime wash.
Regardless of timing, the relationship between sleep quality and tattoo healing cannot be overstated. Studies consistently show that wounds heal approximately 40-60% faster in well-rested individuals compared to sleep-deprived ones, due to the overnight peak of growth hormone, prolactin, and other anabolic hormones. If you struggle with sleep, consider whether a strategic pre-bed shower temperature can support better sleep quality during your healing period. Even research from the Sleep Foundation, referenced in our guide to warm showers for sleep, confirms that a warm shower 1-2 hours before bed accelerates sleep onset.
Post-Exercise Showering Protocol During Healing
For gym-goers and athletes, the question of when and how to shower relative to exercise is critically important during tattoo healing. Sweat is not just water—it contains sodium chloride, urea, lactate, potassium, and various proteins. When this cocktail contacts fresh tattoo wounds, it creates an osmotic imbalance that can draw fluid from wound tissue, and the salt content is genuinely irritating to healing skin.
Our gym shower routine guide covers general best practices, but here are the tattoo-specific rules:
- Days 1-7: Avoid any exercise that causes significant sweating or puts mechanical stress on the tattoo area. If you must exercise, opt for upper-body work only if the tattoo is below the waist, and vice versa.
- Days 7-14: Light exercise permitted. Shower within 30 minutes of sweating. Do not allow sweat to air-dry on a healing tattoo.
- Weeks 3+: Gradually resume normal training. Monitor for any skin irritation at the tattoo site and adjust workout clothing accordingly.
- Gym Hygiene Alert: Public gyms are microbial environments. Before touching gym equipment, wash hands thoroughly. Never place a healing tattoo against any shared gym surface—even with clothing between it and the equipment.
Steam, Humidity & Your Tattoo: A Complete Environmental Analysis
The relationship between environmental moisture and tattoo healing is nuanced. While adequate hydration of the skin is essential for healing, excessive humidity—especially combined with heat—creates conditions that can impede healing and invite bacterial and fungal overgrowth.
Understanding Steam Exposure
Steam showers have legitimate wellness benefits for the respiratory system, circulation, and muscle relaxation. Our guide to steam shower health benefits and risks covers these in detail. However, for tattooed skin in the first two weeks, steam presents specific challenges:
- Vasodilation: Steam heat—even without direct water contact—raises skin temperature and dilates blood vessels, which increases blood flow and swelling in the healing tattoo.
- Moisture Saturation: Prolonged steam exposure can over-hydrate the skin, softening the developing scab layer and the fragile new epithelium beneath it. Over-hydrated tissue is more susceptible to mechanical damage.
- Bacterial Growth: Warm, moist environments are ideal for bacterial proliferation. If your steam shower is not impeccably clean, the steam itself can carry bacterial particles.
- Collagen Disruption: Repeated heat exposure to healing skin can disrupt the organized collagen remodeling that gives a healed tattoo its smooth, clear appearance.
If your household shares a steam shower or you regularly use a steam shower system, you’ll need to use an alternate shower during the first two weeks of healing, or shower before others use the steam function and ventilate the bathroom thoroughly before entering.
Bathroom Ventilation and Humidity Control
Even without a steam shower, a poorly ventilated bathroom creates a high-humidity environment that can remain elevated for 30-60 minutes post-shower. This lingering humidity affects the drying stage of your aftercare routine—the critical 10-15 minute air-dry period before applying ointment.
Tips for optimizing bathroom humidity during tattoo healing:
- Run your bathroom exhaust fan during and for 20 minutes after every shower
- Leave the bathroom door ajar when safely possible during the air-dry period
- If possible, pat dry in a different room with better air circulation
- In summer months, a small fan pointed at the tattoo during air-dry accelerates evaporation without touching the skin
- Consider a dehumidifier in your bathroom if you live in a naturally humid climate
Body Location-Specific Showering Guide
Where your tattoo is located dramatically impacts your shower strategy. Here’s a detailed breakdown:
| Body Area | Healing Challenges | Shower Strategy | Special Gear Recommendation |
|---|---|---|---|
| Feet & Ankles | High bacteria exposure (shoes, floors), constant movement, swelling. | Wash last in your shower routine. Keep feet out of dirty shower water runoff. Dry meticulously between toes. | Open-toed sandals, shower chair to keep foot elevated. |
| Hands & Fingers | Constant use, frequent washing, high infection risk. | Wash hands as needed but avoid submerging. Pat dry, don’t rub. Wear clean gloves for dirty tasks. | Non-stick gauze and medical tape for overnight protection. |
| Ribcage & Torso | Friction from clothing, stretching with movement. | Wear loose, soft shirts. Avoid letting the shower stream hit directly—let water run from shoulders. | Silk or bamboo undershirts to reduce friction. |
| Back & Shoulders | Hard to see/reach, pressure from sleeping. | Use a handheld showerhead. Have a partner help with washing/drying if needed. Sleep on your side or stomach. | Long-handled shower brush, handheld mirror. |
| Legs (Thighs/Calves) | Significant swelling, friction from pants. | Elevate leg when possible. Use a shower chair to minimize standing. Wear loose shorts or skirts. | Teak shower bench, compression sleeve. |
| Head & Neck | High vascularity (fast healing but more bleeding/plasma), hair products. | Protect from shampoo/conditioner runoff. Wash hair leaning forward over sink if possible. Use a gentle rainfall-style showerhead. | Waterproof bandage for hair washing, silk pillowcase. |
Hair Washing With a New Tattoo: Protecting Head, Neck & Upper Body Tattoos
Hair washing is one of the trickiest challenges for anyone with a fresh tattoo on the head, neck, upper back, chest, or shoulders. Shampoo and conditioner formulas almost universally contain fragrance compounds, essential oils, silicones, sulfates, and preservatives—none of which should contact an open wound. The waterfall of suds that runs from scalp to body during hair washing is a significant vector for chemical irritation and potential infection in head-adjacent tattoos.
The Sink Wash Solution
For the first 7-10 days of healing any tattoo above the collarbone (or shoulder blade), seriously consider washing your hair at the sink rather than in the shower. This eliminates runoff entirely. Use a detachable faucet hose or a large cup to wet and rinse hair while bent over the sink, keeping your head below the faucet level to direct water away from your neck and face.
In-Shower Hair Washing Technique
If sink washing isn’t practical, use this choreography to minimize contact between hair products and your healing tattoo:
- Begin your shower by cleansing the tattoo first, before any shampoo enters the water.
- Move to the opposite end of the shower from the drain, or use a handheld showerhead to direct flow precisely.
- Tilt your head forward and down to direct shampoo runoff toward the floor rather than your back or neck.
- Apply shampoo only to scalp, not the length of hair, to minimize suds volume.
- Rinse with the handheld head at the lowest comfortable pressure, directing water forward over your face into the drain.
- Condition the mid-lengths and ends of hair only—never the scalp—to reduce runoff volume near the tattoo.
- Exit the shower before any remaining hair product has dripped onto the tattoo area.
- Immediately rinse the tattoo at the sink if any product contact occurred.
Dry Shampoo: The Interim Solution
Unscented dry shampoo can extend the interval between wet hair washes during the most critical 72-hour weeping phase. Check ingredients carefully—some dry shampoos contain alcohol (listed as “SD Alcohol” or “Alcohol Denat.”) which is highly irritating to healing skin. Look for starch-based formulas (rice starch, corn starch) with a short ingredient list and no fragrance.
Infection Identification vs. Normal Healing
It’s crucial to distinguish normal healing responses from signs of infection. When in doubt, contact your artist or a healthcare professional.
| Symptom | Normal Healing Response | Possible Infection Sign | Action Required |
|---|---|---|---|
| Redness | Pink or light red halo extending 0.5-1 inch from tattoo edges. Subsides after 2-3 days. | Increasing redness after day 3, dark red or purple hue, red streaks radiating from tattoo. | Contact artist. Streaks = seek medical care immediately. |
| Swelling | Mild to moderate, peaks at 24-48 hours, then gradually decreases. Common on extremities. | Swelling increases after day 3, feels hot/hard to touch, spreads beyond tattoo area. | Elevate area, apply cool compress. If worsening, contact doctor. |
| Pain | Bruised, sunburned sensation. Improves steadily each day. | Throbbing, pulsating pain that worsens or returns after initial improvement. | May indicate abscess. Contact healthcare provider. |
| Discharge | Clear, amber, or blood-tinged plasma for first 1-3 days. Small amounts of ink (“weeping”). | Thick, opaque yellow/green pus. Foul odor. Increasing volume of discharge. | Likely infection. Seek medical attention for possible antibiotics. |
| Fever/Chills | None. (A very low-grade fever on day 1 is extremely rare but possible after large pieces.) | Fever >100.4°F (38°C), chills, body aches, malaise. | Systemic infection possible. Seek medical attention immediately. |
| Scabbing | Thin, flaky scabs that form after plasma dries. Color matches skin/ink. | Thick, hard, raised scabs. Yellow or green coloration under scab. | May indicate impetigo or other infection. Do not pick. See a doctor. |
The Psychology of Tattoo Aftercare: Mental Strategies for the Healing Period
The physical protocols of tattoo aftercare are well-documented—but the psychological dimension is rarely addressed. The 2-4 week healing period can be genuinely stressful, particularly for first-time tattoo recipients who may be anxious about whether their new tattoo is healing correctly. Paradoxically, this anxiety can manifest in behaviors that worsen healing outcomes: compulsive checking, excessive product application, picking at scabs, or over-researching symptoms and convincing themselves something is wrong.
Managing Tattoo Healing Anxiety
Here are evidence-based psychological strategies for navigating the healing period calmly:
The “Check-In Schedule” Method
Rather than constantly examining your tattoo throughout the day (which leads to catastrophizing), establish two dedicated check-in times: once during your morning aftercare routine and once during your evening routine. Between these times, actively redirect your attention. Frequent checking amplifies anxiety without providing useful information—healing happens at a cellular level and isn’t visible hour-to-hour.
Photo Documentation
Taking daily photographs at consistent lighting and distance gives you an objective record that can actually reassure you when anxiety spikes. What feels like dramatic deterioration often looks like minor day-to-day variation when you compare photographs. It also provides valuable documentation if you do develop a genuine concern to share with your artist or doctor.
The Distraction Shower
Make your tattoo-safe shower a mindful, enjoyable ritual rather than a clinical procedure. Play music through a waterproof Bluetooth shower speaker—music engages the prefrontal cortex and reduces the limbic system’s anxiety response. A pleasant shower environment reduces the mental load of the aftercare routine, making you more likely to adhere to it consistently.
The “Healing Ugly” Phase: Preparing for the Emotional Dip
One of the most psychologically challenging aspects of tattoo healing that artists often underemphasize is what collectors colloquially call the “healing ugly” phase—the period between days 5 and 14 when the tattoo looks its worst. Peeling skin, dull colors, patchy appearance, and milky sheens can make even a masterfully executed tattoo look damaged or poorly done.
Knowing this phase is coming, understanding why it occurs (a thin layer of regenerating skin temporarily obscuring the settled ink), and having a fixed date in your mind (typically 6-8 weeks for full visual clarity) dramatically reduces anxiety and prevents people from making the catastrophic mistake of returning to their artist for a premature touch-up before the tattoo has fully healed.
Advanced Aftercare Product Science: What’s in Your Bottle Matters
Not all “tattoo aftercare” products are created equal. Understanding ingredients helps you avoid irritants that can compromise healing.
The Cleansing Phase: Soap Ingredients
Seek: Chloroxylenol (in Dial Gold), Benzalkonium chloride, or simple glycerin-based soaps.
Avoid: Sodium lauryl sulfate (SLS – too harsh), fragrances, dyes, alcohol, triclosan (banned in some countries).
Why: The goal is to reduce bacterial load without stripping the skin’s natural lipid barrier, which is essential for healing.
The Moisturizing Phase: Ointments vs. Lotions
Days 1-4 (Ointment): Use a petrolatum-based ointment (Aquaphor, Original A&D) in a thin layer. It creates an occlusive barrier against bacteria and water loss.
Days 5+ (Lotion): Switch to a water-based, fragrance-free lotion. Look for ceramides, hyaluronic acid, or oat extract for hydration without clogging pores.
Specialized Tattoo Products
Pro Tips: Many tattoo-specific balms contain natural butters (shea, cocoa) and oils (jojoba, vitamin E). These can be excellent but ensure they’re unscented. Beware of products with long ingredient lists full of botanicals—more ingredients mean more potential allergens.
Patch Test: If trying a new product, test on a small, healed tattoo or inner arm first.
Ingredient Deep-Dive: Decoding Your Aftercare Labels
The tattoo aftercare industry has exploded into a multi-million dollar market, with hundreds of products ranging from simple petroleum jelly to elaborate botanical formulations. Making an educated choice requires understanding what specific ingredients actually do at the wound-healing level—and which ones to categorically avoid during the acute healing phase.
Ingredients That Support Tattoo Healing
| Ingredient | Type | Function in Healing | Best Used |
|---|---|---|---|
| Petrolatum (Petroleum Jelly) | Occlusive | Creates watertight barrier, reduces transepidermal water loss (TEWL), prevents bacterial contamination of open wound | Days 1-5 only, thin layer |
| Ceramides (1, 3, 6-II) | Barrier repair | Structural components of the skin barrier; ceramide-deficient skin heals poorly. Supplementing accelerates barrier restoration | Day 4 onward |
| Hyaluronic Acid | Humectant | Attracts and binds water molecules to skin; supports cellular proliferation in the healing wound bed | Day 5 onward |
| Panthenol (Pro-Vitamin B5) | Humectant + healing | Converts to pantothenic acid in skin, supporting keratinocyte proliferation and reducing inflammation | Any phase |
| Colloidal Oatmeal | Anti-inflammatory | Beta-glucan compounds reduce inflammatory cytokines; clinically proven to reduce itch severity | Peeling phase (days 5-14) |
| Zinc Oxide | Antimicrobial + barrier | Mild antimicrobial properties, accelerates epithelial turnover, UV-protective when healed | After healing for sun protection |
| Glycerin | Humectant | Pulls moisture from the environment into skin, prevents drying and cracking of healing epithelium | Day 4 onward |
Ingredients to Categorically Avoid on Healing Tattoos
- Fragrance (Parfum): A catch-all term that can represent hundreds of undisclosed chemical compounds. Even “natural” fragrance from essential oils (lavender, tea tree, eucalyptus) can be potent allergens on broken skin.
- Alcohol (Ethanol, SD Alcohol, Isopropyl): Denatures proteins and destroys cellular membranes. Deeply drying and irritating to wound tissue. Found in many “sanitizing” or “quick-dry” products.
- Retinoids (Retinol, Retin-A): Dramatically increase cellular turnover, which can interfere with the organized healing process and cause excessive peeling in already-peeling tattoo skin.
- Alpha Hydroxy Acids (AHAs: Glycolic, Lactic, Mandelic): Chemical exfoliants that dissolve the bonds between dead skin cells. During the peeling phase, these will accelerate scab removal before new epithelium is ready.
- Benzoyl Peroxide: A strong oxidizing agent used for acne treatment. Bleaches both fabric and—in some cases—certain tattoo pigments.
- Neomycin (in triple antibiotic ointments like Neosporin): Neomycin is one of the most common contact allergens. A surprising number of people have sensitivities, and using it on a large, freshly tattooed wound area dramatically increases the chance of developing a sensitizing reaction. Most tattoo artists now explicitly advise against Neosporin.
- Sunscreen actives on unhealed tattoos: Wait until fully healed. Chemical sunscreen actives (avobenzone, oxybenzone) and even some physical actives can irritate unhealed skin. Use clothing for UV protection during healing.
The “Tattoo-Safe” Shower Kit: Essential Products
You need specific products to ensure you don’t irritate the skin. Here are the gold-standard recommendations from Amazon.

Dial Gold Antibacterial Soap
The Industry Standard. Ask any tattoo artist, and they will recommend Dial Gold. It removes bacteria without leaving residue. Note: It can be drying, so lotion afterward is key.
Check Price on Amazon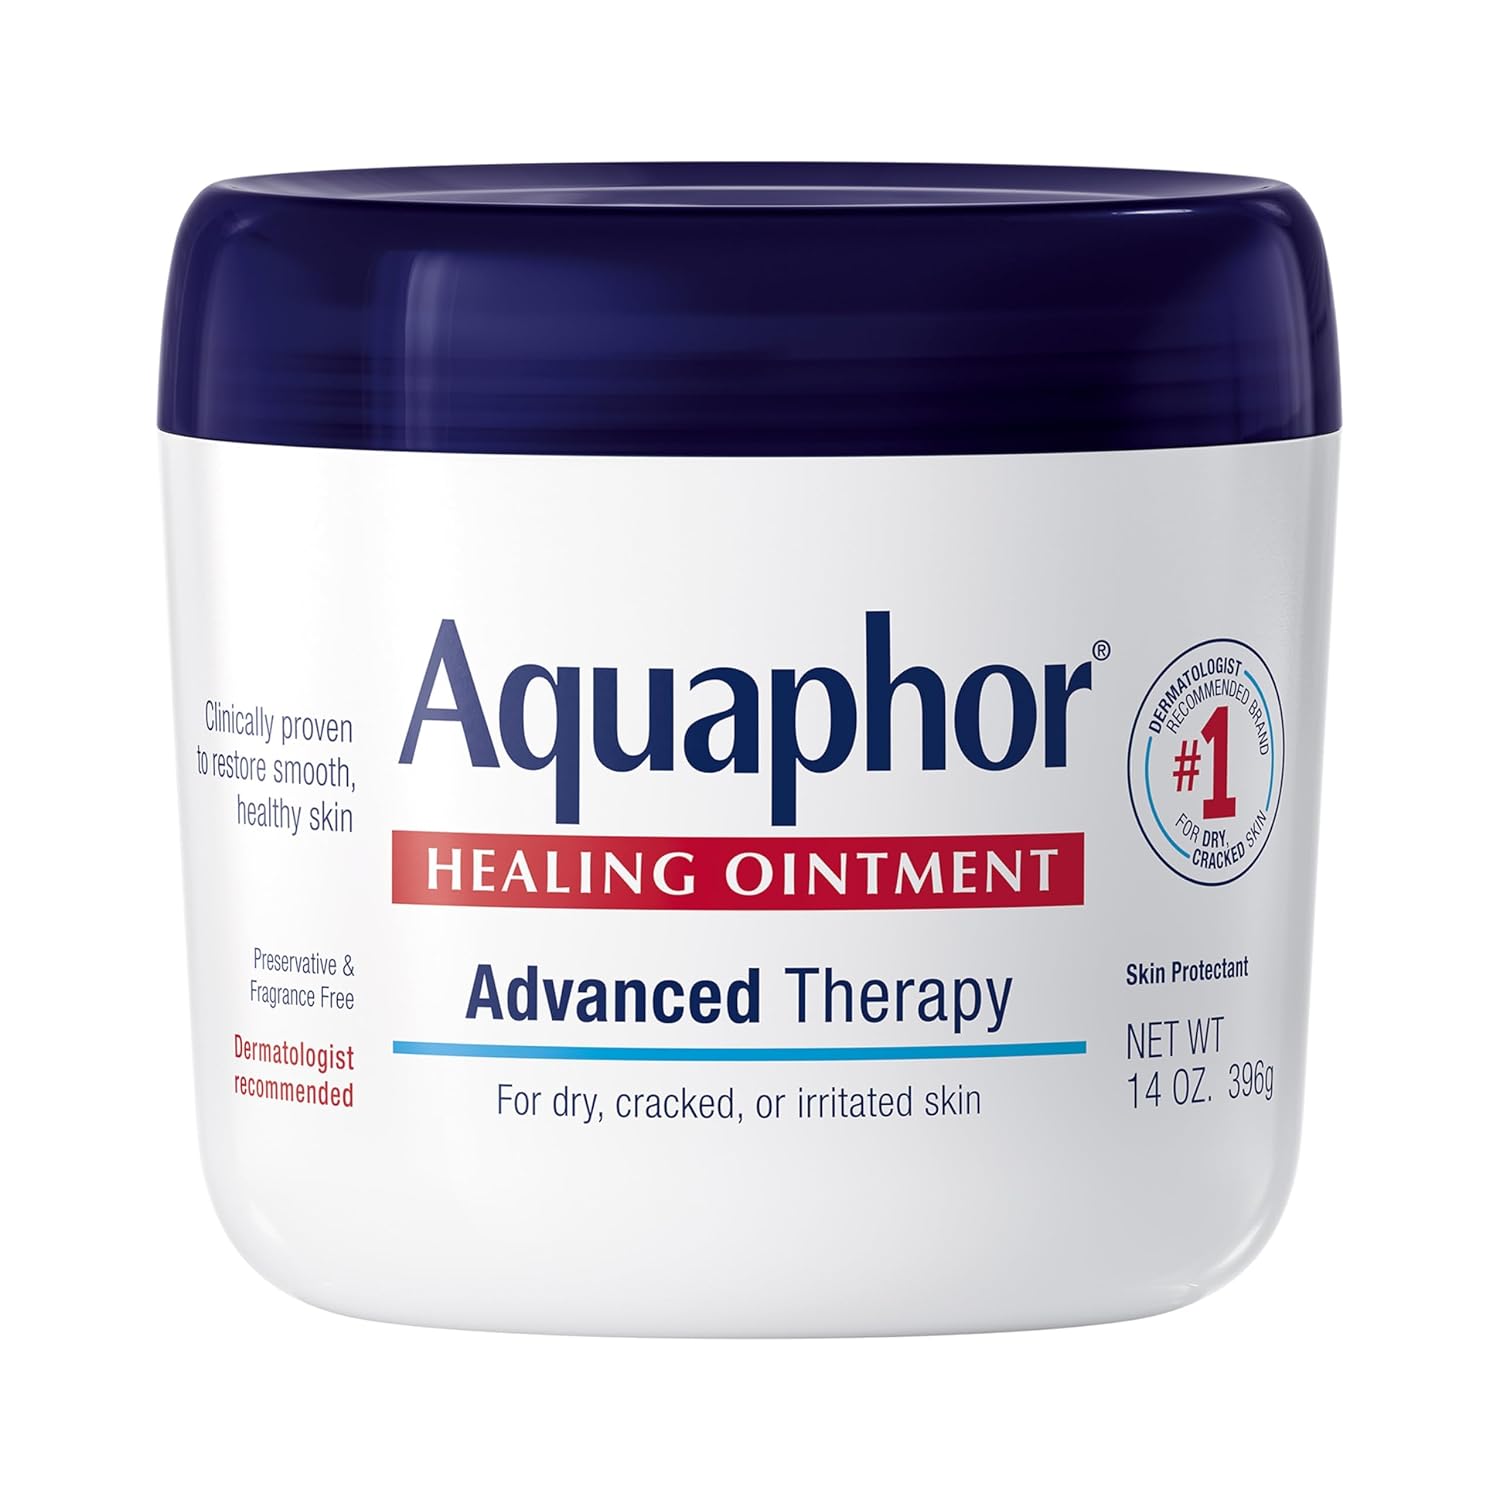
Aquaphor Healing Ointment
The Healing Shield. After your shower, apply a thin layer. It protects the tattoo from water and airborne particles while keeping it moisturized.
Check Price on Amazon
SparkPod Gentle Rain Head
Soft Pressure Solution. If your current shower feels like needles, swap it. This head provides a soft, soaking spray ideal for sensitive, healing skin.
Check Price on Amazon
Hustle Butter Deluxe
Premium Natural Aftercare. A vegan, fragrance-free blend of shea, mango, and aloe butters. Excellent for the moisturizing phase (days 5+). Loved by artists for color saturation preservation.
Check Price on Amazon
Saniderm Adhesive Bandage
Professional-Grade Protection. If your artist didn’t apply Second Skin, this medical-grade adhesive bandage allows waterproof protection while letting the tattoo breathe. Can stay on for 3-7 days.
Check Price on Amazon
Lubriderm Daily Moisture
The Long-Term Care Essential. Once peeling stops, this dermatologist-recommended, fragrance-free lotion maintains skin health without clogging pores. Vital for preventing cracking and preserving ink vibrancy.
Check Price on AmazonBath, Pool & Water Activity Restrictions: The Complete Science
The prohibition on soaking during tattoo healing isn’t arbitrary caution—it’s grounded in wound healing physiology. Understanding exactly why soaking is harmful will reinforce your commitment to the restriction, especially when a luxurious bath is tempting during a stressful healing period.
Why Soaking is Categorically Different From Showering
🔬 The Science of Osmotic Wound Damage
When skin is submerged in water for extended periods, an osmotic gradient develops between the hypotonic water and the slightly hypertonic fluid within the wound tissue. Water molecules migrate across the semi-permeable wound bed via osmosis, causing cellular swelling (edema) within the healing tissue. This disrupts the organized cellular architecture of healing, dilutes growth factors and cytokines that orchestrate the healing cascade, and mechanically weakens the fragile new epithelium. Brief showering—2-8 minutes of water contact—doesn’t produce significant osmotic effects. Soaking for 15+ minutes absolutely does. When choosing between a shower vs. bath, the healing implications are unambiguous: shower only, every time.
Specific Water Activity Restrictions
| Water Activity | Primary Hazards | Minimum Wait Time | Additional Considerations |
|---|---|---|---|
| Bathtub Soak | Osmotic damage, backflow of bacteria from tub water into wound, soap/bath product contact | 3 weeks minimum | Even in a clean tub with plain water—the soaking itself is the problem |
| Swimming Pool | Chlorine chemical irritation, other swimmers’ bacteria & pathogens, pH imbalance | 4-6 weeks minimum | Even “heavily chlorinated” pools harbor antibiotic-resistant bacteria. No exceptions. |
| Hot Tub / Jacuzzi | Extreme heat (vasodilation), bacteria (hot tubs notoriously harbor Pseudomonas aeruginosa), chemical exposure | 6+ weeks minimum | Hot tub folliculitis is a real medical condition. The heat alone disqualifies hot tubs entirely during healing. |
| Ocean / Sea | Salt osmotic damage, marine bacteria (Vibrio vulnificus can cause severe wound infections), sand abrasion | 4-6 weeks minimum | Natural bodies of water carry microorganisms that no immune system is prepared for in an open wound scenario |
| Lakes / Rivers | Highest bacterial and pathogenic load of any water environment—including algae, parasites, and agricultural runoff bacteria | 6+ weeks minimum | Documented cases of life-threatening infections from healing tattoos exposed to natural freshwater |
| Rain Exposure | Mild—brief rain contact is generally harmless. Prolonged drenching can be problematic. | No strict restriction, use judgment | Getting caught briefly in rain: rinse with clean water and pat dry. Avoid extended rain exposure and cover tattoo outdoors when possible |
Lifestyle Adjustments During Healing
Exercise & Physical Activity
Days 1-3: Rest. Avoid gyms (bacteria), excessive sweating, and activities that stretch the tattooed area.
Days 4-14: Light activity okay if you keep the area clean and dry. Sweat contains salt that can irritate. Shower immediately after sweating. Refer to our before vs. after exercise showering guide.
Weeks 3+: Gradually resume normal exercise. For tattoos in high-friction areas (under bra strap, waistband), consider protective coverings.
Sleep & Rest Positioning
Your body heals fastest during deep sleep. Protect your tattoo at night:
- Fresh Tattoo (Days 1-7): Place a clean towel over your sheets. Wear clean, loose clothing. Avoid sleeping directly on the tattoo.
- Peeling Phase: Flakes will stick to sheets. Use dark-colored sheets or a dedicated tattoo recovery sheet.
- Back/Shoulder Tattoos: Sleep on your stomach or opposite side. Consider a travel pillow to create a “donut hole” for the tattoo.
Clothing & Fabric Science
- AVOID: Wool (itchy), synthetic polyester/nylon (traps sweat), tight elastic bands.
- CHOOSE: 100% cotton (breathable), bamboo (antibacterial, soft), silk (low friction). Loose-fitting is key.
- Work Attire: If you must wear restrictive clothing, place a non-stick gauze pad between the tattoo and fabric.
Skin Type-Specific Aftercare: One Size Does Not Fit All
Your skin type—oily, dry, combination, sensitive, or mature—profoundly influences how your tattoo heals and which aftercare products will work best. Dermatologists recognize that tattooed skin is subject to the same intrinsic variation as all skin, and protocols that work perfectly for one person can be inadequate or even counterproductive for another.
Oily Skin and Tattoo Healing
People with oily skin (characterized by enlarged pores, a naturally shiny complexion, and higher sebum production) tend to heal tattoos differently from those with dry skin:
- Advantages: Higher natural sebum levels mean better baseline skin barrier function and less tendency toward extreme dryness during the peeling phase. Less need for heavy ointments.
- Challenges: Excess sebum can trap bacteria more readily in healing pores. May be more prone to miliaria (heat rash) when using heavy occlusive ointments. More likely to experience clogged pores if Aquaphor is applied too thickly.
- Adjusted Protocol: Use thinner applications of ointment more frequently. Transition to a lightweight, oil-free lotion earlier (day 3-4) rather than day 5. Wash 3 times daily rather than 2.
Dry Skin and Tattoo Healing
- Advantages: Less sebum means a less hospitable environment for certain bacteria that thrive in oilier conditions.
- Challenges: Significantly higher risk of over-drying during healing, especially with antibacterial soaps. More aggressive peeling, more itching, and slower barrier restoration. Must be especially diligent about moisturizing.
- Adjusted Protocol: Extend the ointment phase to day 6-7. Follow every shower immediately with moisturizer (no prolonged air-dry in dry environments). Consider adding a humidifier to your bedroom to support overnight healing. Check our proper showering techniques for different skin types for baseline guidance.
Sensitive Skin and Tattoo Healing
Sensitive skin is characterized by heightened reactivity to environmental stimuli, low threshold for irritation, and a tendency toward redness, burning, and stinging with product use. For sensitive-skinned individuals, tattoo healing presents heightened challenges:
- May react to even “gentle” antibacterial soaps—test Dial Gold on a small inner-arm area first
- High risk of contact dermatitis from aftercare products, especially those with botanical extracts
- More likely to experience prolonged post-healing redness and sensitivity
- Should avoid all products with more than 10 ingredients during the acute healing phase
- If you regularly experience sensitivity, discuss this with your tattoo artist before your appointment—they may adjust ink choices (certain pigments are more reactive) and recommend specific aftercare protocols
Mature/Aging Skin and Tattoo Healing
Skin physiologically changes with age in ways directly relevant to tattoo healing. After approximately age 40, skin produces less collagen (by roughly 1% per year), has thinner epidermal layers, lower moisture retention capacity, and reduced immune surveillance. These changes mean:
- Healing typically takes 30-50% longer than in younger skin
- Colors may not “lock” as vibrantly, as there are fewer macrophages available to encapsulate ink
- More prone to prolonged post-inflammatory hyperpigmentation (darkening around the tattoo)
- Require more intensive and longer-duration moisturizing protocols
- Should be especially vigilant about gentle handling—mature skin tears and bruises more easily
- More likely to benefit from shower chairs and seated showering to reduce physical stress during the healing period. Our shower chairs with arm support offer stability for those who prefer seated bathing.
Special Considerations & Risk Factors
Medical Conditions Affecting Healing
- Diabetes: Poor circulation and high blood sugar slow healing and increase infection risk.
- Autoimmune Disorders: (Lupus, psoriasis, rheumatoid arthritis) May experience exaggerated healing responses or flare-ups.
- Blood Thinners: (Warfarin, aspirin) Increase bleeding and bruising during tattooing.
- Keloid History: If you form raised scars easily, tattoos can trigger keloids.
- Pregnancy/Breastfeeding: Generally advised to wait due to immune system changes and ink components passing to baby.
Seasonal Healing Considerations
Summer Healing: Sun exposure is the enemy. Stay indoors or keep tattoo completely covered with clothing (not sunscreen until healed). Sweat management is crucial—shower after sweating. Monitor your daily water intake carefully in hot weather, as hydration directly affects skin healing capacity.
Winter Healing: Dry air and indoor heating parch skin. Increase moisturizing frequency. Avoid wool scarves/sweaters directly on tattoo. Beware of static electricity from synthetic fabrics irritating healing skin. Hot showers—the natural winter temptation—are particularly dangerous during tattoo healing. Commit to lukewarm regardless of the temperature outside.
Building a Tattoo-Friendly Bathroom: Design Elements That Support Healing
If you’re a committed tattoo collector who regularly gets new work—or if you’re planning a bathroom renovation—it’s worth considering how your bathroom design can be optimized to support the ongoing tattoo healing lifestyle. Modern bathroom design offers a range of solutions that make the post-tattoo shower routine safer, more comfortable, and more hygienic.
Shower Design Features That Aid Healing
When thinking about bathroom renovation costs versus benefits, some design choices deliver outsized value for people who frequently heal tattoos:
- Curbless / Zero-Entry Showers: A seamless curbless shower entrance or a doorless walk-in design eliminates the trip hazard of stepping over a curb when your mobility may be impaired (large thigh or leg tattoos can limit range of motion). They’re also easier to clean, reducing bacterial load.
- Linear Drains: A linear drain or hidden floor drain allows for a completely flat shower floor, making it easier to position a shower chair or bench and reducing standing time during long healing sessions.
- Built-In Benches: A built-in floating shower bench provides a stable, permanent surface for seated showering—far more stable than portable solutions. Ideal for healing leg and foot tattoos.
- Large Format Tiles with Minimal Grout: Large-format tiles have fewer grout lines, which means fewer bacterial harboring surfaces. This is a genuine hygiene advantage. When grout is used, a sealed grout is far easier to keep clean.
- Recessed Niches: A recessed shower niche or tall vertical niche keeps aftercare products organized and off the floor. If you’re calculating tile quantities for a niche remodel, factor in an accent tile for the niche back wall.
- Water-Repellent Glass: Shower enclosures with water-repellent glass coatings stay cleaner longer, reducing the frequency of harsh chemical cleaning needed near healing skin.
Professional Tattoo Artist Insights: What They Wish You Knew
Nutrition, Hydration & Internal Healing: What You Eat Matters
Tattoo aftercare is typically framed as entirely topical—what you apply to your skin. But the skin is an organ, and like all organs, its healing capacity is profoundly influenced by your internal nutritional environment. Understanding the connection between diet, hydration, and wound healing gives you a powerful additional lever for optimizing your tattoo’s recovery.
The Healing Nutrients
Vitamin C & Collagen Synthesis
Vitamin C is the rate-limiting cofactor for collagen synthesis—the process of laying down new connective tissue around ink particles. Deficiency in Vitamin C measurably impairs wound healing. During tattoo healing, ensure adequate intake: citrus fruits, bell peppers, kiwi, and broccoli are excellent sources. The recommended daily intake is 65-90mg, but many nutrition experts suggest 200-500mg during active wound healing may be beneficial.
Zinc & Immune Function
Zinc is essential for DNA synthesis, protein production, and immune cell activity—all critical for wound healing. Zinc-deficient individuals experience significantly delayed healing and increased infection susceptibility. Food sources include oysters, beef, pumpkin seeds, and legumes. Zinc supplements are widely available, though excess zinc interferes with copper absorption, so don’t exceed 40mg/day.
Hydration & Skin Turgor
Even mild dehydration (1-2% body weight loss) measurably reduces skin elasticity and impairs the transport of healing nutrients to wound sites. During tattoo healing, aim for consistent hydration throughout the day rather than large boluses of water. Track your intake with a daily water consumption tracker. A simple benchmark: your urine should be pale yellow, not clear (over-hydration is wasteful) and not amber (under-hydration).
Anti-Inflammatory Diet Principles
Systemic inflammation impairs wound healing by overwhelming the regulated inflammatory response necessary for organized tissue repair. During the 2-4 week healing period, minimize pro-inflammatory foods: processed sugars, refined carbohydrates, seed oils high in omega-6 fatty acids, and alcohol. Emphasize anti-inflammatory foods: fatty fish (omega-3s), leafy greens, berries (anthocyanins), turmeric (curcumin), and olive oil (oleocanthal).
Alcohol & Tattoo Healing: A Specific Warning
Alcohol consumption is uniquely problematic during tattoo healing for multiple simultaneous reasons. Unlike most dietary considerations, the alcohol-tattoo relationship is well-documented enough to warrant a firm recommendation against drinking during the first 2 weeks of healing:
- Anticoagulant effect: Alcohol thins the blood, increasing weeping and bleeding from the fresh tattoo
- Vasodilation: Alcohol dilates blood vessels, worsening swelling and inflammation
- Immune suppression: Even moderate alcohol consumption measurably suppresses immune function for 24-48 hours, increasing infection risk in an open wound
- Dehydration: Alcohol is a diuretic, reducing skin hydration at a time when hydration is critical
- Impaired judgment: Intoxication increases the risk of forgetting aftercare protocols, touching the tattoo with dirty hands, or scratching during sleep
Long-Term Tattoo Preservation & Maintenance
Your tattoo’s longevity depends on lifelong care:
Sun Protection Protocol
UV radiation breaks down ink particles, causing fading and blurring. Once healed, apply broad-spectrum SPF 30+ sunscreen every single time the tattoo is exposed, even on cloudy days. Reapply every 2 hours if outdoors.
Moisture & Skin Health
Well-hydrated skin keeps ink looking vibrant. Use fragrance-free lotion daily after showering. In winter or dry climates, consider a heavier cream or ointment at night.
Professional Touch-Ups
Most tattoos need a touch-up 1-2 years after healing, especially areas with lots of color or fine detail. This is normal—some ink naturally settles or is lost during healing. Budget for this when planning your tattoo.
The Complete Day-by-Day Shower Routine: A Practical Calendar
Translating all of the science and strategy above into a concrete, day-by-day routine removes ambiguity and decision fatigue during an already high-attention period. Here is a practical calendar for the first 21 days:
| Day(s) | Morning Routine | Evening Routine | Product Phase |
|---|---|---|---|
| Day 0 (Tattoo Day) | N/A | Remove wrap (if not Saniderm). First wash at sink only. Pat dry. Apply thin Aquaphor. | Ointment begins |
| Days 1-3 | Gentle 5-min shower, lukewarm. Dial Gold wash. Pat dry. Aquaphor (thin). | Repeat morning routine before bed. Air dry 10-15 min. Apply Aquaphor. | Ointment phase |
| Days 4-5 | Continue gentle morning shower. Begin transitioning to lotion if peeling starts. Monitor for over-moisturizing. | Evening wash and pat dry. Begin Lubriderm or lotion if Aquaphor was causing congestion. | Ointment → Lotion transition |
| Days 6-10 | Morning shower up to 8 min now. Lotion only (Lubriderm or Hustle Butter). Do not pick peeling skin. | Evening cleanse. Full lotion application. Take daily photo for documentation. | Lotion phase |
| Days 11-14 | Normal shower duration. Lotion morning and evening. Tattoo may look “ugly” and milky—this is normal. | Continue evening lotion. Begin light exercise if desired; shower post-sweat. | Lotion phase |
| Days 15-21 | Resume normal shower habits. Continue lotion at least twice daily. No sun exposure without clothing coverage. | Lotion before bed. Monitor for any delayed reactions. Schedule check-in with artist if concerned. | Maintenance lotion |
| Week 4+ | Normal life resumes. Daily fragrance-free lotion continues. SPF on tattoo whenever sun-exposed. | Optional evening lotion. Tattoo should be visually settling. Full vibrance by weeks 6-8. | Long-term care |
Frequently Asked Questions (Expanded)
Can I use my normal body wash?
No. Most body washes contain fragrances, alcohol, sulfates, and essential oils that will burn, irritate, and potentially cause allergic reactions in an open wound. Stick to fragrance-free antibacterial soap (like Dial Gold) for the first 2 weeks minimum.
What if I have a leg tattoo?
Leg tattoos swell significantly due to gravity. Elevate your leg when resting. In the shower, use a shower chair to minimize standing time. Dry meticulously, especially behind the knee. Wear loose pants or skirts to avoid friction.
My tattoo feels slimy in the shower, is that normal?
Yes, completely normal during the first 1-3 days. That “slime” is plasma—a mixture of water, proteins, and white blood cells that forms the initial protective layer and eventual scab. Gently washing it off is essential to prevent thick, problematic scabs.
Can I take a cold shower?
Yes, and it can be beneficial. Cold water (not ice-cold) causes vasoconstriction, reducing swelling and inflammation. It can also temporarily relieve itching. For more on this, see our comparison of cold vs hot showers. Just ensure you still use antibacterial soap.
How do I know if I’m allergic to the ink?
Ink allergies are rare but possible, usually to red pigments (containing mercury or cadmium) or less commonly, yellow or blue. Signs include: severe itching beyond normal, blistering, raised rash that extends beyond the tattoo lines, or the tattoo remaining swollen/painful for weeks. If suspected, see a dermatologist for patch testing.
Can I go to the beach/pool if I cover my tattoo?
No. Even with a waterproof bandage, the risk is too high. Sand is abrasive and full of bacteria. Pool chlorine is a harsh chemical that will irritate. Ocean water contains salt and microbes. Plus, heat and sun exposure are detrimental. Wait the full 2-3 weeks minimum, and even then, protect with high-SPF sunscreen.
My tattoo looks faded and blurry after peeling. Did it heal wrong?
Probably not. This is the “milky” phase. A thin layer of new skin (stratum corneum) temporarily obscures the ink. Over the next 4-8 weeks, this layer will naturally exfoliate, revealing the true, settled color. Be patient. If it still looks blurry after 2 months, consult your artist about a possible touch-up.
Can I shave over a healed tattoo?
Yes, but wait at least 4-6 weeks until the skin feels completely normal (no tenderness, tightness, or flaking). Use a fresh, sharp razor and plenty of shaving cream. Shave in the direction of hair growth, not against it. For more technique, see our guide on shaving before or after shower.
Does not showering every day benefit tattoo healing?
There are genuine benefits of not showering every day for regular skin health—reducing disruption to the natural microbiome and sebum balance. However, during tattoo healing, this logic is reversed. The open wound requires regular cleansing to prevent bacterial accumulation. Once your tattoo is fully healed (after 4 weeks), you can return to whatever showering frequency works best for your skin.
Can I shower with stitches?
The protocols for showering with stitches share significant overlap with tattoo aftercare—both involve open wounds that require gentle water exposure and protection from soaking. The key differences are that stitched wounds generally require keeping the area completely dry for the first 24-48 hours, whereas fresh tattoos benefit from gentle cleansing within hours of application.
How does tattoo aftercare differ from post-spray tan care?
The guides are actually complementary—both involve protecting skin from water contact for a defined window. After a spray tan, you avoid showering to preserve the developing color. After a tattoo, you shower carefully to prevent infection. Our broader guide to post-beauty treatment showering protocols covers spray tans, tattoos, lash lifts, and other procedures in one place.
What about showering after other wellness treatments?
If you’ve had a sauna session or cupping therapy while healing a tattoo, be especially careful—these treatments increase blood flow and skin sensitivity. Our guide to post-treatment shower timing provides specific protocols for each treatment type. Generally, avoid sauna use entirely during the first two weeks of tattoo healing.
Conclusion: From Open Wound to Lifelong Art
Showering with a new tattoo isn’t just about cleanliness—it’s a critical component of the healing ritual that transforms an open wound into permanent art. By understanding the biological processes at play, respecting the physics of water and pressure on fragile skin, accounting for your water quality, optimizing your shower environment, and selecting scientifically appropriate products, you become an active participant in your tattoo’s destiny.
Remember that the 2-4 week healing period is a short investment for artwork that will last a lifetime. The temporary inconvenience of lukewarm showers, gentle patting, strategic hair-washing choreography, and avoiding your favorite activities pales in comparison to the permanence of a well-healed, vibrant tattoo versus a faded, scarred, or infected one.
Equip your bathroom with the right tools—a gentle rainfall showerhead, clean paper towels, and proper soaps. Consider the long-term benefits of a well-designed shower space that supports both daily hygiene and your aftercare routine. Keep your environment sterile, organizing your aftercare kit in a drill-free caddy to avoid contamination. Use a shower water usage calculator to keep showers brief and efficient. And listen to your body and your artist above all else.
Your tattoo is more than ink—it’s a story, a memory, an expression of self. Treat the healing process with the reverence it deserves, and you’ll be rewarded with art that looks as stunning decades from now as it does today.
- ✅ Wait 3-24 hours before first wash (follow artist’s wrap instructions)
- ✅ Shower with lukewarm water only—no hot water. See our ideal temperature guide.
- ✅ Use fragrance-free antibacterial soap (Dial Gold)
- ✅ Let water flow indirectly over tattoo—no direct high-pressure streams. Fix pressure issues beforehand.
- ✅ Pat dry with clean paper towel—never rub
- ✅ Apply thin layer of aftercare ointment (Aquaphor) or switch to lotion after day 4
- ✅ No soaking in baths, pools, hot tubs, or natural water for 2-3 weeks
- ✅ No picking or scratching peeling skin
- ✅ Protect from sun with clothing first, then SPF 30+ after healing
- ✅ Stay hydrated—track intake with our daily water tracker
- ✅ Keep your shower clean—scrub grout, descale the showerhead, remove mold
- ✅ Contact your artist with concerns before seeking medical advice
Disclaimer: As an Amazon Associate, ShowerInsider earns from qualifying purchases. The information in this guide is compiled from interviews with professional tattoo artists, dermatological research from the American Academy of Dermatology, and wound care principles from clinical practice. Always prioritize the specific aftercare instructions provided by your licensed tattoo artist, as they account for your individual tattoo, skin type, and health considerations.
Pingback: Can You Shower With a Nose Piercing? Safe Guide